Salta al contenuto principale

HP Mini 210-2070NR Hard Drive Replacement

Cosa ti serve

  1. HP Mini 210-2070NR Hard Drive Replacement, Battery and Service Access Cover: passo 1, immagine 1 di 1
    • Before beginning, make sure that your computer is turned off and all external power cords are disconnected.

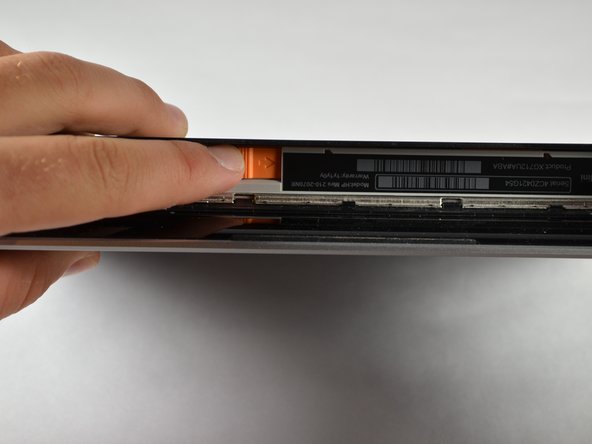
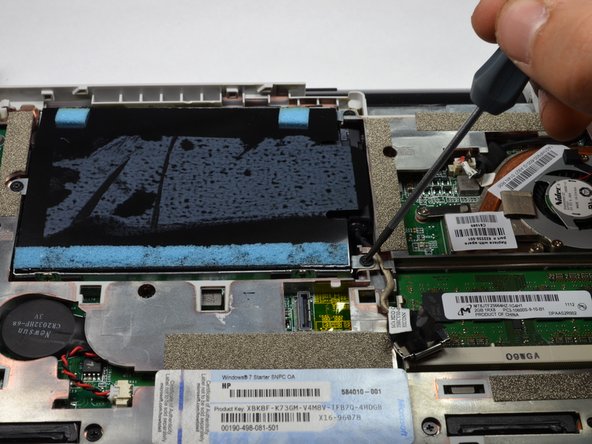
    • Close the laptop and turn it over so that the underside is up and the silver battery bay is facing towards you.

  2. HP Mini 210-2070NR Hard Drive Replacement: passo 2, immagine 1 di 3 HP Mini 210-2070NR Hard Drive Replacement: passo 2, immagine 2 di 3 HP Mini 210-2070NR Hard Drive Replacement: passo 2, immagine 3 di 3
    • The battery locking latch is on the bottom right corner; slide it inward to unlock the battery.

    • Slide the battery release latch inwards.

    • Pull the battery towards you to remove it.

  3. HP Mini 210-2070NR Hard Drive Replacement: passo 3, immagine 1 di 3 HP Mini 210-2070NR Hard Drive Replacement: passo 3, immagine 2 di 3 HP Mini 210-2070NR Hard Drive Replacement: passo 3, immagine 3 di 3
    • Slide the service access cover release lever to the right.

    • While holding the lever to the right, lift up the laptop's bottom cover gently and remove the cover.

  4. HP Mini 210-2070NR Hard Drive Replacement: passo 4, immagine 1 di 1
    • Orient the computer as shown in the picture.

  5. HP Mini 210-2070NR Hard Drive Replacement, Hard Drive: passo 5, immagine 1 di 3 HP Mini 210-2070NR Hard Drive Replacement, Hard Drive: passo 5, immagine 2 di 3 HP Mini 210-2070NR Hard Drive Replacement, Hard Drive: passo 5, immagine 3 di 3
    • Remove the HP product sticker.

    • Be careful not to pull up the black hard drive plastic connector with the sticker. Also, removing this sticker will void your warranty.

  6. HP Mini 210-2070NR Hard Drive Replacement: passo 6, immagine 1 di 2 HP Mini 210-2070NR Hard Drive Replacement: passo 6, immagine 2 di 2
    • Locate the hard drive, where the HP Product sticker used to be.

    • Locate the hard drive cable, connected to the hard drive.

    • Disconnect the hard drive cable by gently pulling upward.

  7. HP Mini 210-2070NR Hard Drive Replacement: passo 7, immagine 1 di 2 HP Mini 210-2070NR Hard Drive Replacement: passo 7, immagine 2 di 2
    • Using a #00 Phillips screwdriver, unscrew and remove the three 2.0 x 4.0 Philips screws holding the hard drive in place.

  8. HP Mini 210-2070NR Hard Drive Replacement: passo 8, immagine 1 di 2 HP Mini 210-2070NR Hard Drive Replacement: passo 8, immagine 2 di 2
    • Use the Mylar Tab located on the right side of the hard drive to pry up the hard drive.

    • Remove the hard drive.

  9. HP Mini 210-2070NR Hard Drive Replacement: passo 9, immagine 1 di 1
    • Lay the hard drive down with the underside facing up.

    • Pull and remove the hard drive pin connector from the hard drive.

Conclusione

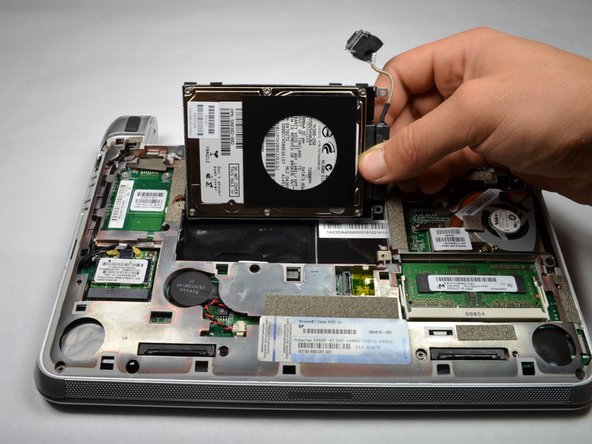
To reassemble your device, follow these instructions in reverse order.

Altre 4 persone hanno completato questa guida.

Alek Linquist

Membro da: 10/05/12

123 Reputazione

2 Guide realizzate

Team

Cal Poly, Team 3-23, Amido Fall 2012 Membro di Cal Poly, Team 3-23, Amido Fall 2012

CPSU-AMIDO-F12S3G23

4 Membri

6 Guide realizzate

0 Commenti

Aggiungi Commento

Visualizza Statistiche:

Ultime 24 Ore: 0

Ultimi 7 Giorni: 5

Ultimi 30 Giorni: 7

Tutti i Tempi: 2,258