Salta al contenuto principale

Garmin GPSmap 60CSx Screen Replacement

Cosa ti serve

  1. Garmin GPSmap 60CSx Screen Replacement, Back Cover and AA Batteries: passo 1, immagine 1 di 1
    • Lift and twist the battery cover release 90 degrees counterclockwise on the back of the device.

  2. Garmin GPSmap 60CSx Screen Replacement: passo 2, immagine 1 di 1
    • Lift battery release up to remove battery cover.

  3. Garmin GPSmap 60CSx Screen Replacement: passo 3, immagine 1 di 2 Garmin GPSmap 60CSx Screen Replacement: passo 3, immagine 2 di 2
    • Pull AA batteries out.

  4. Garmin GPSmap 60CSx Screen Replacement, Screen: passo 4, immagine 1 di 2 Garmin GPSmap 60CSx Screen Replacement, Screen: passo 4, immagine 2 di 2
    • Remove the six 10 mm screws on the back of the device with a Phillips #0 Screwdriver.

    • Flip the back panel over to view the green electronics board (the PCB) and the PCB cover.

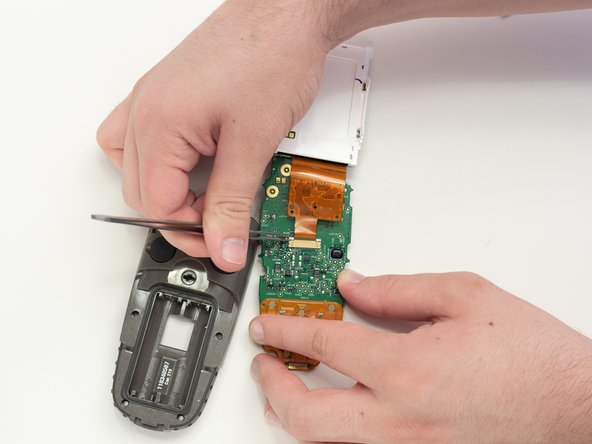
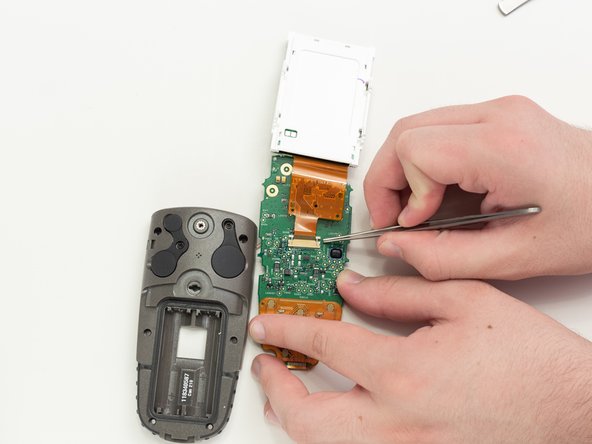
    • Remove the black, yellow, blue, and red wires connected to the PCB with light force.

  5. Garmin GPSmap 60CSx Screen Replacement: passo 5, immagine 1 di 1
    • Take the spudger and place it in the bottom right corner of the black PCB cover.

    • Use the spudger to pry the corner out. This will need to be done to all four corners of the PCB cover.

    • It is best to do remove the bottom corners first.

    • Pull the PCB cover out of the GPSMap 60CSx.

  6. Garmin GPSmap 60CSx Screen Replacement: passo 6, immagine 1 di 2 Garmin GPSmap 60CSx Screen Replacement: passo 6, immagine 2 di 2
    • Carefully use the spudger to lift the PCB a few centimeters.

    • Pull the PCB towards the bottom of the GPSMap 60CSx.

    • This will pull the other components out of the GPSMap 60CSx like the antenna and the screen.

  7. Garmin GPSmap 60CSx Screen Replacement: passo 7, immagine 1 di 3 Garmin GPSmap 60CSx Screen Replacement: passo 7, immagine 2 di 3 Garmin GPSmap 60CSx Screen Replacement: passo 7, immagine 3 di 3
    • Apply light pressure to the four white tabs that are holding the screen in place.

    • The screen will now come off the PCB.

  8. Garmin GPSmap 60CSx Screen Replacement: passo 8, immagine 1 di 1
    • Turn the PCB over so the screen connector is facing you.

    • Move the screen out of the way for access to the screen connector.

  9. Garmin GPSmap 60CSx Screen Replacement: passo 9, immagine 1 di 3 Garmin GPSmap 60CSx Screen Replacement: passo 9, immagine 2 di 3 Garmin GPSmap 60CSx Screen Replacement: passo 9, immagine 3 di 3
    • Use tweezers to pull the two white pins on the connector forward.

  10. Garmin GPSmap 60CSx Screen Replacement: passo 10, immagine 1 di 1
    • Remove the screen ribbon connector and screen.

Conclusione

To reassemble your device, follow these instructions in reverse order.

Altre 4 persone hanno completato questa guida.

2 Commenti

i have a 60csx and the battery bounces the liquid, can help me?

salvador2707 - Replica

Thank you for these step by step detailed instructions.

jlciscorp - Replica

Aggiungi Commento

Visualizza Statistiche:

Ultime 24 Ore: 1

Ultimi 7 Giorni: 12

Ultimi 30 Giorni: 36

Tutti i Tempi: 4,577