Questa versione può contenere modifiche errate. Passa all'ultima istantanea verificata.
Cosa ti serve
-
Questo passaggio è privo di traduzione. Aiuta a tradurlo
-
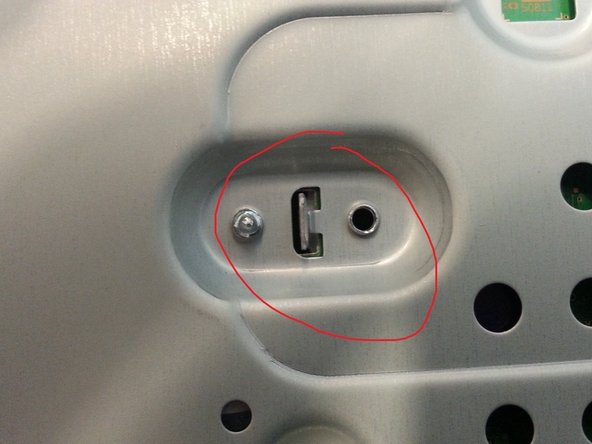
Remove the face plate by depressing the small plastic tab
-
****NOTE: ***eject disk tray first before dis-assembly to gain access.
-
-
Questo passaggio è privo di traduzione. Aiuta a tradurlo
-
Release front 4 tabs in order to slide main cover forward.
-
****NOTE:*** slide only a few mils forwards before next step.
-
-
Questo passaggio è privo di traduzione. Aiuta a tradurlo
-
Release tabs on both left and right sides of unit while maintaining forward pressure to slide cover off.
-
****NOTE:*** The arrows depict where the tabs are located.
-
-
Questo passaggio è privo di traduzione. Aiuta a tradurlo
-
After cover removal, you should now have access to the internal components.
-
We will begin removing the power supply. Compress the center clip and open plastic shield.
-
-
-
Questo passaggio è privo di traduzione. Aiuta a tradurlo
-
Unscrew two mounting screw for power supply. Slide forward and pull out for removal.
-
-
Questo passaggio è privo di traduzione. Aiuta a tradurlo
-
This should be your current progress thus far.
-
-
Questo passaggio è privo di traduzione. Aiuta a tradurlo
-
Release tab to remove plastic power supply shield.
-
-
Questo passaggio è privo di traduzione. Aiuta a tradurlo
-
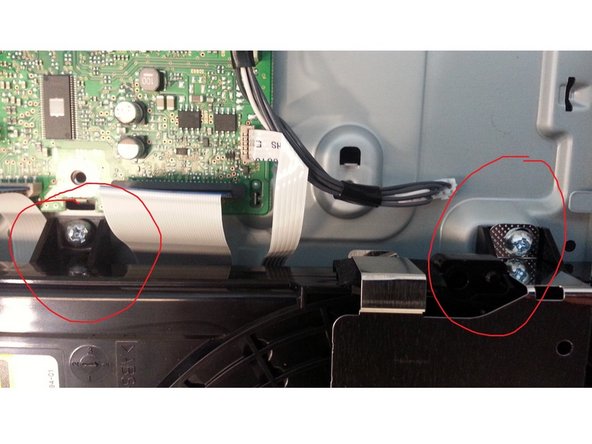
Remove the three screws.
-
Now depress metal tab to fully remove heat sink clamp.
-
-
Questo passaggio è privo di traduzione. Aiuta a tradurlo
-
Pull on indicated ribbon cable to begin removal of front display.
-
Now remove single screw to remove front display panel.
-
-
Questo passaggio è privo di traduzione. Aiuta a tradurlo
-
This should be you current dis-assembly progress thus far.
-
-
Questo passaggio è privo di traduzione. Aiuta a tradurlo
-
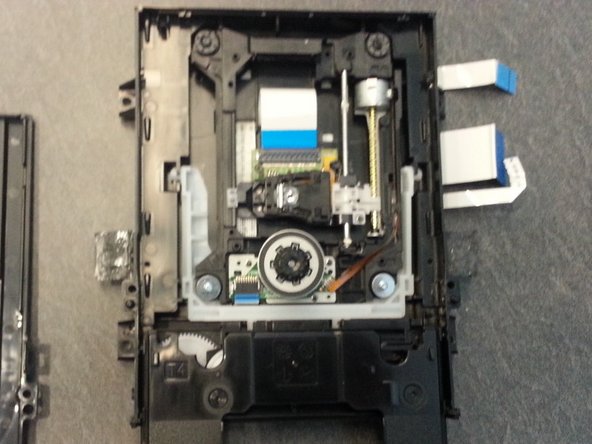
Next, remove all three ribbon cables attached to optical disc drive.
-
****NOTE:*** largest ribbon cable has small secure clamp, be sure to release it before pulling.
-
Now unscrew both mounting screw for optical disc drive for complete removal.
-
-
Questo passaggio è privo di traduzione. Aiuta a tradurlo
-
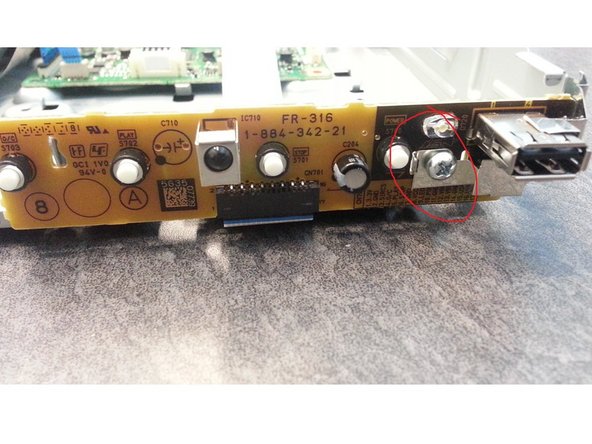
To completely remove the main board, locate screws on back of unit. Unscrew these 2 screws and then slide main board out.
-
-
Questo passaggio è privo di traduzione. Aiuta a tradurlo
-
You should now be completely dis-assembled. For further dis-assembly of the optical disc drive, continue to step 15.
-
-
Questo passaggio è privo di traduzione. Aiuta a tradurlo
-
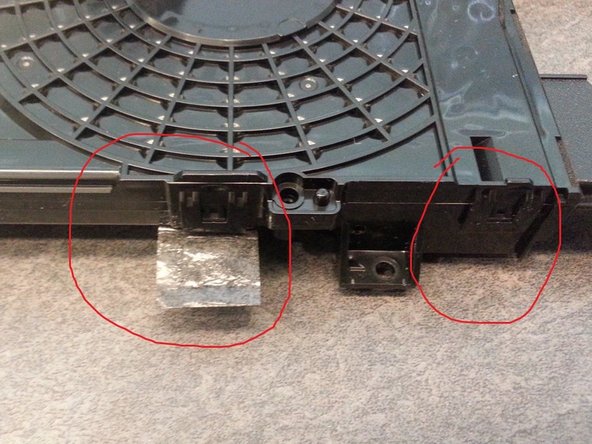
First remove metal shroud exposing tabs.
-
Peel back security tape and release all 4 tabs (2 on each side) for removal of top cover.
-
Now the internal components of the optical disc drive are now exposed.
-


Annulla: non ho completato questa guida.
Altre 6 persone hanno completato questa guida.
7 Commenti
now I know I'm missing lots of parts...lol
Thanks! the hardest part was getting the tray out.