Salta al contenuto principale

Digitac Jazz Ultratab C725 Charging Port Replacement

Cosa ti serve

  1. Digitac Jazz Ultratab C725 Charging Port Replacement, Charging Port: passo 1, immagine 1 di 3 Digitac Jazz Ultratab C725 Charging Port Replacement, Charging Port: passo 1, immagine 2 di 3 Digitac Jazz Ultratab C725 Charging Port Replacement, Charging Port: passo 1, immagine 3 di 3
    • Locate the four 3.5 mm Phillips head screws holding the silver back plate and the screen together. There are 2 screws on the top and another 2 screws on the bottom.

    • Remove all four screws with the Phillips #00 screwdriver.

    • Remove the screws with the least amount of force. The removal of the screw will be more difficult if thread damage occurs.

  2. Digitac Jazz Ultratab C725 Charging Port Replacement: passo 2, immagine 1 di 3 Digitac Jazz Ultratab C725 Charging Port Replacement: passo 2, immagine 2 di 3 Digitac Jazz Ultratab C725 Charging Port Replacement: passo 2, immagine 3 di 3
    • Flip your device so that the long side without the buttons is facing you.

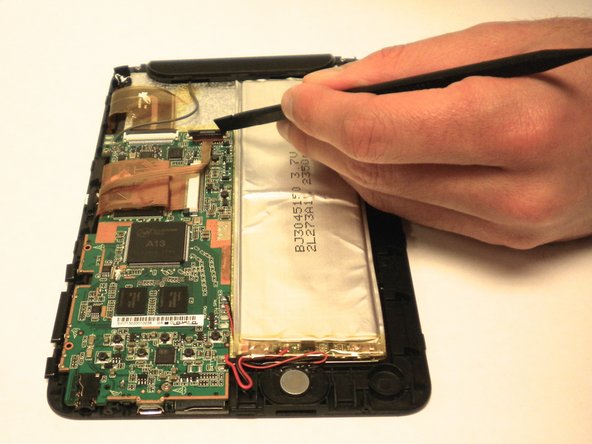
    • Insert the plastic opening tool between the silver back plate and the screen. From the corner of the device on either side, pry the seam of the device about 1 inch.

    • With the plastic opening tool, pry the screen apart from the back plate.

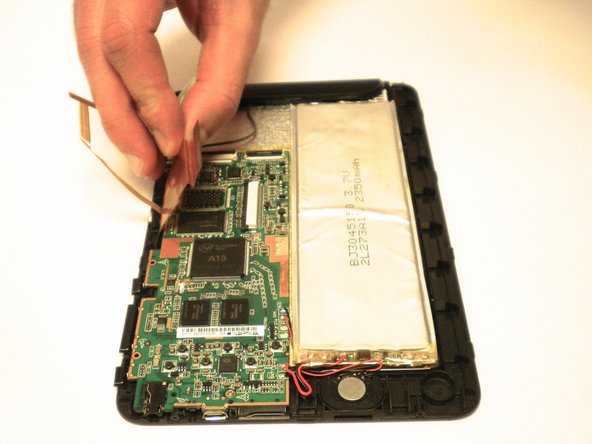
    • Keep prying the screen apart from the back plate until they are separated.

    • With the plastic opening tool, if necessary, pry apart the remaining seams of the device.

    • After the screen is loose, pull the screen towards you. Lift it to prevent damage to the buttons.

  3. Digitac Jazz Ultratab C725 Charging Port Replacement: passo 3, immagine 1 di 3 Digitac Jazz Ultratab C725 Charging Port Replacement: passo 3, immagine 2 di 3 Digitac Jazz Ultratab C725 Charging Port Replacement: passo 3, immagine 3 di 3
    • Locate the 3 black clips on the motherboard that hold the data cables./

    • Using the Spudger, pry the black clips up to a 90 degree angle./

    • Pull the data cables out once the clips are up to a 90 degree angle.

    • Repeat this for all 3 clips.

  4. Digitac Jazz Ultratab C725 Charging Port Replacement: passo 4, immagine 1 di 3 Digitac Jazz Ultratab C725 Charging Port Replacement: passo 4, immagine 2 di 3 Digitac Jazz Ultratab C725 Charging Port Replacement: passo 4, immagine 3 di 3
    • Locate the two 4.0 mm Phillips head screws that are holding the motherboard in place.

    • Use the Phillips #00 screwdriver to remove both of the screws.

  5. Digitac Jazz Ultratab C725 Charging Port Replacement: passo 5, immagine 1 di 3 Digitac Jazz Ultratab C725 Charging Port Replacement: passo 5, immagine 2 di 3 Digitac Jazz Ultratab C725 Charging Port Replacement: passo 5, immagine 3 di 3
    • The motherboard should now be loose.

    • To gain access to the charging port, flip the motherboard over.

    • Use the tweezers to pull the charging port off of the motherboard.

Conclusione

To reassemble your device, follow these instructions in reverse order.

Un'altra persona ha completato questa guida.

Team

USF Tampa, Team 11-6, Blackwell Winter 2015 Membro di USF Tampa, Team 11-6, Blackwell Winter 2015

USFT-BLACKWELL-W15S11G6

2 Membri

5 Guide realizzate

0 Commenti

Aggiungi Commento

Visualizza Statistiche:

Ultime 24 Ore: 0

Ultimi 7 Giorni: 0

Ultimi 30 Giorni: 1

Tutti i Tempi: 445