Salta al contenuto principale

Dell Inspiron 13 7378 Fan Replacement

Cosa ti serve

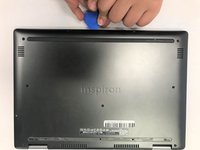
  1. Dell Inspiron 13 7378 Fan Replacement, Back Cover: passo 1, immagine 1 di 1
    • Set the laptop with its underside facing up for improved accessibility.

  2. Dell Inspiron 13 7378 Fan Replacement: passo 2, immagine 1 di 2 Dell Inspiron 13 7378 Fan Replacement: passo 2, immagine 2 di 2
    • Using a Phillips #00 screwdriver, extract the nine 3 mm screws located on the back of the laptop.

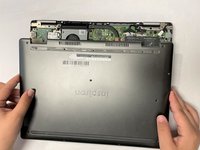
  3. Dell Inspiron 13 7378 Fan Replacement: passo 3, immagine 1 di 3 Dell Inspiron 13 7378 Fan Replacement: passo 3, immagine 2 di 3 Dell Inspiron 13 7378 Fan Replacement: passo 3, immagine 3 di 3
    • Carefully pry open the back of the back of the laptop using opening picks.

    • Carefully raise and detach the back cover from the laptop.

    • Exercise caution to prevent damaging or cracking the device's back cover.

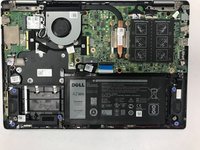
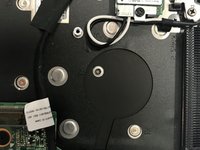
  4. Dell Inspiron 13 7378 Fan Replacement, Fan: passo 4, immagine 1 di 1
    • Remove the two 3 mm screws holding the fan in place using a Phillips screwdriver.

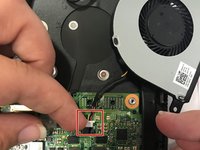
  5. Dell Inspiron 13 7378 Fan Replacement: passo 5, immagine 1 di 3 Dell Inspiron 13 7378 Fan Replacement: passo 5, immagine 2 di 3 Dell Inspiron 13 7378 Fan Replacement: passo 5, immagine 3 di 3
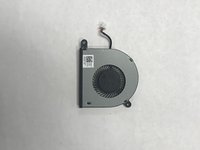
    • Disconnect the fan's connector from the motherboard.

    • Remove the fan from the laptop.

Conclusione

Replace the back cover to complete the process.

Altre 2 persone hanno completato questa guida.

Javier Perez

Membro da: 02/08/22

277 Reputazione

2 Guide realizzate

Team

Gateway, Team 1-3, Saknee Spring 2022 Membro di Gateway, Team 1-3, Saknee Spring 2022

GCC-SAKNEE-S22S1G3

5 Membri

16 Guide realizzate

0 Commenti

Aggiungi Commento

Visualizza Statistiche:

Ultime 24 Ore: 0

Ultimi 7 Giorni: 1

Ultimi 30 Giorni: 43

Tutti i Tempi: 303