Introduzione
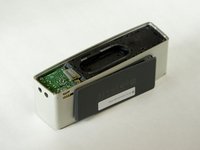
The battery cover is the rubber flap on the bottom of the speaker that covers the battery. It cannot be pulled off without first going through several prerequisite steps. This guide will provide you with easy to follow steps to remove the battery cover on the Bose SoundLink Mini speaker.
Cosa ti serve
-
-
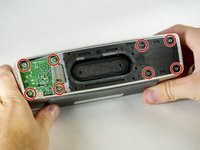
Peel back the rubber battery cover and remove the four circled 6.0 mm screws using a T8 Torx Screwdriver.
 Chiedi a FixBot
-
-
-
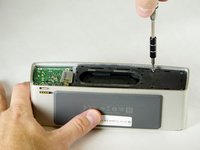
While holding the cover back, pull straight up on the battery to remove it.
-
-
-
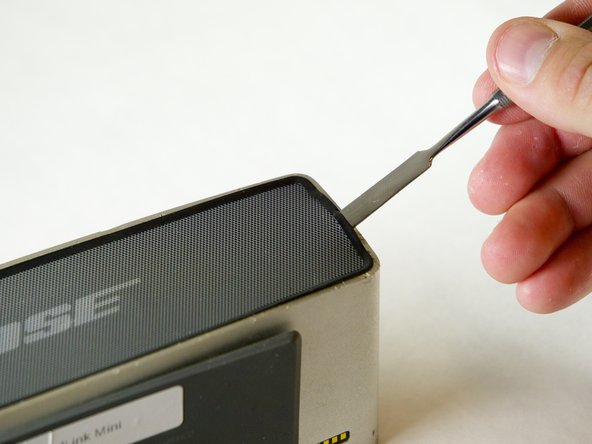
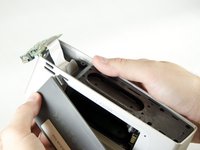
Insert the Metal Spudger between the rubber edge on the grille and the aluminum casing.
-
-
-
-
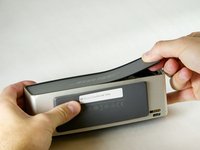
The grille is attached to the speaker with double sided sticky tape. To remove the grill gently pull upward while keeping tension to the right.
-
-
-
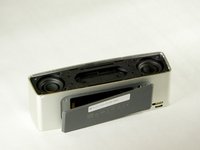
Remove the four 15.0 mm screws on the left and the four 9.0 mm screws on the right using the T8 Torx Screwdriver.
-
-
-
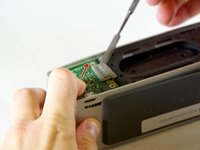
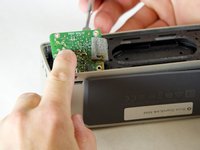
Remove the circuit board by pushing it with your index finger in the direction shown while using a nylon or metal spudger to lift it up and out of place.
-
-
-
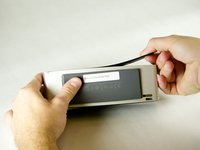
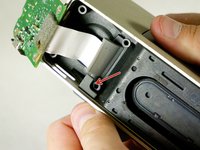
Carefully pull on the battery cover until the rubber tab slides out of the aluminum casing.
-


To reassemble your device, follow these instructions in reverse order.
Annulla: non ho completato questa guida.
Altre 8 persone hanno completato questa guida.
Team

Cal Poly, Team 1-23, Maness Fall 2015 Membro di Cal Poly, Team 1-23, Maness Fall 2015
CPSU-MANESS-F15S1G23
4 Membri
24 guide realizzate
3Commenti sulla guida
@rajpotus: I had the same problem. If the little rubber tab is not damaged (mine was fine), you should be able to follow these instructions to replace it. But I have these comments on the instructions:
1) You do NOT need to remove the front grill. I have no idea why they suggest you do that here.
2) I think the reason you remove the battery is to make sure the circuit board has zero power on it when you work on it — otherwise a touch of the screwdriver to an unlucky spot on the board might short/burn something out. But I don’t think there’s any mechanical reason to remove it.
3) Once you pop off the back grill cover, you should be able to slide the tab through the slot and coax it up (maybe with a tooth-pick and/or tweezers) on top of the circuit board, but it’s probably better to unscrew the circuit board (as directed here) which makes it easier to push the rubber tab through. Then slide the circuit board back under the tab and screw it back into place.