Salta al contenuto principale

Blu L120 Loudspeaker Replacement

Cosa ti serve

  1. Blu L120 Loudspeaker Replacement, Open the back panel: passo 1, immagine 1 di 3 Blu L120 Loudspeaker Replacement, Open the back panel: passo 1, immagine 2 di 3 Blu L120 Loudspeaker Replacement, Open the back panel: passo 1, immagine 3 di 3
    • Remove the back cover by lifting at the notch towards the bottom of the phone. Use your fingernail to pry up.

  2. Blu L120 Loudspeaker Replacement, Screw removal: passo 2, immagine 1 di 3 Blu L120 Loudspeaker Replacement, Screw removal: passo 2, immagine 2 di 3 Blu L120 Loudspeaker Replacement, Screw removal: passo 2, immagine 3 di 3
    • Remove these nine screws with a small philips screwdriver. They are all of the same size

    • There is a small screw hidden under the warranty sticker. You may either remove or poke through it.

    • *WARNING* by doing this you will void your manufacturer warranty.

  3. Blu L120 Loudspeaker Replacement, Rear panel removal: passo 3, immagine 1 di 3 Blu L120 Loudspeaker Replacement, Rear panel removal: passo 3, immagine 2 di 3 Blu L120 Loudspeaker Replacement, Rear panel removal: passo 3, immagine 3 di 3
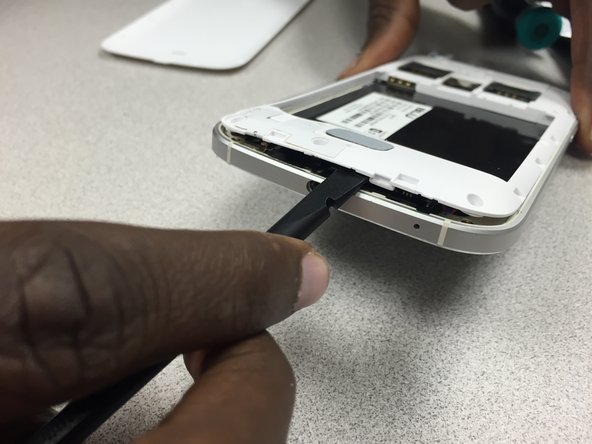
    • Use the Spudger to gently separate the panel from the frame, starting from the bottom left corner.

    • Then work your way along the edges of the phone.

  4. Blu L120 Loudspeaker Replacement, Separate back panel and frame: passo 4, immagine 1 di 3 Blu L120 Loudspeaker Replacement, Separate back panel and frame: passo 4, immagine 2 di 3 Blu L120 Loudspeaker Replacement, Separate back panel and frame: passo 4, immagine 3 di 3
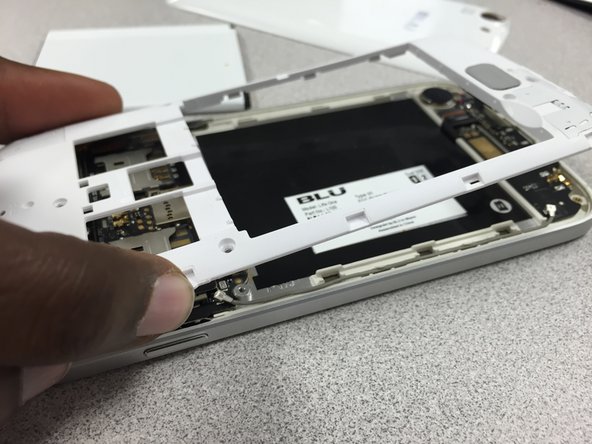
    • Continue using the spudger around the back panel of the phone to separate both pieces.

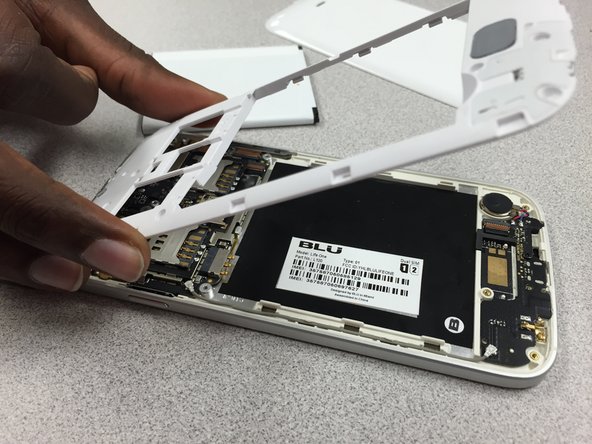
    • Once you have gone around the entire frame, use both hands to pull it apart.

  5. Blu L120 Loudspeaker Replacement, Speaker Removal: passo 5, immagine 1 di 2 Blu L120 Loudspeaker Replacement, Speaker Removal: passo 5, immagine 2 di 2
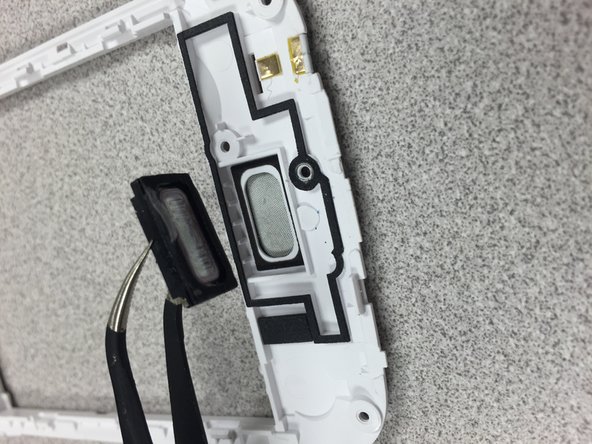
    • Use a pair of tweezers to grab the speaker assembly from the back of the panel and gently remove the it from the frame. (double sided tape is used to hold it together)

    • Install the new speaker, and follow the guide in reverse to reassemble the phone.

Conclusione

To reassemble your device, follow these instructions in reverse order.

Julio

Membro da: 10/25/14

695 Reputazione

6 Guide realizzate

Team

Gateway, Team 1-5, Johnson Fall 2014 Membro di Gateway, Team 1-5, Johnson Fall 2014

GCC-JOHNSON-F14S1G5

3 Membri

6 Guide realizzate

Un commento

where can i get the Loud speaker

Shamar Houston - Replica

Aggiungi Commento

Visualizza Statistiche:

Ultime 24 Ore: 0

Ultimi 7 Giorni: 0

Ultimi 30 Giorni: 1

Tutti i Tempi: 272