Salta al contenuto principale

Acer Chromebook R11 C738T-C44Z Motherboard Replacement

Cosa ti serve

  1. Acer Chromebook R11 C738T-C44Z Motherboard Replacement, Back Cover: passo 1, immagine 1 di 3 Acer Chromebook R11 C738T-C44Z Motherboard Replacement, Back Cover: passo 1, immagine 2 di 3 Acer Chromebook R11 C738T-C44Z Motherboard Replacement, Back Cover: passo 1, immagine 3 di 3
    • Lay the laptop with the back side up.

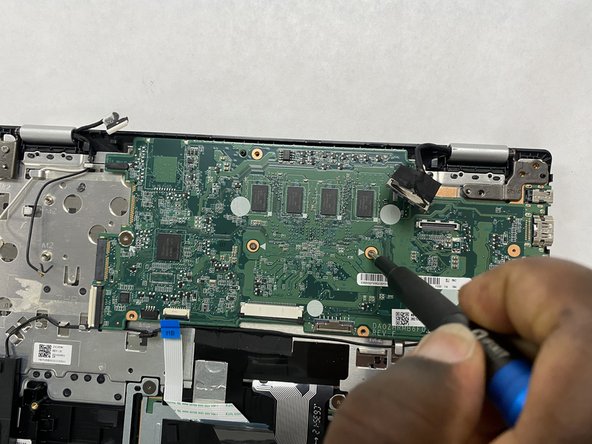
    • Use a Phillips #1 screwdriver to remove eleven 3 mm screws.

    • Use the opening tool to pry the back cover off gently by placing it in the seam and working your way around the perimeter.

  2. Acer Chromebook R11 C738T-C44Z Motherboard Replacement, Battery: passo 2, immagine 1 di 2 Acer Chromebook R11 C738T-C44Z Motherboard Replacement, Battery: passo 2, immagine 2 di 2
    • Unplug the battery connector from the motherboard. (The motherboard is a group of wires in rainbow colors)

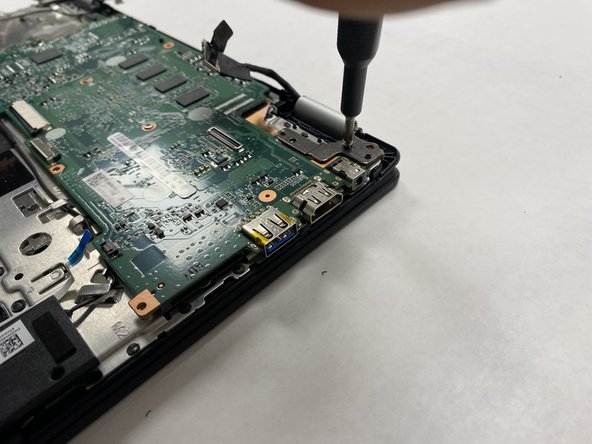
    • Use a Phillips #1 screwdriver to remove the two 3 mm screws, (one on each side of the battery), that secure it in place.

  3. Acer Chromebook R11 C738T-C44Z Motherboard Replacement: passo 3, immagine 1 di 1
    • Remove battery from its holder by pulling it upwards from the device

    • Attempt to remove it as gently as possible to avoid damaging the Motherboard

  4. Acer Chromebook R11 C738T-C44Z Motherboard Replacement: passo 4, immagine 1 di 1
    • Install the new battery and again use a Phillips #1 screwdriver to remove the two 3 mm screws

  5. Acer Chromebook R11 C738T-C44Z Motherboard Replacement, Wireless Card: passo 5, immagine 1 di 2 Acer Chromebook R11 C738T-C44Z Motherboard Replacement, Wireless Card: passo 5, immagine 2 di 2
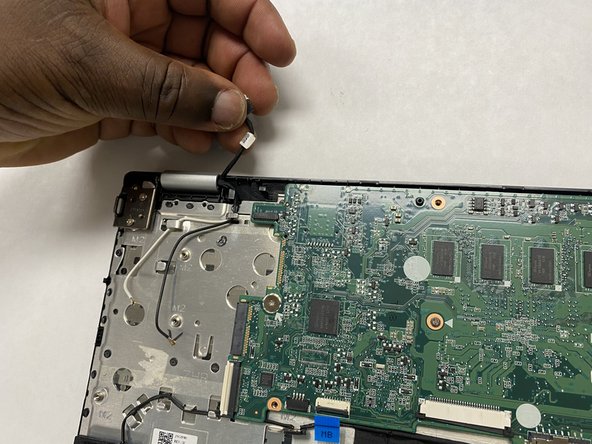
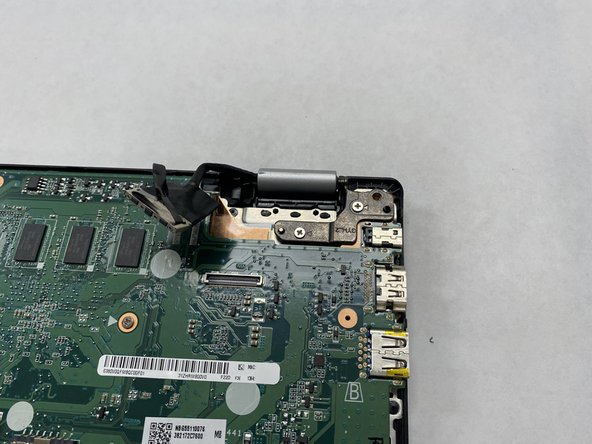
    • Disconnect the two antenna cables (one black and one white) that are attached to the wireless card.

  6. Acer Chromebook R11 C738T-C44Z Motherboard Replacement: passo 6, immagine 1 di 1
    • Use a Phillips #1 screwdriver to remove the single 3 mm screw that secures the wireless card.

  7. Acer Chromebook R11 C738T-C44Z Motherboard Replacement: passo 7, immagine 1 di 2 Acer Chromebook R11 C738T-C44Z Motherboard Replacement: passo 7, immagine 2 di 2
    • Carefully slide the wireless card out of its socket from the motherboard.

  8. Acer Chromebook R11 C738T-C44Z Motherboard Replacement, Motherboard: passo 8, immagine 1 di 3 Acer Chromebook R11 C738T-C44Z Motherboard Replacement, Motherboard: passo 8, immagine 2 di 3 Acer Chromebook R11 C738T-C44Z Motherboard Replacement, Motherboard: passo 8, immagine 3 di 3
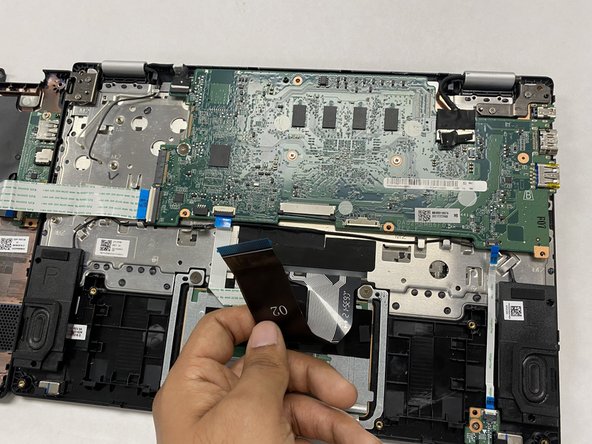
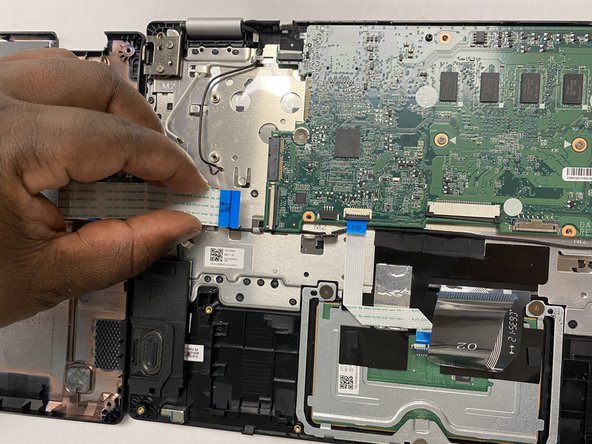
    • Disconnect the LED board ribbon by pulling it out gently.

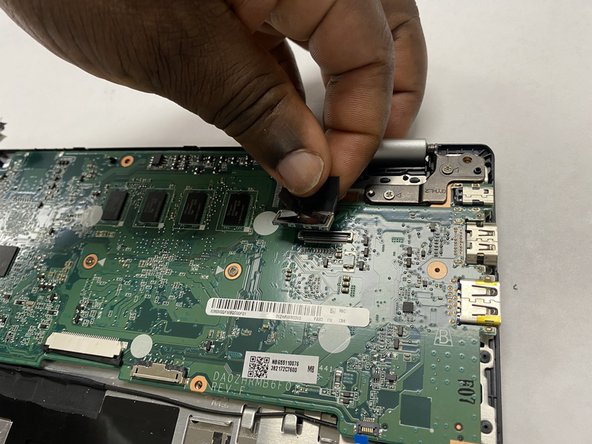
    • Disconnect the speaker cable.

  9. Acer Chromebook R11 C738T-C44Z Motherboard Replacement: passo 9, immagine 1 di 2 Acer Chromebook R11 C738T-C44Z Motherboard Replacement: passo 9, immagine 2 di 2
    • Disconnect the keyboard ribbon.

    • Slide it out gently to not rip it.

  10. Acer Chromebook R11 C738T-C44Z Motherboard Replacement: passo 10, immagine 1 di 2 Acer Chromebook R11 C738T-C44Z Motherboard Replacement: passo 10, immagine 2 di 2
    • Disconnect the daughterboard ribbon by flipping up the white tab and pulling it out from the motherboard.

  11. Acer Chromebook R11 C738T-C44Z Motherboard Replacement: passo 11, immagine 1 di 2 Acer Chromebook R11 C738T-C44Z Motherboard Replacement: passo 11, immagine 2 di 2
    • Disconnect the touchpad ribbon by lifting up the tab and pulling it out.

  12. Acer Chromebook R11 C738T-C44Z Motherboard Replacement: passo 12, immagine 1 di 2 Acer Chromebook R11 C738T-C44Z Motherboard Replacement: passo 12, immagine 2 di 2
    • Disconnect the sensor cable by pulling it out.

  13. Acer Chromebook R11 C738T-C44Z Motherboard Replacement: passo 13, immagine 1 di 3 Acer Chromebook R11 C738T-C44Z Motherboard Replacement: passo 13, immagine 2 di 3 Acer Chromebook R11 C738T-C44Z Motherboard Replacement: passo 13, immagine 3 di 3
    • Disconnect the LCD cable by pinching it and lifting it off the motherboard.

  14. Acer Chromebook R11 C738T-C44Z Motherboard Replacement: passo 14, immagine 1 di 2 Acer Chromebook R11 C738T-C44Z Motherboard Replacement: passo 14, immagine 2 di 2
    • Use a Phillips #1 screwdriver to remove the two 3 mm screws that hold the hinge down.

  15. Acer Chromebook R11 C738T-C44Z Motherboard Replacement: passo 15, immagine 1 di 3 Acer Chromebook R11 C738T-C44Z Motherboard Replacement: passo 15, immagine 2 di 3 Acer Chromebook R11 C738T-C44Z Motherboard Replacement: passo 15, immagine 3 di 3
    • Use a Phillips #1 screwdriver to remove the three 3 mm screws that secure the motherboard.

  16. Acer Chromebook R11 C738T-C44Z Motherboard Replacement: passo 16, immagine 1 di 2 Acer Chromebook R11 C738T-C44Z Motherboard Replacement: passo 16, immagine 2 di 2
    • Slide the opening tool underneath the hinge latch to lift it up.

    • This is to free the motherboard.

  17. Acer Chromebook R11 C738T-C44Z Motherboard Replacement: passo 17, immagine 1 di 2 Acer Chromebook R11 C738T-C44Z Motherboard Replacement: passo 17, immagine 2 di 2
    • Grab the motherboard securely to lift and remove it.

Conclusione

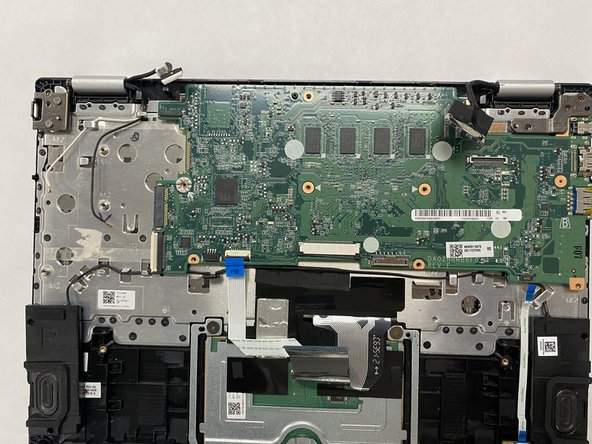
To reassemble your device, follow these instructions in reverse order.

Un'altra persona ha completato questa guida.

Team

Gateway, Team 1-4, Saknee Fall 2021 Membro di Gateway, Team 1-4, Saknee Fall 2021

GCC-SAKNEE-F21S1G4

4 Membri

6 Guide realizzate

0 Commenti

Aggiungi Commento

Visualizza Statistiche:

Ultime 24 Ore: 0

Ultimi 7 Giorni: 8

Ultimi 30 Giorni: 24

Tutti i Tempi: 463