Salta al contenuto principale

why! WDi7SSD Replace processor (CPU)

Cosa ti serve

  1. why! WDi7SSD Replace processor (CPU), why! WDi7SSD Opening procedure: passo 1, immagine 1 di 3 why! WDi7SSD Replace processor (CPU), why! WDi7SSD Opening procedure: passo 1, immagine 2 di 3 why! WDi7SSD Replace processor (CPU), why! WDi7SSD Opening procedure: passo 1, immagine 3 di 3
    • Make sure the computer is disconnected from the power source.

    • Flip the computer over.

    • Remove the six screws with a 2 mm Allen key.

    • Carefully remove the back panel, as well the left and right panel.

  2. why! WDi7SSD Replace processor (CPU): passo 2, immagine 1 di 1
    • Now flip up the base panel to which all components are attached.

  3. why! WDi7SSD Replace processor (CPU), Processor (CPU): passo 3, immagine 1 di 3 why! WDi7SSD Replace processor (CPU), Processor (CPU): passo 3, immagine 2 di 3 why! WDi7SSD Replace processor (CPU), Processor (CPU): passo 3, immagine 3 di 3
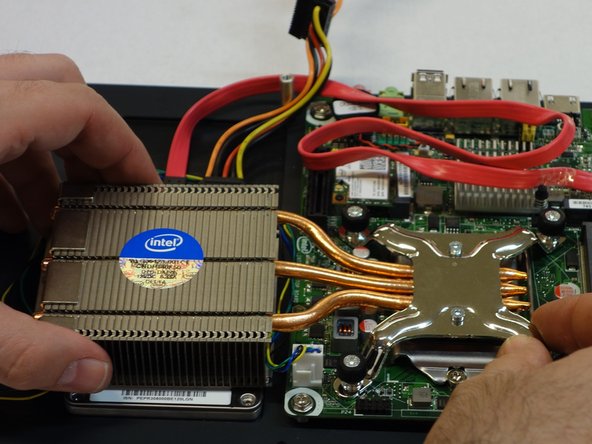
    • Loosen the 4 PH2 Phillips screws of the heat sink.

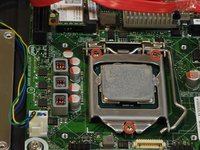
    • Now remove the heat sink.

  4. why! WDi7SSD Replace processor (CPU): passo 4, immagine 1 di 2 why! WDi7SSD Replace processor (CPU): passo 4, immagine 2 di 2
    • Use the screwdriver to unscrew the three PH2 slotted screws to release the CPU holder.

    • Press down the spring on the right side of the CPU and pull it carefully to the side.

    • Put the CPU aside.

    • To remove the thermal paste, you can use isopropanol. The thermal paste must be completely removed from the heatsink and CPU.

Conclusione

To reassemble the unit, follow the instructions in reverse order.

Un'altra persona ha completato questa guida.

Un ringraziamento speciale a questi traduttori:

de en

100%

oldturkey03 ci sta aiutando ad aggiustare il mondo! Vuoi partecipare?
Inizia a tradurre ›

Felice Suglia

Membro da: 06/15/13

31.100 Reputazione

264 Guide realizzate

0 Commenti

Aggiungi Commento

Visualizza Statistiche:

Ultime 24 Ore: 0

Ultimi 7 Giorni: 3

Ultimi 30 Giorni: 16

Tutti i Tempi: 154