Salta al contenuto principale

why! N240BU Hard Drive M.2 Replacement

Cosa ti serve

  1. why! N240BU Hard Drive M.2 Replacement, Battery: passo 1, immagine 1 di 2 why! N240BU Hard Drive M.2 Replacement, Battery: passo 1, immagine 2 di 2
    • Start by unlocking the right locking latch.

    • Then, by simultaneously unlocking the left latch, lift the battery out of its socket.

  2. why! N240BU Hard Drive M.2 Replacement, Access to main components: passo 2, immagine 1 di 2 why! N240BU Hard Drive M.2 Replacement, Access to main components: passo 2, immagine 2 di 2
    • Begin by spotting the dummy memory card.

    • Then, remove it and put it on your workplan.

  3. why! N240BU Hard Drive M.2 Replacement: passo 3, immagine 1 di 3 why! N240BU Hard Drive M.2 Replacement: passo 3, immagine 2 di 3 why! N240BU Hard Drive M.2 Replacement: passo 3, immagine 3 di 3
    • Locate the 15 screws that hold the bottom cover of the device in place.

    • Unscrew them and place them on your work surface.

    • Then, un-clip the bottom cover, starting with the side shown in the third picture.

  4. why! N240BU Hard Drive M.2 Replacement, SSD Hard Drive: passo 4, immagine 1 di 3 why! N240BU Hard Drive M.2 Replacement, SSD Hard Drive: passo 4, immagine 2 di 3 why! N240BU Hard Drive M.2 Replacement, SSD Hard Drive: passo 4, immagine 3 di 3
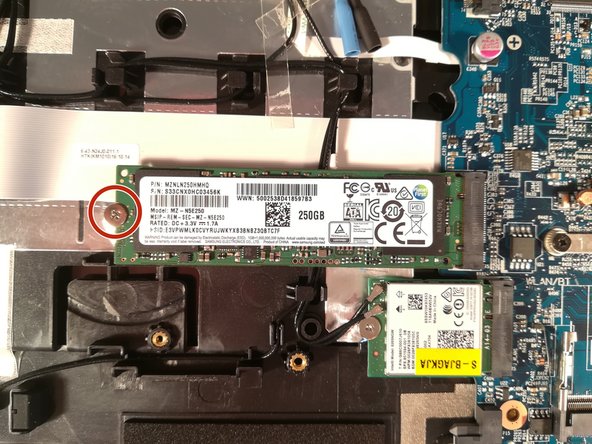
    • Unscrew the screw circled in red

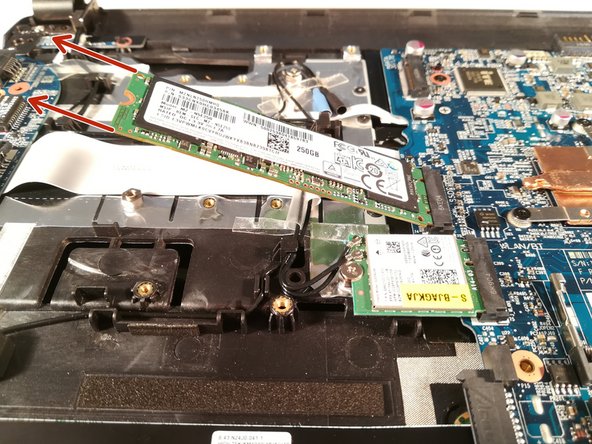
    • Pull out the M.2 SSD in the direction of the red arrows

Conclusione

To reassemble your device, follow these instructions in reverse order.

Un'altra persona ha completato questa guida.

Un ringraziamento speciale a questi traduttori:

fr en

100%

Questi traduttori ci stanno aiutando ad aggiustare il mondo! Vuoi partecipare?
Inizia a tradurre ›

Felice Suglia

Membro da: 06/15/13

30.884 Reputazione

263 Guide realizzate

0 Commenti

Aggiungi Commento

Visualizza Statistiche:

Ultime 24 Ore: 0

Ultimi 7 Giorni: 2

Ultimi 30 Giorni: 2

Tutti i Tempi: 205