Salta al contenuto principale

PlayStation 4 Proの分解

Inglese
Giapponese

Traduzione in corso passo 8

Passo 8
PlayStation 4 Pro Teardown: passo 0, immagine 1 di 3 PlayStation 4 Pro Teardown: passo 0, immagine 2 di 3 PlayStation 4 Pro Teardown: passo 0, immagine 3 di 3
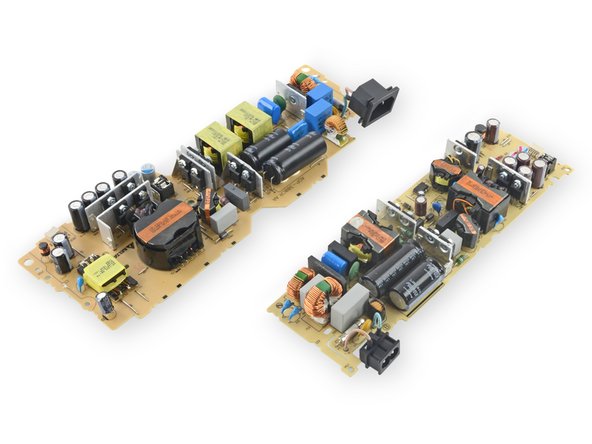
  • With the top panel removed, we focus our attention towards the power supply unit.

  • Unlike the 2013 model, which topped out at 165 W, this PSU dishes out 289 W of power (1.5 A @ 4.8 V +23.5 A @ 12 V).

  • According to the official technical specifications, the PS4 Pro pulls 310 W of power total. The balance is probably spent in transforming power from AC to DC.

  • And now for the million dollar question: Why is this console so much bigger than the original?

  • For comparison purposes, we lined up the PSU from the PS4 Pro (left) and the original PS4 (right). While there's only an 74.2 g difference between the two units, the requisite heat pipe and fan add a bit more bulk to the Pro to wick away excess heat generated by the additional graphics power.

上部パネルが取り外せたら、次に電源装置ユニット(PSU)に注目してみましょう。

最大165 Wに達する2013年のモデルと違って、このPSUは289 Wの電気を供給できます。(1.5 A @ 4.8 V +23.5 A @ 12 V)

公式仕様によると、PS4 Proは最大310Wを必要とします。この差は電気をACからDCに変換するためのものでしょう。

そして、誰もが知りたい質問です。このコンソールはオリジナルのサイズと比べると、どうしてこんなに大きくなったのでしょうか?

比較するために、PS4 Pro(左)とオリジナルのPS4 (右)のPSU を並べてみました。二つの重量の違いは僅か74.2 gほどです。しかし、追加されたグラフィックパワーからより多く出る熱を排出するため、ヒートパイプとファンの追加が必要だったのでしょう。

I tuoi contributi sono usati su licenza in base alla licenza open source Creative Commons.