Salta al contenuto principale

iPad Air 2 Wi-Fi ロジックボードの交換

Avviso: Stai modificando una guida prerequisita. Tutte le modifiche avranno effetto su tutte le guide che includono questo passo.

Inglese
Giapponese

Traduzione in corso passo 26

Passo 26
iPad Air 2 Wi-Fi Logic Board Replacement: passo 0, immagine 1 di 2 iPad Air 2 Wi-Fi Logic Board Replacement: passo 0, immagine 2 di 2
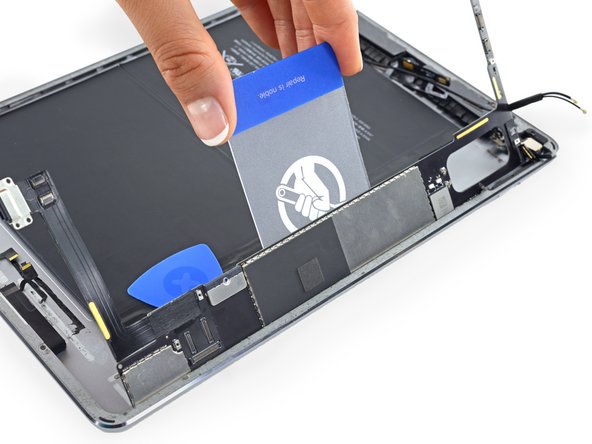
  • Slide a plastic card underneath the center of the logic board, pushing it in as far as it will go.

  • Slowly swing the left edge of the logic board up, while making sure it doesn't snag against any of the disconnected cables.

  • If any portion of the logic board requires excessive force to pry up, stop prying, re-apply the iOpener, and re-perform the corresponding guide steps to fully release the adhesive.

ロジックボード中心部の下からプラスチックカードをスライドさせ、できるところまで押し続けます。

未接続のケーブルに当たらないように確認しながら、ロジックボードの左端をゆっくりと振り上げます。

ロジックボードのいずれかの部分を持ち上げるのに、かなりの力が必要な場合は作業を中断して、iOpenerで温めなおします。完全に接着剤を剥がすためのガイド手順を繰り返してください。

I tuoi contributi sono usati su licenza in base alla licenza open source Creative Commons.