Nota: Stai modificando un prerequisito per la guida che stavi visualizzando. Tutte le modifiche avranno effetto su tutte 9le guide che includono questo passo.
Traduzione in corso passo 2
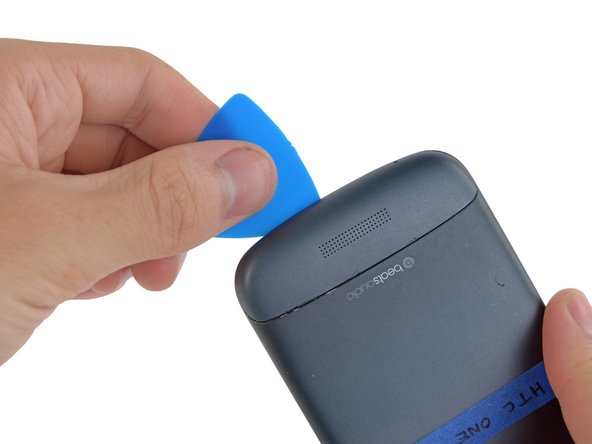
Passo 2


-
Gently place an opening pick in the corner of the gap between the bottom casing and rear case.
-
Slide the opening pick along the side of the casing, prying it away from the adhesive as you go.
I tuoi contributi sono usati su licenza in base alla licenza open source Creative Commons.