Avviso: Stai modificando una guida prerequisita. Tutte le modifiche avranno effetto su tutte le guide che includono questo passo.
Traduzione in corso passo 3
Passo 3


-
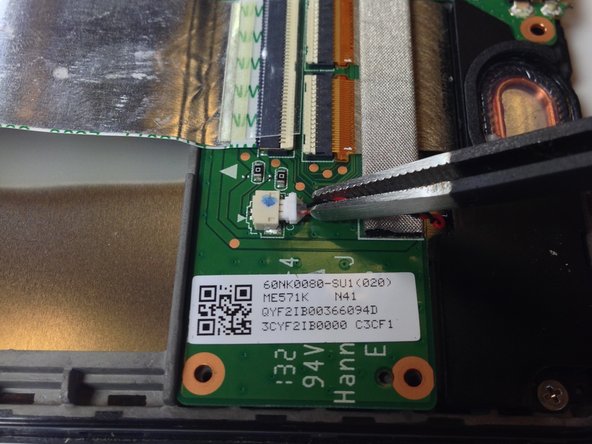
Use the tweezers to unplug the speaker connector from the daughterboard by pulling sideways.
| - | [* black] Use the tweezers to unplug the speaker connector from the daughterboard by pulling sideways. |
|---|---|
| + | [* black] Use the [product|IF145-020|tweezers] to unplug the speaker connector from the daughterboard by pulling sideways. |
| [* icon_caution] Be gentle in this step as this connector can be fragile. Do not pull upwards. |
I tuoi contributi sono usati su licenza in base alla licenza open source Creative Commons.