Salta al contenuto principale

iPad Mini 3 Wi-Fi LCD Austausch

Avviso: Stai modificando una guida prerequisita. Tutte le modifiche avranno effetto su tutte le guide che includono questo passo.

Inglese
Tedesco

Traduzione in corso passo 4

Passo 4
iPad Mini 3 Wi-Fi LCD Replacement: passo 0, immagine 1 di 3 iPad Mini 3 Wi-Fi LCD Replacement: passo 0, immagine 2 di 3 iPad Mini 3 Wi-Fi LCD Replacement: passo 0, immagine 3 di 3
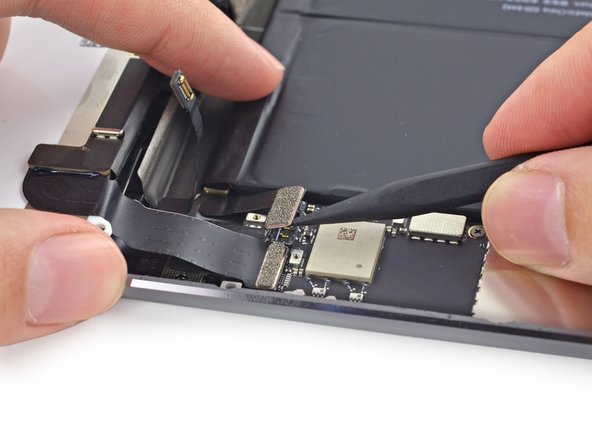
  • Use the tip of a spudger to gently lift the battery connector up off its socket on the logic board.

  • Be very careful to only pry up on the battery connector and not on the socket itself. If you pry up on the logic board socket, you may break the connector entirely.

Benutze die Spitze eines Spudgers, um den Stecker der Batterie vorsichtig aus seiner Fassung am Logicboard zu heben.

Achte darauf, nur den Stecker anzuheben und nicht den gesamten Anschluss. Falls du den Anschluss vom Logicboard anhebst, kannst du ihn irreparabel beschädigen.

I tuoi contributi sono usati su licenza in base alla licenza open source Creative Commons.