Salta al contenuto principale

MacBook Pro 13" Retina-scherm uit eind 2013 Vervanging van de bovenste behuizing

Avviso: Stai modificando una guida prerequisita. Tutte le modifiche avranno effetto su tutte le guide che includono questo passo.

Inglese
Olandese

Traduzione in corso passo 26

Passo 26
MacBook Pro 13" Retina Display Late 2013 Upper Case Replacement: passo 0, immagine 1 di 3 MacBook Pro 13" Retina Display Late 2013 Upper Case Replacement: passo 0, immagine 2 di 3 MacBook Pro 13" Retina Display Late 2013 Upper Case Replacement: passo 0, immagine 3 di 3
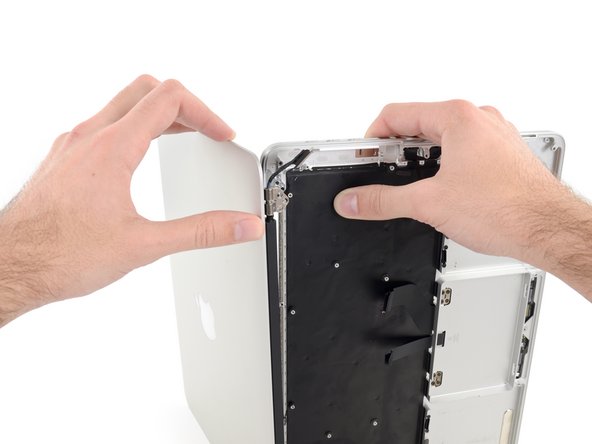
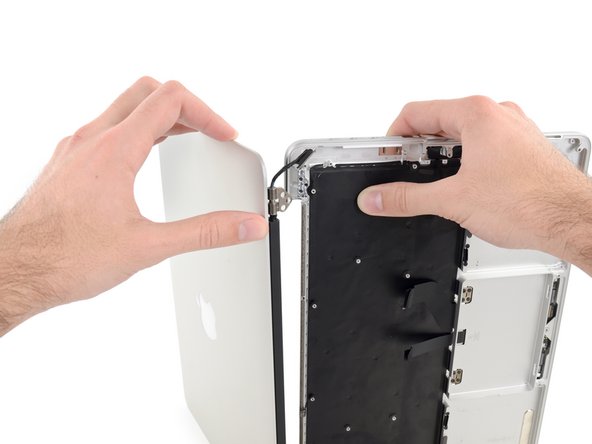
  • Grip both halves of the device, one in each hand.

  • Gently push forward on the bottom half of the device to detach it from the display assembly.

  • Carefully set each component aside, making sure to set down the lower half keyboard-side down.

Pak beide helften van het toestel vast, een helft in iedere hand.

Duw de onderste helft van de laptop voorzichtig naar voren om deze van de schermmodule los te koppelen.

Leg beide helften voorzichtig weg en zorg dat je de onderste helft met het toetsenbord omlaag op je werkoppervlak legt.

I tuoi contributi sono usati su licenza in base alla licenza open source Creative Commons.