Traduzione in corso passo 5
Passo 5


-
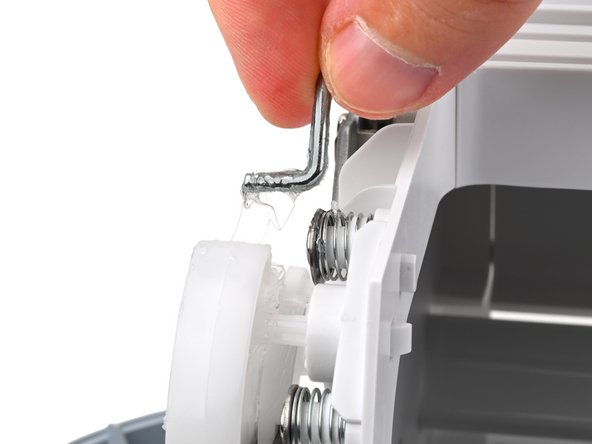
Remove the front end of the tray release arm from the front tray release mechanism by pulling it towards the center of the Cricut, then lifting it up.
-
If a lot of damping grease was lost during disassembly, use a spudger or popsicle stick to apply new high viscosity damping grease to the tray release mechanism.
-
Use paper towels and isopropyl alcohol to clean up any excess grease. If you're cleaning grease from electronic components, make sure you use high concentration (greater than 90%) alcohol.
I tuoi contributi sono usati su licenza in base alla licenza open source Creative Commons.