Nota: Stai modificando un prerequisito per la guida che stavi visualizzando. Tutte le modifiche avranno effetto su tutte 2le guide che includono questo passo.
Traduzione in corso passo 10


-
You can do this step before or after you remove the top.
-
Careful, it is easily broken! (I re-attached mine tastefully with tape, having broken the attachment points. ;o) )
-
Take a piece of tape, preferably painters tape, and make a small tape T-handle on the rear Jura badge. A small piece of rubber might work or you might be able to get it off with just clean fingers and skin friction.
-
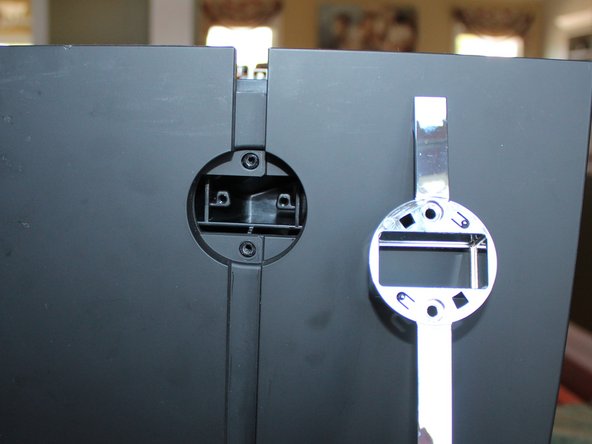
Carefully push in and twist it to the left ~1/10 of a turn. Then, when you feel that it has come loose, pull it gently out to remove it. It is held in place by little lugs and pressure tangs.
-
After the rear Jura badge has been removed, behind it you will find two T15 Torx screws marked with red circles in the second picture. They must be removed.
-
You can then gently wiggle free the vertical plastic chrome piece that is on the rear - pull out and set that aside.
I tuoi contributi sono usati su licenza in base alla licenza open source Creative Commons.