Salta al contenuto principale

iPad 9 Front Panel tauschen

Avviso: Stai modificando una guida prerequisita. Tutte le modifiche avranno effetto sulla guida che include questo passo.

Inglese
Tedesco

Traduzione in corso passo 4

Passo 4
iPad 9 Front Panel Replacement: passo 0, immagine 1 di 3 iPad 9 Front Panel Replacement: passo 0, immagine 2 di 3 iPad 9 Front Panel Replacement: passo 0, immagine 3 di 3
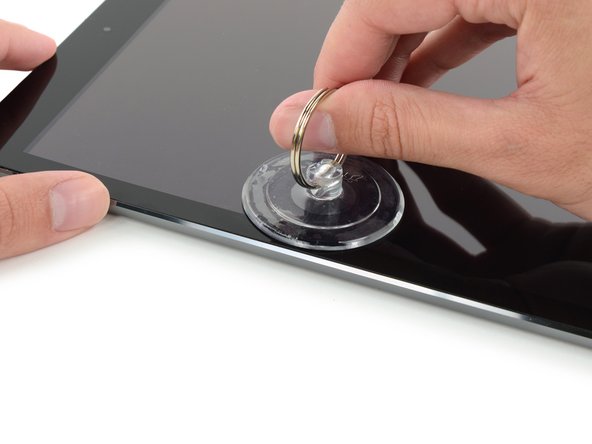
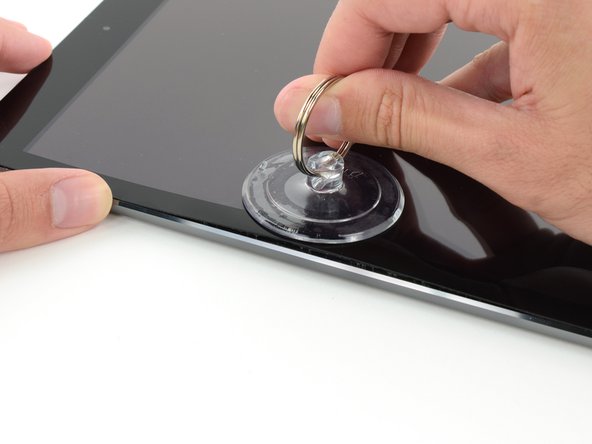
  • Carefully place a suction cup halfway up the heated side.

  • Be sure the cup is completely flat on the screen to get a tight seal.

  • While holding the iPad down with one hand, pull up on the suction cup to slightly separate the front panel glass from from the rear case.

  • If your iPad's screen is badly cracked, covering it with a smooth layer of clear packing tape may help the suction cup adhere. Alternatively, use a strong piece of tape (such as duct tape) and fold it into a handle.

Setze einen Saugheber vorsichtig auf der Hälfte der beheizten Seite an.

Achte darauf, dass der Saugheber ganz flach auf dem Display aufliegt, um eine feste Versiegelung zu erreichen.

Während du das iPad mit einer Hand festhältst, ziehst du nun den Saugheber nach oben, um das Glas des Front Panels leicht vom Rückgehäuse zu lösen.

Wenn das Display deines iPads stark gesprungen ist, kann es helfen, wenn du das Display mit einer glatten Schicht durchsichtigem Klebeband abdeckst, damit der Saugheber besser haften kann. Alternativ kannst du auch ein starkes Stück Klebeband verwenden und es zu einem Griff falten.

I tuoi contributi sono usati su licenza in base alla licenza open source Creative Commons.