Salta al contenuto principale

Remplacement du panneau frontal de l'iPod Touch 7e génération

Avviso: Stai modificando una guida prerequisita. Tutte le modifiche avranno effetto su tutte le guide che includono questo passo.

Inglese
Francese

Traduzione in corso passo 6
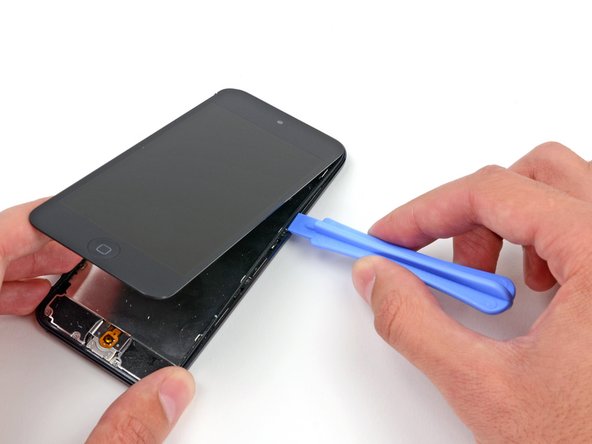
Passo 6
iPod Touch 7th Generation Front Panel Replacement: passo 0, immagine 1 di 2 iPod Touch 7th Generation Front Panel Replacement: passo 0, immagine 2 di 2
  • Insert the plastic opening tool between the frame and the rear case behind the first clip.

  • Rock the tool sideways, to spread the gap behind the clip and separate it from the rear case.

  • This may not free the clip initially, but repeating the procedure for each clip will begin to loosen the piece.

Insérez l'outil d'ouverture en plastique entre le châssis et la coque arrière, derrière le premier clip.

Faites jouer l'outil pour élargir l'espace derrière le clip et le détacher de la coque arrière.

Il se peut que le clip ne se défasse pas tout de suite. Mais répéter la procédure pour chaque clip contribuera à détacher peu à peu le châssis.

I tuoi contributi sono usati su licenza in base alla licenza open source Creative Commons.