Salta al contenuto principale

Sostituzione batteria MacBook Pro 13" Touch Bar fine 2016

Avviso: Stai modificando un prerequisito per la guida che stavi visualizzando. Tutte le modifiche avranno effetto sulla guida che include questo passo.

Inglese
Italiano

Traduzione in corso passo 22

Passo 22
MacBook Pro 13" Touch Bar Late 2016 Battery Replacement, Battery installation: passo 0, immagine 1 di 3 MacBook Pro 13" Touch Bar Late 2016 Battery Replacement, Battery installation: passo 0, immagine 2 di 3 MacBook Pro 13" Touch Bar Late 2016 Battery Replacement, Battery installation: passo 0, immagine 3 di 3
Battery installation
  • Double-check the fit and alignment of your new battery before sticking it down.

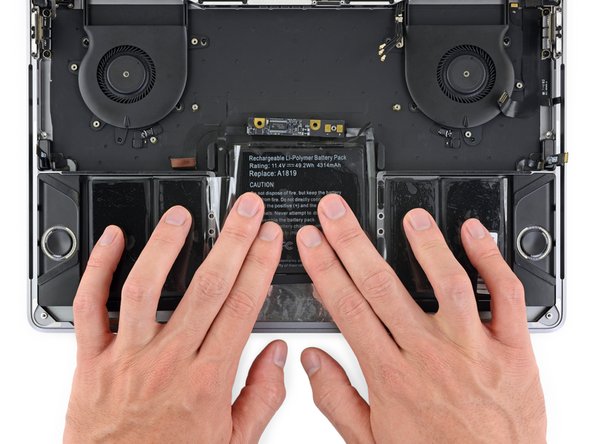
  • Be mindful of the battery data cable and make sure it doesn't get pinched or trapped under the battery board.

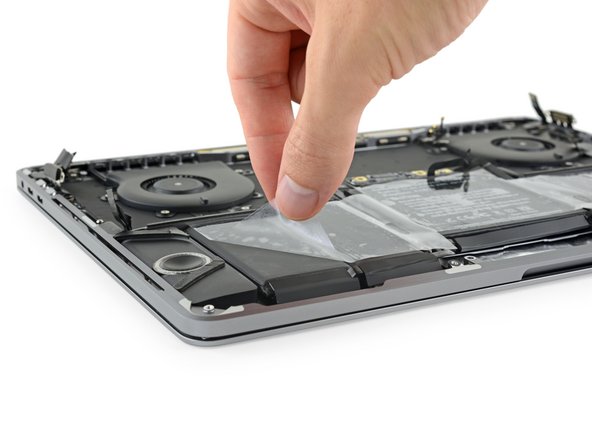
  • If your battery came with adhesive pre-installed on the bottom, flip it over and carefully peel away the liner to expose the adhesive. If your battery did not come with adhesive, apply a thin double-sided adhesive tape such as Tesa 61395 to keep your battery in place.

  • Carefully position the battery and set it into place.

  • Press and hold each cell firmly for 5-10 seconds to secure it to the lower case.

Controlla molto bene se la batteria si inserisce bene nel suo vano e se è ben allineata prima di attaccarla.

Stai attento al cavo dati della batteria e accertati che non rimanga schiacciato o intrappolato sotto la scheda della batteria.

Se la tua batteria è dotata di adesivo preinstallato sulla faccia inferiore, rovescia la e stacca con cura la protezione per esporre l'adesivo. Se invece è priva di adesivo preinstallato, applica un sottile nastro biadesivo come il Tesa 61395 per tenere in posizione la batteria.

Posiziona con cura la batteria e disponila nella sua posizione.

Premi e tieni premuta fermamente ciascuna cella per 5-10 secondi per fissarla al case inferiore.

I tuoi contributi sono usati su licenza in base alla licenza open source Creative Commons.