Traduzione in corso passo 3
Passo 3


-
First, you will use a PH-1 bit to remove the 17 8mm screws circled in red.
-
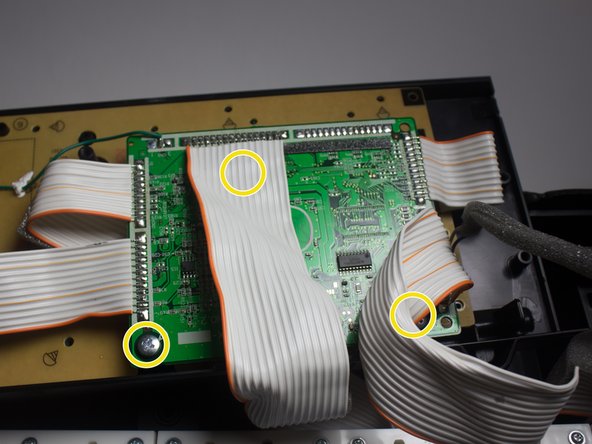
Next, using the same PH-1 bit, you will remove the three 8mm screws hidden under the white wires, circled in orange.
-
Then, using a JIS-1 bit, we will remove three 7mm screws from the circuit board, circled in yellow.
-
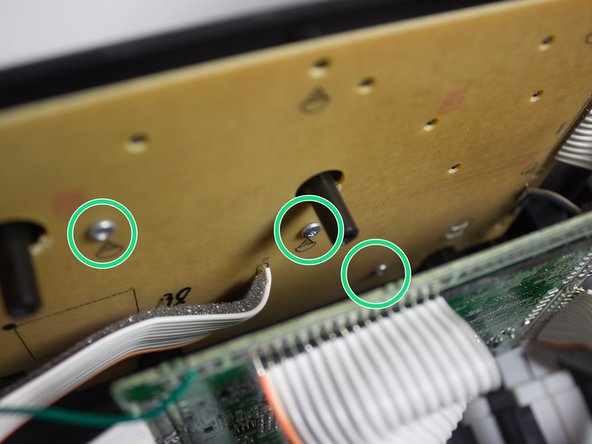
After removing the circuit board, the last three screws are revealed, circled in green. You will use the PH-1 bit to remove these last screws.
I tuoi contributi sono usati su licenza in base alla licenza open source Creative Commons.