Salta al contenuto principale

Canon EOS Rebel T2i Main PCB Board Replacement

Avviso: Stai modificando una guida prerequisita. Tutte le modifiche avranno effetto sulla guida che include questo passo.

Inglese
Italiano

Traduzione in corso passo 1

Passo 1
Canon EOS Rebel T2i Main PCB Board Replacement: passo 0, immagine 1 di 3 Canon EOS Rebel T2i Main PCB Board Replacement: passo 0, immagine 2 di 3 Canon EOS Rebel T2i Main PCB Board Replacement: passo 0, immagine 3 di 3
  • Use caution while handling ribbon cables and ribbon cables connects to avoid damaging them.

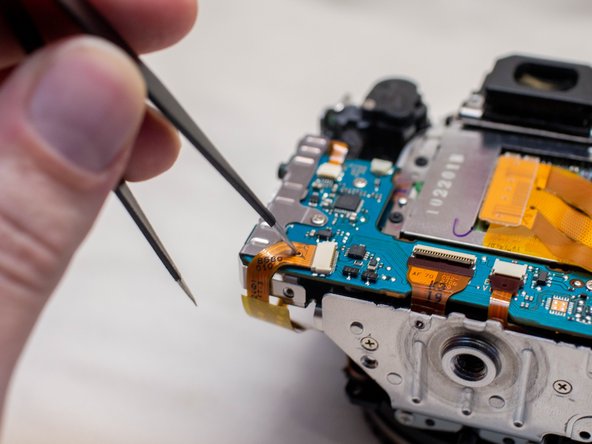
  • Locate these three ribbon cables located on the left side of the main PCB board.

  • Disconnect the ribbon cables.

  • Two of these ribbon cables features a hole in them which can assist with disconnecting them. Use either a pair of tweezers or another tool with a thin point to pull out the ribbon cables utilizing this hole.

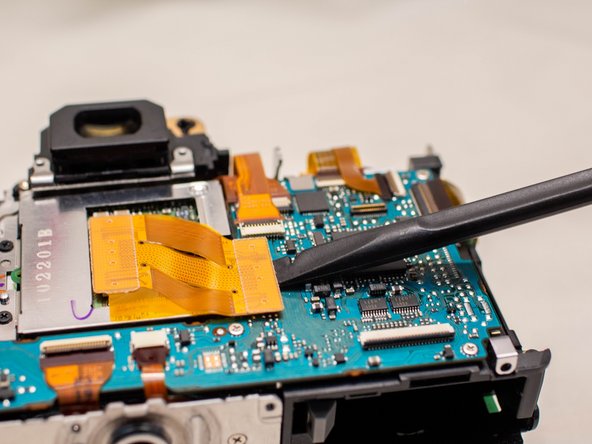
  • Use a plastic spudger tool to carefully push up and disconnect the imaging sensor ribbon cable.

Inserisci qui la traduzione

Inserisci qui la traduzione

Inserisci qui la traduzione

Inserisci qui la traduzione

Inserisci qui la traduzione

I tuoi contributi sono usati su licenza in base alla licenza open source Creative Commons.