Salta al contenuto principale

iPod Touch 7th Generation LCD Shield Plate Replacement

Avviso: Stai modificando una guida prerequisita. Tutte le modifiche avranno effetto su tutte le guide che includono questo passo.

Inglese
Italiano

Traduzione in corso passo 1

Passo 1
iPod Touch 7th Generation LCD Shield Plate Replacement: passo 0, immagine 1 di 2 iPod Touch 7th Generation LCD Shield Plate Replacement: passo 0, immagine 2 di 2
  • Gently fold the display over away from the rest of the iPod, taking care not to disconnect or break any of the ribbon cables. Set the two halves flat on a table or bench.

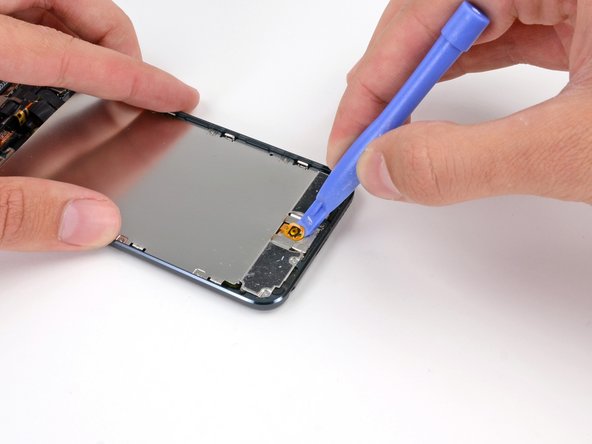
  • If your iPod has a black home button assembly rather than the orange one shown here, you can skip this step. The button is not attached to the LCD plate and does not need to be removed to complete the repair.

  • Use a plastic opening tool to pry the home button switch up from the LCD plate.

  • It may be necessary to use a heat gun or hair dryer to soften the adhesive on the back of the home button. Always use a low heat setting.

  • Do not attempt to remove the home button switch, as it is connected to components below the LCD plate.

Inserisci qui la traduzione

Inserisci qui la traduzione

Inserisci qui la traduzione

Inserisci qui la traduzione

Inserisci qui la traduzione

I tuoi contributi sono usati su licenza in base alla licenza open source Creative Commons.