Introduzione
This guide will show you how to specifically open the case of your iRulu AX760 to gain access to the battery. Then, this guide will show you how to remove the battery from the device.
Cosa ti serve
-
-
Use a plastic opening tool or metal spudger to free the rear cover.
-
Insert your spudger into the side of your tablet.
-
Crack open each edge and remove the cover.
-
-
-
-
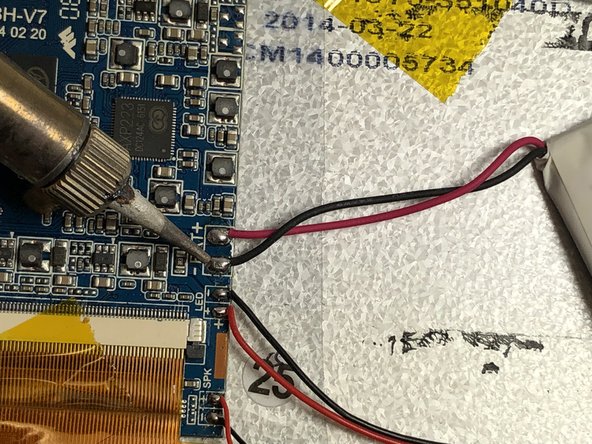
Use a soldering iron to remove the solder that connects the black and red wires of the battery to the motherboard.
-
Keep the wires of the battery taught.
-
The iron should only be pressed to the solder for 2-3 seconds max.
-
Visit this link for information about soldering. Come saldare e dissaldare componenti elettrici
-


To reassemble your device, follow these instructions in reverse order.
To reassemble your device, follow these instructions in reverse order.
Team

IUPUI, Team S6-G4, Baechle Spring 2018 Membro di IUPUI, Team S6-G4, Baechle Spring 2018
IUPUI-BAECHLE-S18S6G4
4 Membri
8 Guide realizzate