Salta al contenuto principale

iRobot Roomba 655 Pet Series Cliff Sensors Replacement

Cosa ti serve

  1. iRobot Roomba 655 Pet Series Cliff Sensors Replacement, Removing the Side Brush: passo 1, immagine 1 di 2 iRobot Roomba 655 Pet Series Cliff Sensors Replacement, Removing the Side Brush: passo 1, immagine 2 di 2
    • Flip the device over onto its back.

    • Find the side brush, and unscrew the single screw that connects to brush motor by using the Phillips head #2 screwdriver.

    • This screw doesn't completely come out of the yellow side brush.

  2. iRobot Roomba 655 Pet Series Cliff Sensors Replacement, Removing the Back Panel: passo 2, immagine 1 di 2 iRobot Roomba 655 Pet Series Cliff Sensors Replacement, Removing the Back Panel: passo 2, immagine 2 di 2
    • Using a Phillips #1 screwdriver, remove the four screws on the back panel.

    • Once the screws are loose gently pry the back plate away from the body by using the spudger tool.

    • The screws don't completely come out of the panel, but it will still come apart once unscrewed.

  3. iRobot Roomba 655 Pet Series Cliff Sensors Replacement, Removing the Battery: passo 3, immagine 1 di 3 iRobot Roomba 655 Pet Series Cliff Sensors Replacement, Removing the Battery: passo 3, immagine 2 di 3 iRobot Roomba 655 Pet Series Cliff Sensors Replacement, Removing the Battery: passo 3, immagine 3 di 3
    • Grab the two pieces of green tape with your thumb and index finger

    • Pull up on the battery in an upwards direction to remove it

  4. iRobot Roomba 655 Pet Series Cliff Sensors Replacement, Battery Contact Points: passo 4, immagine 1 di 2 iRobot Roomba 655 Pet Series Cliff Sensors Replacement, Battery Contact Points: passo 4, immagine 2 di 2
    • These are the contact points on the Roomba for the battery

    • These are the contact points on the battery

    • If these contact points are dirty, they can be cleaned with a moist microfiber cloth (distilled water recommended)

  5. iRobot Roomba 655 Pet Series Cliff Sensors Replacement, Front Bumper: passo 5, immagine 1 di 2 iRobot Roomba 655 Pet Series Cliff Sensors Replacement, Front Bumper: passo 5, immagine 2 di 2
    • Remove the ten 11mm screws that hold the front bumper to the plastic bumper protector with your Phillips #1 screwdriver.

    • Pull the plastic bumper protector up and off of the bumper.

  6. iRobot Roomba 655 Pet Series Cliff Sensors Replacement: passo 6, immagine 1 di 3 iRobot Roomba 655 Pet Series Cliff Sensors Replacement: passo 6, immagine 2 di 3 iRobot Roomba 655 Pet Series Cliff Sensors Replacement: passo 6, immagine 3 di 3
    • Flip the Roomba back over, so you are viewing the top.

    • Pull up on the front bumper to remove it.

    • Be careful not to pull too hard because there is wiring attached to the bumper.

    • Remove the two 7mm screws with your Phillips #1 screwdriver, holding the wire sensors in place to the front bumper.

  7. iRobot Roomba 655 Pet Series Cliff Sensors Replacement, Front Face Plate: passo 7, immagine 1 di 2 iRobot Roomba 655 Pet Series Cliff Sensors Replacement, Front Face Plate: passo 7, immagine 2 di 2
    • Remove the dust bin by pushing on the button for the dust bin removal

    • Pull the dust bin out

  8. iRobot Roomba 655 Pet Series Cliff Sensors Replacement: passo 8, immagine 1 di 2 iRobot Roomba 655 Pet Series Cliff Sensors Replacement: passo 8, immagine 2 di 2
    • Pull up on the silver handle to release the top protectant plastic

    • Remove the top plastic carefully

  9. iRobot Roomba 655 Pet Series Cliff Sensors Replacement, Internal Faceplate: passo 9, immagine 1 di 3 iRobot Roomba 655 Pet Series Cliff Sensors Replacement, Internal Faceplate: passo 9, immagine 2 di 3 iRobot Roomba 655 Pet Series Cliff Sensors Replacement, Internal Faceplate: passo 9, immagine 3 di 3
    • The outside six - 10mm screws and the inside set of four - 10mm screws are the same here, use your Phillips head #2 to remove them

    • Use your Phillips head #0 to remove the one - 7mm bottom center screw

    • Use your Phillips head #2 to remove the two - 8mm screws by the handle

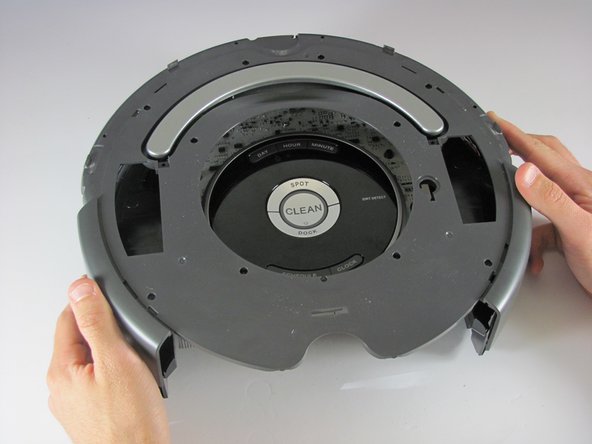
    • Push down the two release points to pull the plastic piece up

    • Pull the plastic piece up

  10. iRobot Roomba 655 Pet Series Cliff Sensors Replacement, Display: passo 10, immagine 1 di 3 iRobot Roomba 655 Pet Series Cliff Sensors Replacement, Display: passo 10, immagine 2 di 3 iRobot Roomba 655 Pet Series Cliff Sensors Replacement, Display: passo 10, immagine 3 di 3
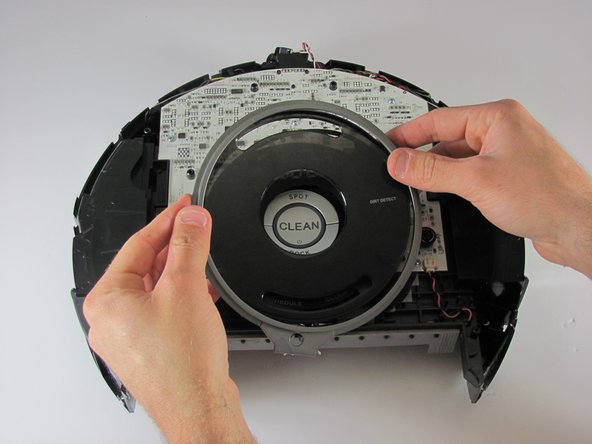
    • Pull the silver tab, and clear tinted display off

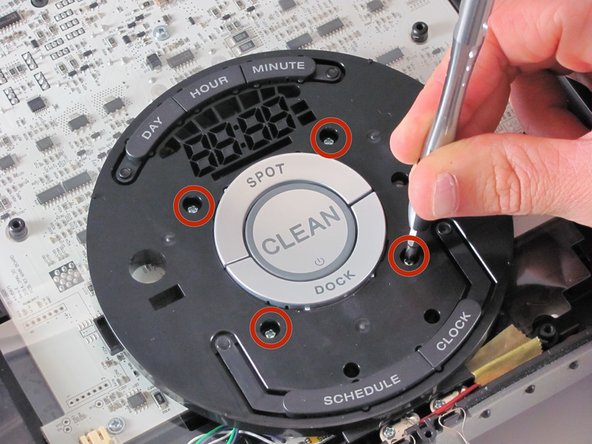
    • Remove the 4 - 9mm screws holding the display with your Phillips head #0

  11. iRobot Roomba 655 Pet Series Cliff Sensors Replacement: passo 11, immagine 1 di 3 iRobot Roomba 655 Pet Series Cliff Sensors Replacement: passo 11, immagine 2 di 3 iRobot Roomba 655 Pet Series Cliff Sensors Replacement: passo 11, immagine 3 di 3
    • Remove the display

    • Remove the plastic protectant film from the motherboard

  12. iRobot Roomba 655 Pet Series Cliff Sensors Replacement, Removing the Motherboard: passo 12, immagine 1 di 2 iRobot Roomba 655 Pet Series Cliff Sensors Replacement, Removing the Motherboard: passo 12, immagine 2 di 2
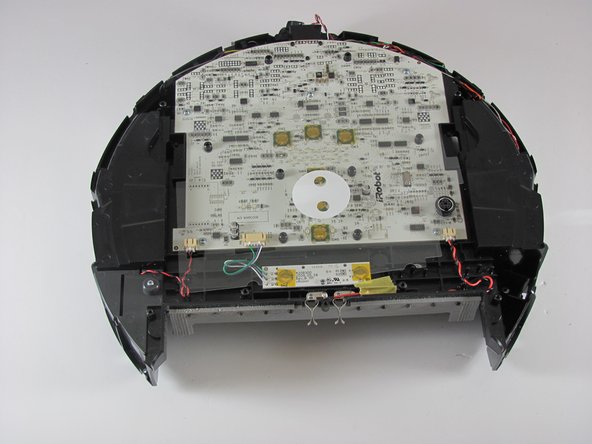
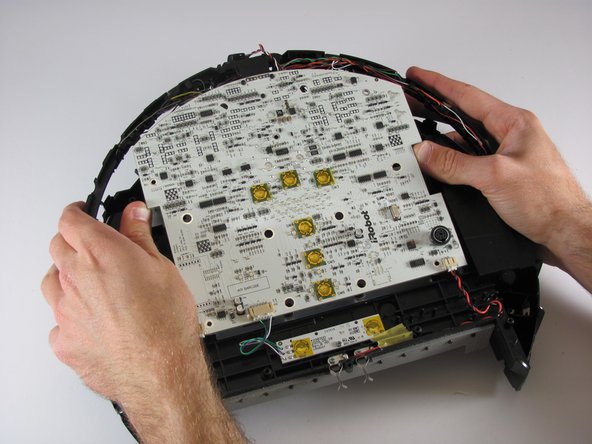
    • Remove the five - 8mm screws with your Phillips head #1, holding the mother board in place to the Roomba

    • Pull the mother board up off the Roomba

    • Be careful not to pull hard because there are a lot of wires attached to the motherboard

  13. iRobot Roomba 655 Pet Series Cliff Sensors Replacement, Unclipping the Wires: passo 13, immagine 1 di 3 iRobot Roomba 655 Pet Series Cliff Sensors Replacement, Unclipping the Wires: passo 13, immagine 2 di 3 iRobot Roomba 655 Pet Series Cliff Sensors Replacement, Unclipping the Wires: passo 13, immagine 3 di 3
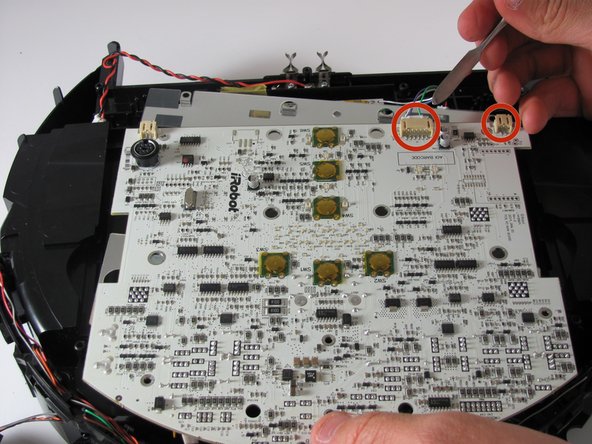
    • Remove the three sets of wires plugged into the back of the motherboard

    • Some of these can be difficult to remove, and you may need the help of the metal spudger

  14. iRobot Roomba 655 Pet Series Cliff Sensors Replacement, Unclip the Cliff Sensor Wires: passo 14, immagine 1 di 3 iRobot Roomba 655 Pet Series Cliff Sensors Replacement, Unclip the Cliff Sensor Wires: passo 14, immagine 2 di 3 iRobot Roomba 655 Pet Series Cliff Sensors Replacement, Unclip the Cliff Sensor Wires: passo 14, immagine 3 di 3
    • Flip the motherboard over

    • Remove the five wire connections using the same method as the previous two

    • Lastly, remove the bumper sensor wires from the motherboard

  15. iRobot Roomba 655 Pet Series Cliff Sensors Replacement, Cliff Sensors: passo 15, immagine 1 di 3 iRobot Roomba 655 Pet Series Cliff Sensors Replacement, Cliff Sensors: passo 15, immagine 2 di 3 iRobot Roomba 655 Pet Series Cliff Sensors Replacement, Cliff Sensors: passo 15, immagine 3 di 3
    • Insert metal spudger between cliff sensor and body of Roomba and push down and away from yourself

    • After releasing the snap lock slide the cliff sensor down to free it from its place

    • Repeat for the other cliff sensors

  16. iRobot Roomba 655 Pet Series Cliff Sensors Replacement: passo 16, immagine 1 di 2 iRobot Roomba 655 Pet Series Cliff Sensors Replacement: passo 16, immagine 2 di 2
    • Here are two pictures that should show what your Roomba fully disassembled looks like

Conclusione

To reassemble your device, follow these instructions in reverse order.

Altre 17 persone hanno completato questa guida.

Rhett

Membro da: 01/22/15

1.329 Reputazione

7 Guide realizzate

Team

Cal Poly, Team 21-20, Maness Winter 2015 Membro di Cal Poly, Team 21-20, Maness Winter 2015

CPSU-MANESS-W15S21G20

4 Membri

14 Guide realizzate

6 Commenti

Thank you very much for this useful guide. I cleaned properly my cliff sensors and all the Robot with the air compressor. Now it works properly and it looks like new!

florinabeakovic23 - Replica

Very complete instructions! Thank you so, so much! There were a few points along the line that I thought I was going to break something but trusted your instructions and everything worked out perfectly! I actually didn't replace my Cliff sensors but took them apart as somehow they had gotten dirt inside of them. My floors are finally clean again and you saved me between 300 + $400!

Maria Christiansen - Replica

Thank you. My roomba was stopping every 5 minutes or so with the “move to a new location” error message. I took it apart following this tutorial and opened the cliff sensors to clean inside of them (with a q-tip dipped in alcohol). After putting everything back together my old roomba is working perfectly again! Thanks for the detailed instructions! The color coded pictures with the screws was most helpful!

junhita - Replica

My intention of needing this video was to disable the cliff sensors on my Roomba 980, so it would vacuum a black-background rug. This was “my bad” but I misunderstood these instructions and thought I only needed to remove the bumper and two screws in order to remove/disable the cliff sensors!! I initially did not realize I needed to go through all of the steps to do this. I am thankful that is ALL I did, as I am not anywhere near the level of proficiency of taking the Roomba apart as these instructions provide. Now that the Roomba 980 is back together, I found another video that exactly suited my purpose in case it will help anyone else — Here’s the link : https://www.youtube.com/watch?v=h8fZLDuQ....

Jodie Wollman - Replica

Thank you for putting this guide together. I have two roomba 655’s and they are getting old. They are starting to have problems. I’ve bought newer models but they just don’t work as well for pet hair. With your instructions I’ll be able to extend the life of the two I have. Thank you

Cheryl - Replica

Aggiungi Commento

Visualizza Statistiche:

Ultime 24 Ore: 3

Ultimi 7 Giorni: 33

Ultimi 30 Giorni: 106

Tutti i Tempi: 22,918