Introduzione
This guide will demonstrate in detail how to remove and replace the Top Bumper Infrared Sensor from the iRobot Roomba 630. The front sensor could become damaged or potentially wear out over time and need to be replaced to ensure the Roomba operates correctly. Without the front sensor, the Roomba won't dock itself correctly nor sense incoming objects as it's vacuuming, causing it to crash around your home or office.
There aren't any special skills required for this removal and you may be interested to discover what hidden mechanisms lurk inside your Roomba. There are, however, quite a few detail-oriented steps so, be sure to read each bullet point in its entirety and compare with the pictures before disassembling your Roomba.
Cosa ti serve
-
-
-
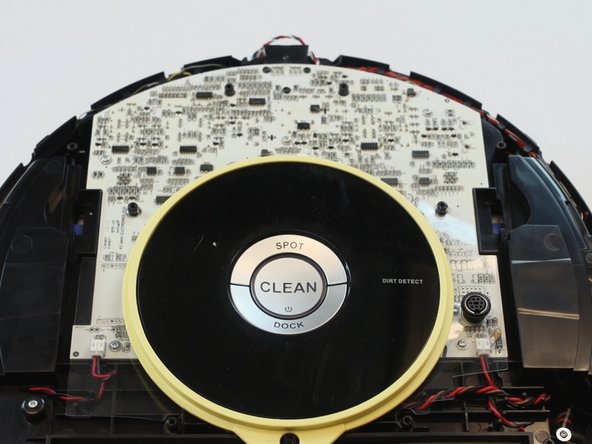
Flip Roomba back over and pry the top cover off.
-
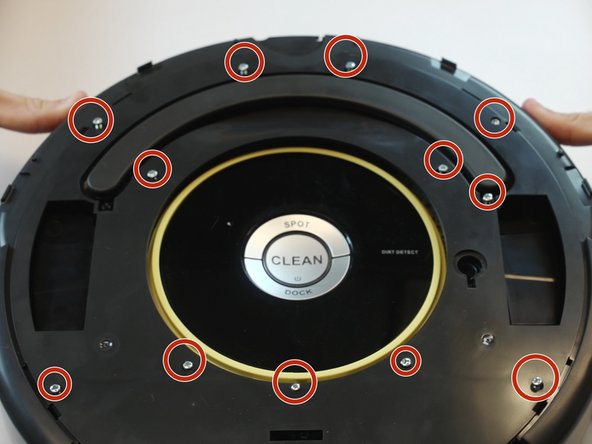
Unscrew the screws to the top plate and lift off.
I tried this on my Roomba 690 and there were fewer top screws, and after removing them could not remove the top cover.
-
-
-
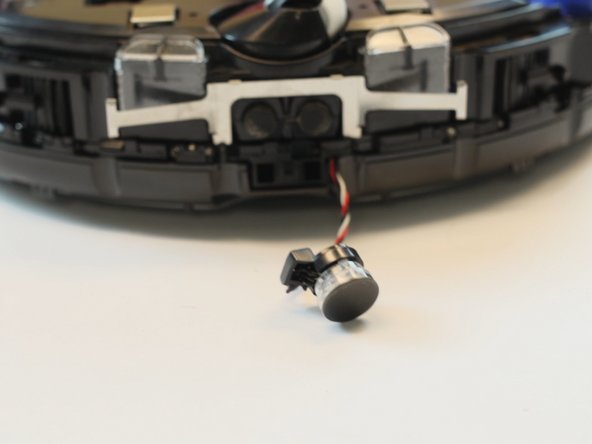
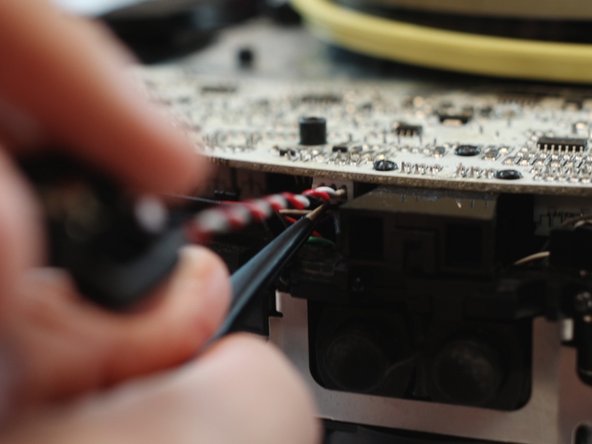
Use tweezers or another tool to push up on the insert while gently pulling the sensor out by its wires.
-
Remove the sensor.
IMPORTANT: Make sure to mount the sensor to the bumper with the wires in the same direction as original otherwise the bumper will not float freely!
-


To reassemble your device, follow these instructions in reverse order.
To reassemble your device, follow these instructions in reverse order.
Annulla: non ho completato questa guida.
Altre 4 persone hanno completato questa guida.
Team

USF Tampa, Team S5-G3, Walkup Fall 2017 Membro di USF Tampa, Team S5-G3, Walkup Fall 2017
USFT-WALKUP-F17S5G3
4 Membri
7 Guide realizzate
4 Commenti
Exact same instructions for a Roomba 690. Great guide and much cheaper than sending it in for out of warranty repair at $135 bucks!!!
Outstanding! I would only add to note position of the 12 top plate screws as they are removed since 3 are smaller/shorter (although not noticeably so) and need to be returned to their exact location. I would not call this difficult. Simply tedious. Thank you very much for the instrucitons.
Thanks for this. Roomba wanted me to send my unit in for repairs costing $130. I bought a replacement Rcon at eBay for $10. Turned out, as others have posted, the red wire was broken! That’s on Roomba!! Works like new, will repair the red wire, and save the rcon for future use.
This is very helpful! Thank you. In my case, all the 3 wires were thorn from the sensor head. I could resolver them but I can’t tell which is which. Can someone post where the 3 wires connect in the sensor head? There are 3 leads coming out of the sensor head but no insulation left on them so I can match with the correct wire. Much appreciated!