Questa versione può contenere modifiche errate. Passa all'ultima istantanea verificata.
Cosa ti serve
-
Questo passaggio è privo di traduzione. Aiuta a tradurlo
-
Place your Roomba upside-down on a hard surface.
-
-
Questo passaggio è privo di traduzione. Aiuta a tradurlo
-
While holding the side brush in place, use a Phillips #1 screwdriver to remove the 4.5mm screw from the center of the brush.
-
-
Questo passaggio è privo di traduzione. Aiuta a tradurlo
-
Gently pull upwards on the brush to remove it.
-
-
Questo passaggio è privo di traduzione. Aiuta a tradurlo
-
Rotate the Roomba upside-down so the bottom is facing towards you.
-
-
Questo passaggio è privo di traduzione. Aiuta a tradurlo
-
Using a Phillips #2 screwdriver, remove the captive screws that hold the bottom plate in place.
-
-
-
Questo passaggio è privo di traduzione. Aiuta a tradurlo
-
Push on the dirt bin release button, and pull gently.
-
-
Questo passaggio è privo di traduzione. Aiuta a tradurlo
-
Use a Phillips #1 screwdriver to loosen the 4 captive screws around the case .
-
-
Questo passaggio è privo di traduzione. Aiuta a tradurlo
-
Grab the brush case and pull upwards to remove.
-
-
Questo passaggio è privo di traduzione. Aiuta a tradurlo
-
Use a Phillips #1 screwdriver to remove the 9.5mm screws from the side of the brush case, and pull to detach.
-
Repeat for the opposite side of the brush case.
-
-
Questo passaggio è privo di traduzione. Aiuta a tradurlo
-
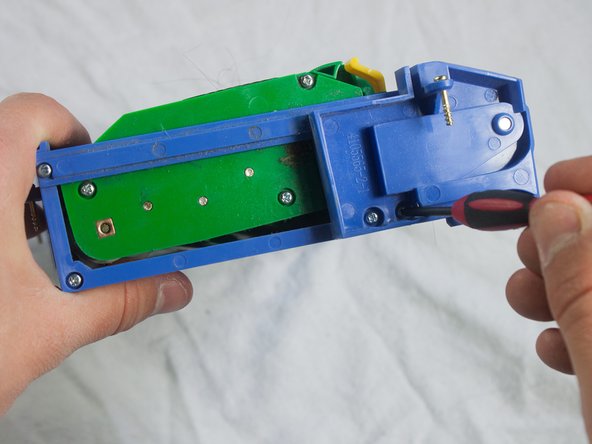
Use a Phillips #1 screwdriver to remove the three 5.0mm screws from the back of the brush case.
-
Pull off the back of the brush case.
-
-
Questo passaggio è privo di traduzione. Aiuta a tradurlo
-
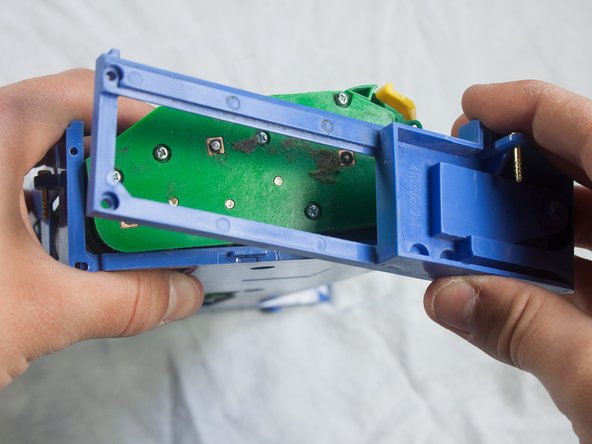
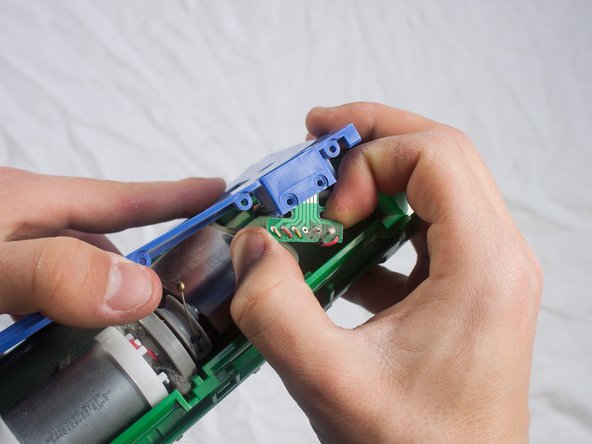
Use a Phillips #1 screwdriver to remove the two 1.5mm screws securing the chip in place.
-
Remove the chip from its housing in the blue brush case.
-
-
Questo passaggio è privo di traduzione. Aiuta a tradurlo
-
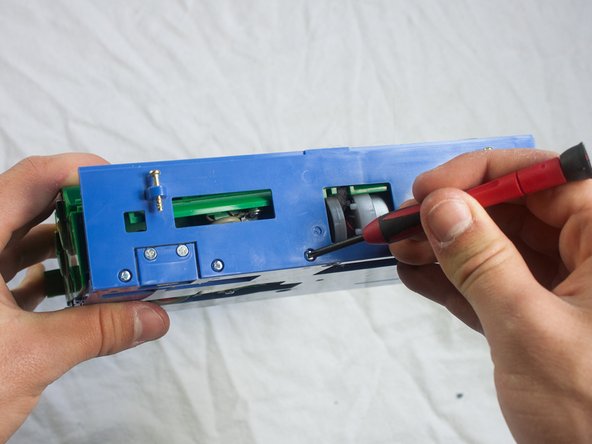
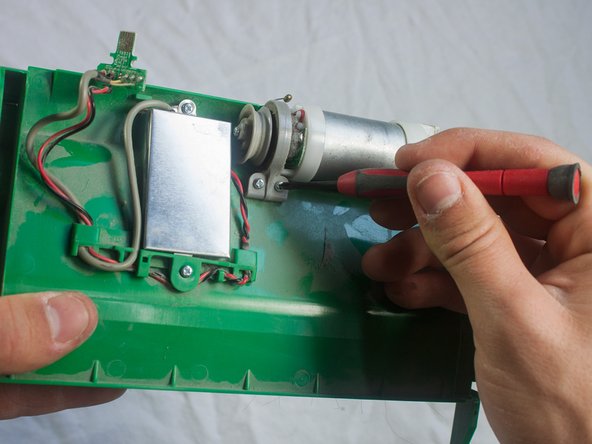
Use a Phillips #1 screwdriver to remove the two 5.5mm screws securing the motor in place.
-
-
Questo passaggio è privo di traduzione. Aiuta a tradurlo
-
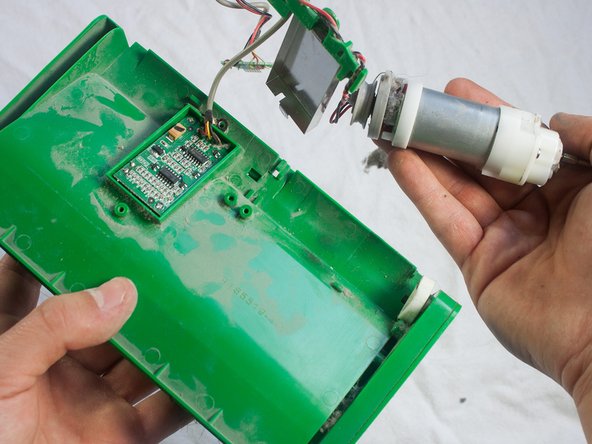
Use a Phillips #1 screwdriver to remove the two 4.5mm screws on the top and bottom of the metal plate.
-
Pull out the motor and metal covering.
-
-
Questo passaggio è privo di traduzione. Aiuta a tradurlo
-
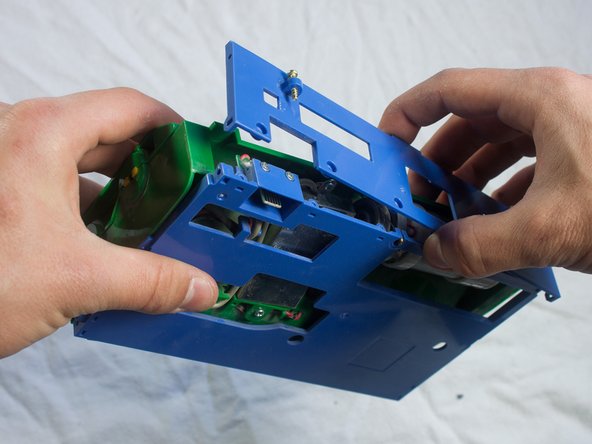
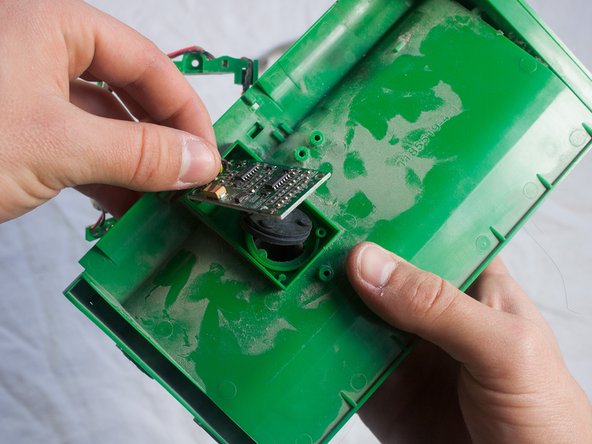
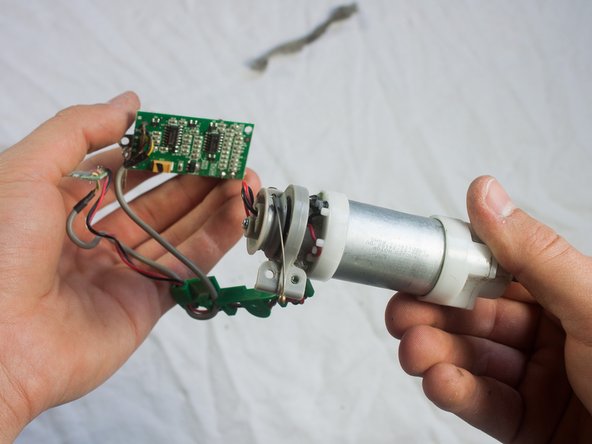
Use a Phillips #1 screwdriver to remove the two 3.5mm screws on the corners of the circuit board.
-
Gently pull out the circuit board.
-


Annulla: non ho completato questa guida.
Altre 2 persone hanno completato questa guida.
Team

Cal Poly, Team 13-14, Regan Winter 2014 Membro di Cal Poly, Team 13-14, Regan Winter 2014
CPSU-REGAN-W14S13G14
4 Membri
19 Guide realizzate