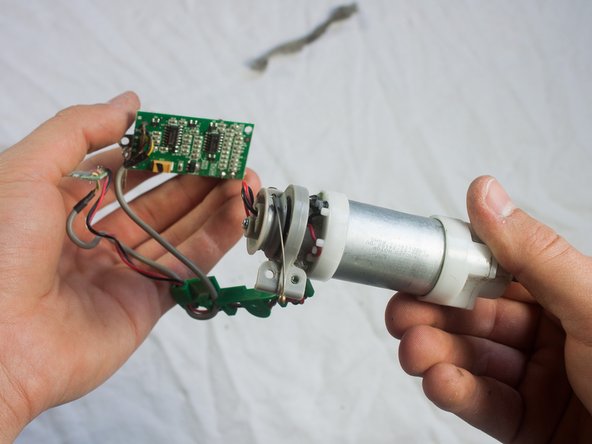
Salta al contenuto principale

iRobot Roomba 551 Main Brush Motor Replacement

Cosa ti serve

  1. iRobot Roomba 551 Main Brush Motor Replacement, Side Brush: passo 1, immagine 1 di 1
    • Place your Roomba upside-down on a hard surface.

  2. iRobot Roomba 551 Main Brush Motor Replacement: passo 2, immagine 1 di 1
    • While holding the side brush in place, use a Phillips #1 screwdriver to remove the 4.5mm screw from the center of the brush.

  3. iRobot Roomba 551 Main Brush Motor Replacement: passo 3, immagine 1 di 1
    • Gently pull upwards on the brush to remove it.

  4. iRobot Roomba 551 Main Brush Motor Replacement, Bottom Plate: passo 4, immagine 1 di 1
    • Rotate the Roomba upside-down so the bottom is facing towards you.

  5. iRobot Roomba 551 Main Brush Motor Replacement: passo 5, immagine 1 di 2 iRobot Roomba 551 Main Brush Motor Replacement: passo 5, immagine 2 di 2
    • Using a Phillips #2 screwdriver, remove the captive screws that hold the bottom plate in place.

  6. iRobot Roomba 551 Main Brush Motor Replacement: passo 6, immagine 1 di 1
    • Carefully lift the bottom plate.

    • The battery is only secured in place by the bottom plate, and may fall out once the bottom plate is removed.

  7. iRobot Roomba 551 Main Brush Motor Replacement, iRobot Roomba 551 Dirt Bin Replacement: passo 7, immagine 1 di 1
    • Push on the dirt bin release button, and pull gently.

  8. iRobot Roomba 551 Main Brush Motor Replacement, Brush Case: passo 8, immagine 1 di 1
    • Use a Phillips #1 screwdriver to loosen the 4 captive screws around the case .

  9. iRobot Roomba 551 Main Brush Motor Replacement: passo 9, immagine 1 di 1
    • Grab the brush case and pull upwards to remove.

  10. iRobot Roomba 551 Main Brush Motor Replacement, Main Brush Motor: passo 10, immagine 1 di 3 iRobot Roomba 551 Main Brush Motor Replacement, Main Brush Motor: passo 10, immagine 2 di 3 iRobot Roomba 551 Main Brush Motor Replacement, Main Brush Motor: passo 10, immagine 3 di 3
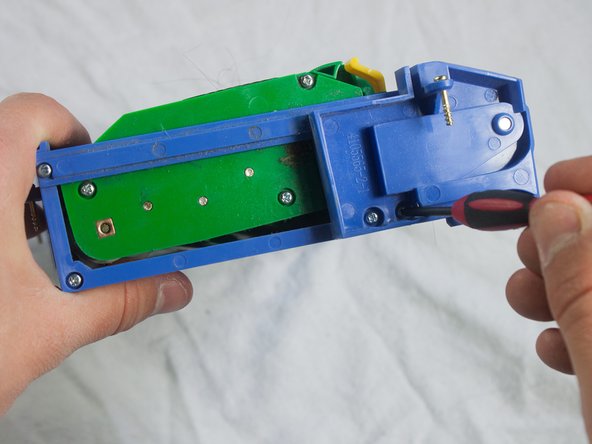
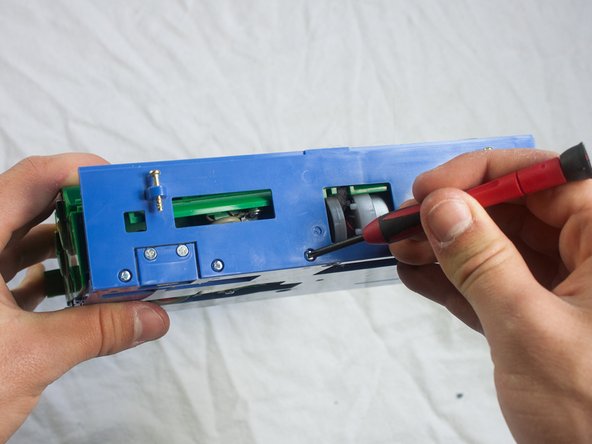
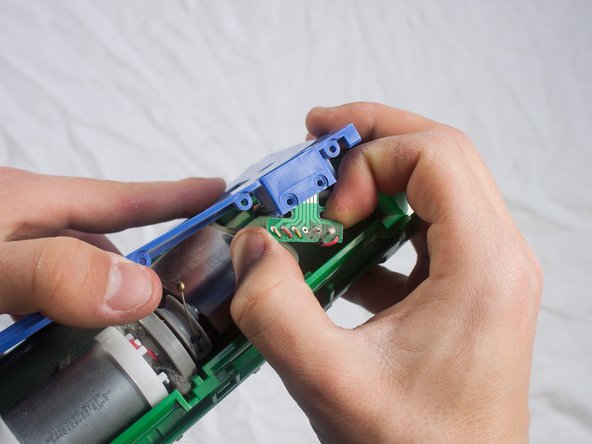
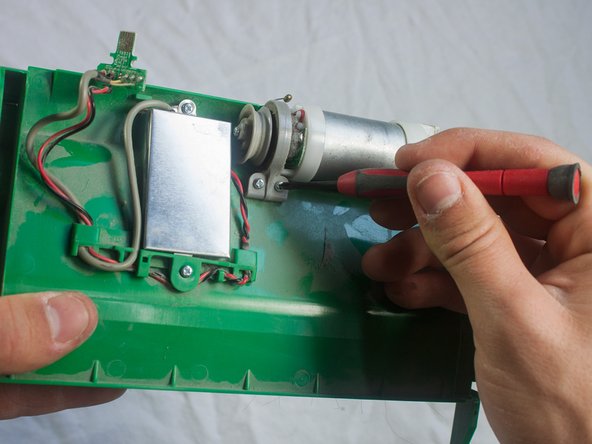
    • Use a Phillips #1 screwdriver to remove the 9.5mm screws from the side of the brush case, and pull to detach.

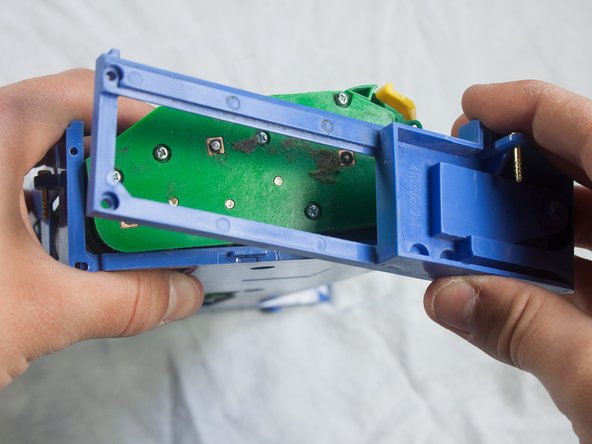
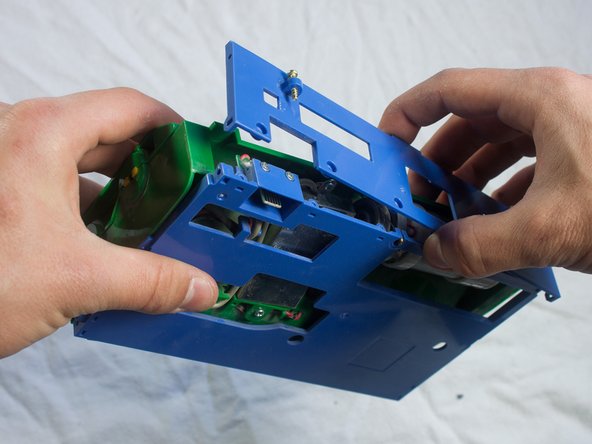
    • Repeat for the opposite side of the brush case.

  11. iRobot Roomba 551 Main Brush Motor Replacement: passo 11, immagine 1 di 3 iRobot Roomba 551 Main Brush Motor Replacement: passo 11, immagine 2 di 3 iRobot Roomba 551 Main Brush Motor Replacement: passo 11, immagine 3 di 3
    • Use a Phillips #1 screwdriver to remove the three 5.0mm screws from the back of the brush case.

    • Pull off the back of the brush case.

  12. iRobot Roomba 551 Main Brush Motor Replacement: passo 12, immagine 1 di 2 iRobot Roomba 551 Main Brush Motor Replacement: passo 12, immagine 2 di 2
    • Use a Phillips #1 screwdriver to remove the two 1.5mm screws securing the chip in place.

    • Remove the chip from its housing in the blue brush case.

  13. iRobot Roomba 551 Main Brush Motor Replacement: passo 13, immagine 1 di 2 iRobot Roomba 551 Main Brush Motor Replacement: passo 13, immagine 2 di 2
    • Use a Phillips #1 screwdriver to remove the two 5.5mm screws securing the motor in place.

  14. iRobot Roomba 551 Main Brush Motor Replacement: passo 14, immagine 1 di 2 iRobot Roomba 551 Main Brush Motor Replacement: passo 14, immagine 2 di 2
    • Use a Phillips #1 screwdriver to remove the two 4.5mm screws on the top and bottom of the metal plate.

    • Pull out the motor and metal covering.

  15. iRobot Roomba 551 Main Brush Motor Replacement: passo 15, immagine 1 di 3 iRobot Roomba 551 Main Brush Motor Replacement: passo 15, immagine 2 di 3 iRobot Roomba 551 Main Brush Motor Replacement: passo 15, immagine 3 di 3
    • Use a Phillips #1 screwdriver to remove the two 3.5mm screws on the corners of the circuit board.

    • Gently pull out the circuit board.

Conclusione

To reassemble your device, follow these instructions in reverse order.

Altre 2 persone hanno completato questa guida.

John McTigue

Membro da: 01/31/14

331 Reputazione

3 Guide realizzate

Team

Cal Poly, Team 13-14, Regan Winter 2014 Membro di Cal Poly, Team 13-14, Regan Winter 2014

CPSU-REGAN-W14S13G14

4 Membri

19 Guide realizzate

0 Commenti

Aggiungi Commento

Visualizza Statistiche:

Ultime 24 Ore: 0

Ultimi 7 Giorni: 0

Ultimi 30 Giorni: 5

Tutti i Tempi: 3,736