Introduzione
Cracked or faulty display? Replace it.
Cosa ti serve
-
-
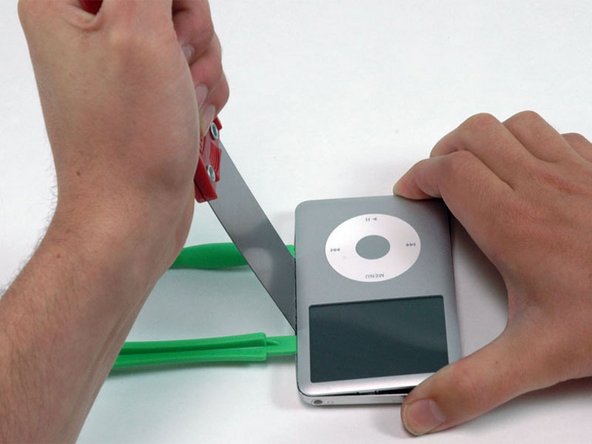
At an angle, carefully insert a putty knife about 1/8 inch into the seam between the two opening tools.
-
Once the putty knife has cleared the lip of the rear panel, pivot the putty knife so that it is vertical, and carefully (but firmly) wiggle it straight down into the gap between the opening tools.
-
-
-
At an angle, carefully insert a putty knife about 1/8 inch into the seam between the two opening tools.
-
Once the putty knife has cleared the lip of the rear panel, angle the putty knife so that it is vertical, and carefully (but firmly) wiggle it straight down into the iPod via the gap between the plastic opening tools.
-
Push with your fingers on the rear panel behind the putty knife to minimize bending. Ever so slightly flex the putty knife to ensure that most of the metal tabs on this side of the iPod are disengaged.
-
-
-
-
Grasp the front panel assembly with one hand and the rear panel with the other.
-
Gently (GENTLY) disengage the remaining clips on the rear panel by pulling the tops of the front and rear panels away from each other (think of the bottom of the iPod as a hinge), taking great care not to damage the ribbon cables holding the two halves together.
-
-
-
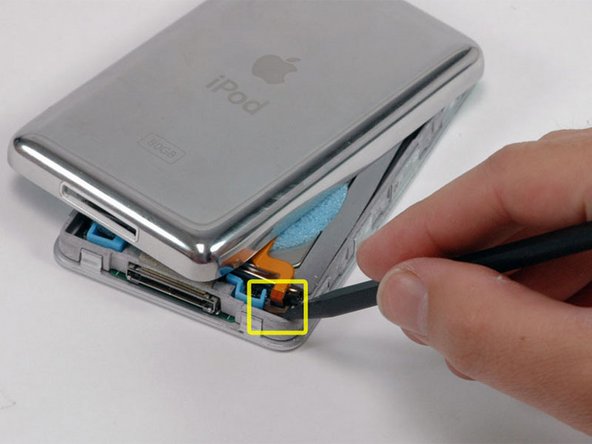
Lift the hard drive up with one hand so you can access the headphone jack ribbon beneath.
-
Use a spudger to flip up the plastic tab holding the headphone jack ribbon in place. The tab will rotate up 90 degrees, releasing the ribbon cable.
-
Slide the orange headphone jack ribbon out of its connector.
-
The rear panel is now free from the iPod.
-
-
-
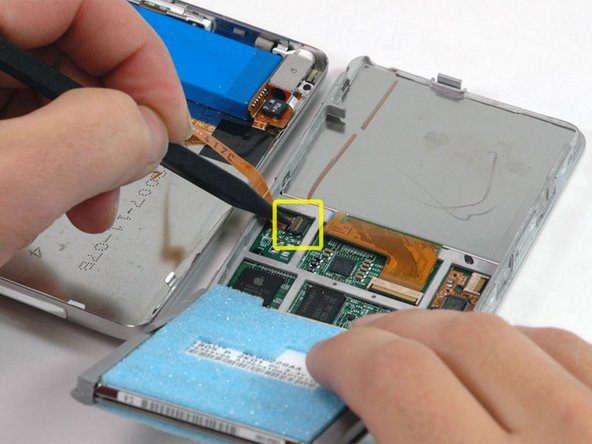
Remove the three Phillips screws securing the front panel to the metal framework.
-
-
-
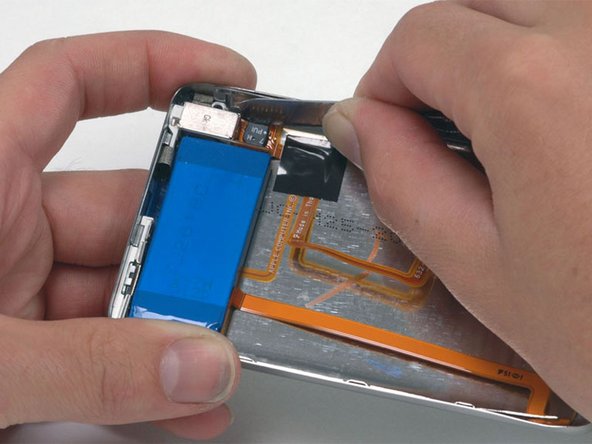
Use a spudger to flip up the plastic tab holding the orange display ribbon in place. The tab will rotate up 90 degrees towards the display, releasing the ribbon cable.
-


Before you snap the case shut, be sure to test the device to ensure that it's working properly.
To reassemble your device, follow these instructions in reverse order.
Annulla: non ho completato questa guida.
Altre 108 persone hanno completato questa guida.

9Commenti sulla guida
If you damage the LCD FPC, do not throw away! I can replace it. The part is not sold so I have to rely on my iPod salvage yard! If you have a classic dead board, I will pay $15 for the board. THe board is used for salvage purposes. If you need the LCD FPC, Battery FPC, hard drive FPC replaced, headphone jack FPC replaced, email me at zfixit.com. I can repair these parts but again, parts are not sold. iPod has to have been working before! No dead iPods that you bought on eBay or craigslist .. fee will still apply! You can check out my contact pages at bustedApple.com and zfixit.com and contact me through there! Price to replace any FPC is $45 + shipping shipping + tax if you reside in Texas. $25 labor fee applies if my work does not bring back to life as it should or the full $45 ++ fee if successful. I can replace the part but other issues with iPod are beyond my control .. so be sure you are original owner with 1st hand knowledge as to the working state prior to FPC damage!
The 6/7th Gen iPod Classic is very hard to open without damaging the chrome back or clips... You may ruin your device. The ifixit tutorial is not the best, I can open in exactly 30 seconds .. their method seems to take an eternity! If you are lucky, you may succeed but really, these devices should be opened by seasoned professionals. Small price to pay so that you have a working iPod after the repair!
hi how can i replace the lil black bit that holds the screen when connected i got spare off old board but cant seem to fit it pls help email me
Before opening my iPod for the second time, I purchased a back cover. very good idea and it is not expensive saves me a lot of trouble getting the cover back because i ruined the clips. I had to transfer the battery, the jack and the switch and the little black frame for the usb cable. The rest went well. Thanks