Questa versione può contenere modifiche errate. Passa all'ultima istantanea verificata.
Cosa ti serve
-
-
Riempi una pentola o una padella con abbastanza acqua per immergerci un iOpener.
-
Scalda l'acqua finché non bolle. Spegni il fuoco.
-
Posiziona l'iOpener nell'acqua calda per 2-3 minuti. Assicurati che l'iOpener sia completamente immerso nell'acqua.
-
Usa delle pinze per estrarre l'iOpener scaldato dall'acqua calda.
-
Asciuga accuratamente l'iOpener con un asciugamano.
-
Il tuo iOpener è pronto all'uso! Se devi scaldare di nuovo l'iOpener, scalda l'acqua fino all'ebollizione, spegni il fuoco e immergi l'iOpener in acqua per 2-3 minuti.
-
-
-
Se il tuo vetro è rotto, evita di romperlo ulteriormente e di tagliarti con le schegge coprendolo con del nastro adesivo.
-
Applica delle strisce di nastro adesivo trasparente da pacchi sul vetro, una sopra l'altra, finché non è completamente coperto.
-
Fai del tuo meglio per seguire il resto della guida come descritto. Comunque, una volta rotto il vetro, continuerà a rompersi mentre ci lavori e potresti dover usare uno strumento di apertura in metallo per rimuovere il vetro.
-
-
-
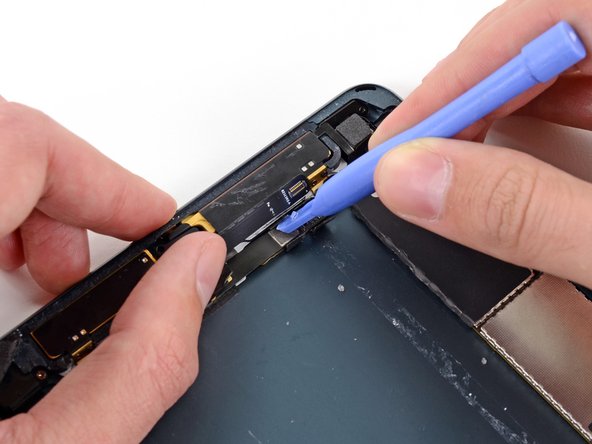
Prendi il primo plettro che hai inserito e fallo scorrere sotto il vetro verso l'angolo superiore dell'iPad.
-
Se vedi la punta del plettro sotto il vetro, niente panico: semplicemente tira un po' indietro il plettro. Probabilmente tutto funzionerà ancora, ma cerca di evitare che succeda per non depositare dell'adesivo, che sarà poi difficile da rimuovere dal pannello LCD.
-
-
-
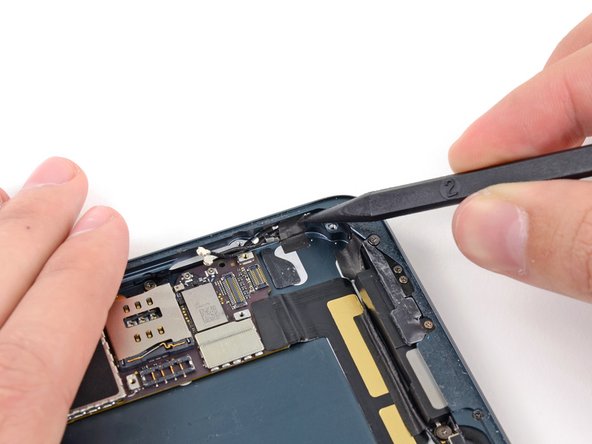
Fai scorrere il plettro sotto l'angolo in basso a sinistra attorno all'angolo per tagliare l'adesivo.
-
Lascia il plettro sotto l'angolo. Non andare oltre e non rimuovere il plettro dall'iPad.
-
Antenne
-
Alloggio tasto Home
-
Cavo digitizer
-
I prossimi passaggi ti mostreranno dove fare leva per evitare queste componenti. Scalda e fai leva solo dove indicato.
-
-
-
Il supporto della fotocamera frontale potrebbe restare incollato al pannello anteriore: rimuovilo e rimettilo sulla fotocamera per proteggerla.
-
Fai oscillare il supporto attorno a uno dei suoi bordi per liberarlo dall'adesivo e poi rimuovilo dal pannello anteriore.
-
Rimetti il supporto della fotocamera frontale nel suo alloggio nel case posteriore.
-
-
-
Usa un paio di pinzette per rimuovere il pezzo di schiuma rettangolare sopra la vite del pannello in alto a destra.
-
Rimuovi il pezzo di schiuma triangolare sopra la vite del pannello in basso a destra.
-
-
-
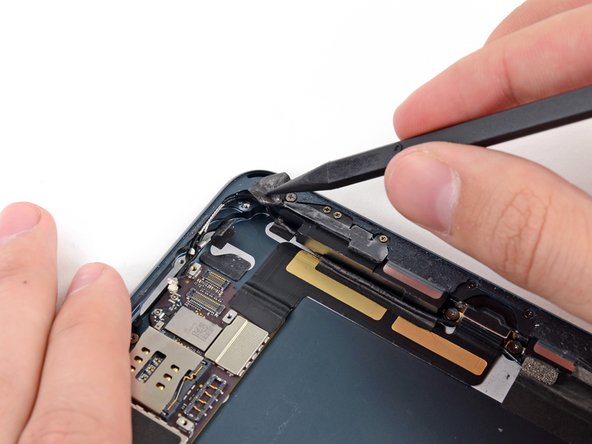
Infila un plettro nella fessura tra il pannello LCD e la copertura posteriore, vicino alla parte superiore del bordo sinistro del pannello.
-
Inclina leggermente il plettro verso l'esterno dell'iPad, giusto il necessario per allargare la fessura tra il pannello LCD e la copertura posteriore.
-
-
-
-
Svita le seguenti viti che fissano la protezione del pannello LCD alla copertura posteriore dell'iPad:
-
Due viti a croce Phillips #00 da 2,6 mm
-
Tredici viti a croce Phillips #00 da 1,7 mm
-
Una vite a croce Phillips #00 da 1,7 mm aggiuntiva su alcuni dispositivi.
-
-
-
Svita le tre viti a croce Phillips #00 da 1,3 mm che fissano la copertura del connettore alla scheda madre.
-
-
-
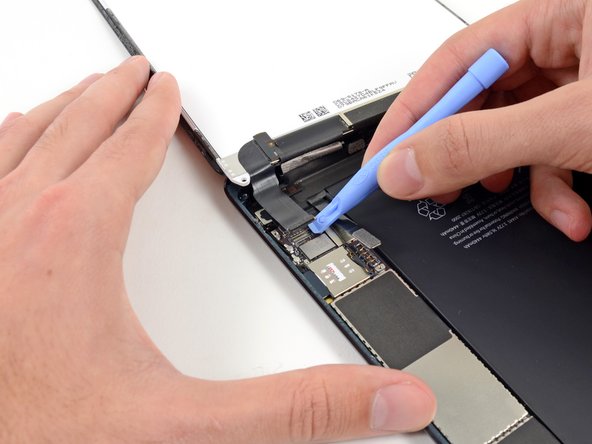
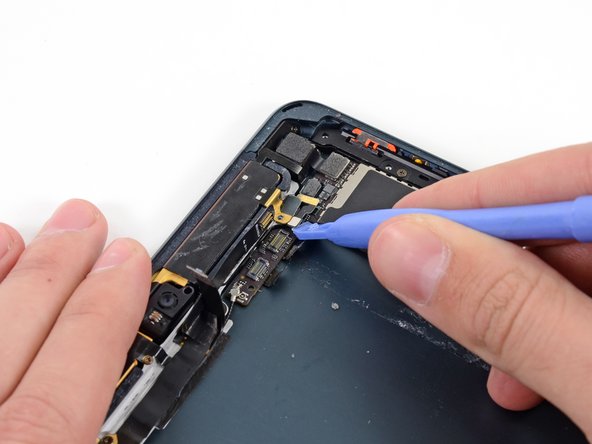
Usa uno strumento di apertura in plastica per fare leva e sollevare il connettore del pannello LCD dalla sua presa sulla scheda madre.
-
-
-
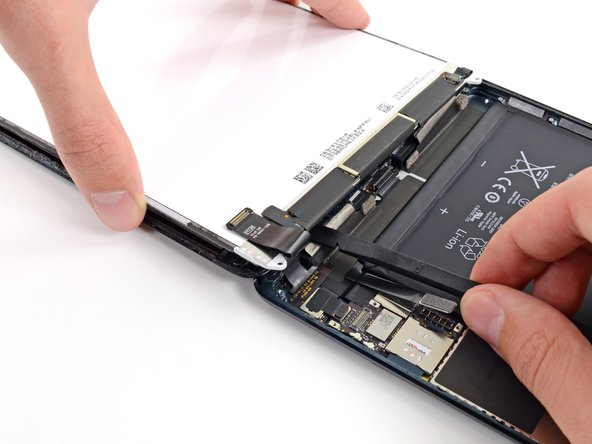
Mentre tieni il pannello LCD con una mano, passa al bordo sinistro dell'iPad e ripeti il passaggio precedente per rimuovere il secondo pezzo di nastro.
-
Infila la parte piatta di uno spudger tra il pannello LCD e il nastro e fallo scorrere verso l'esterno per separare l'adesivo mentre sollevi delicatamente il pannello LCD.
-
-
-
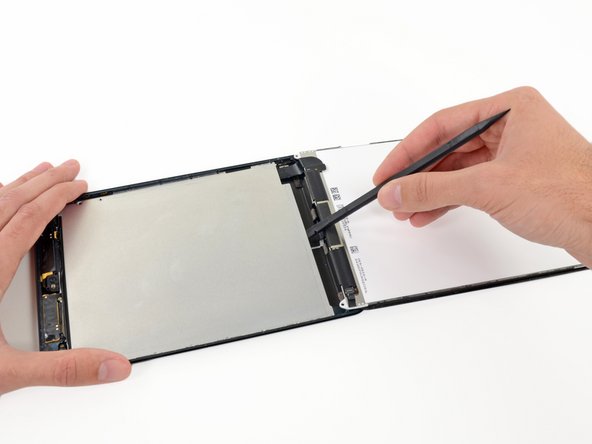
Per ridurre lo sforzo sulla presa, prova a fare leva sotto i lati corti del connettore piuttosto che sotto quelli lunghi, come mostrato nelle immagini.
-
Fai leva delicatamente sul connettore del digitizer per sollevarlo dalla sua presa sulla scheda madre.
-
-
-
Riscalda l'iOpener nel microonde per un minuto.
-
Appoggia l'iOpener sul retro dell'iPad, lungo il centro. Lascialo appoggiato per 90 secondi per ammorbidire l'adesivo della batteria.
-
Sposta l'iOpener sulla destra del retro dell'iPad (il lato opposto alle fotocamere) e lascialo in questa posizione per altri 90 secondi.
-
Se l'iOpener si è raffreddato notevolmente dopo i primi 90 secondi, riscaldalo per un altro minuto.
-
-
Questo passaggio è privo di traduzione. Aiuta a tradurlo
-
Use a SIM card eject tool or an uncoiled paperclip to eject the SIM card tray.
-
-
Questo passaggio è privo di traduzione. Aiuta a tradurlo
-
Use a fingernail to pull the SIM card tray out from the iPad.
-
Remove the SIM card tray.
-
-
Questo passaggio è privo di traduzione. Aiuta a tradurlo
-
Use the tip of a spudger to start peeling up the right side of the black tape covering the small metal bracket.
-
Use tweezers to peel the tape up the rest of the way, and remove it from the bracket.
-
-
Questo passaggio è privo di traduzione. Aiuta a tradurlo
-
Use a plastic opening tool to push the bracket slightly to the left.
-
-
Questo passaggio è privo di traduzione. Aiuta a tradurlo
-
Use a spudger tip to lift up the lower side of the bracket.
-
-
Questo passaggio è privo di traduzione. Aiuta a tradurlo
-
Use tweezers to peel up and remove the small piece of tape covering the front-facing camera cable connector.
-
-
Questo passaggio è privo di traduzione. Aiuta a tradurlo
-
Use a plastic opening tool to gently pry the upper metal plate up from the front-facing camera cable connector.
-
Being careful not to break the plate or the tape attached to it, pry it up and fold it away from the front-facing camera cable connector.
-
-
Questo passaggio è privo di traduzione. Aiuta a tradurlo
-
Gently pry the second (lower) metal plate up from the front-facing camera cable connector.
-
Again, carefully pry the plate up and away from the front-facing camera cable connector.
-
-
Questo passaggio è privo di traduzione. Aiuta a tradurlo
-
Use a plastic opening tool to pry the front-facing camera cable's connector up from its socket on the logic board.
-
-
Questo passaggio è privo di traduzione. Aiuta a tradurlo
-
Gently fold the front-facing camera cable up and out of the way of the logic board.
-
-
Questo passaggio è privo di traduzione. Aiuta a tradurlo
-
Use tweezers to peel up and remove the small piece of tape covering the headphone jack cable connector.
-
-
Questo passaggio è privo di traduzione. Aiuta a tradurlo
-
Use a plastic opening tool to gently pry the lower metal plate up from the headphone jack cable connector.
-
Being careful not to break the plate or the tape attached to it, pry it up and fold it away from the headphone jack cable connector.
-
-
Questo passaggio è privo di traduzione. Aiuta a tradurlo
-
Pry the second (top) metal plate up from the front-facing camera cable connector.
-
Again, carefully pry the plate up and away from the headphone jack cable connector.
-
-
Questo passaggio è privo di traduzione. Aiuta a tradurlo
-
Use a plastic opening tool to pry the headphone jack cable's connector up out of its socket on the logic board.
-
-
Questo passaggio è privo di traduzione. Aiuta a tradurlo
-
Gently bend the headphone jack cable back, away from the logic board.
-
-
Questo passaggio è privo di traduzione. Aiuta a tradurlo
-
Use a plastic opening tool to pry the top left antenna cable up from its socket on the logic board.
-
-
Questo passaggio è privo di traduzione. Aiuta a tradurlo
-
Remove the following three screws securing the top right antenna to the rear case:
-
Two 1.3 mm #00 Phillips screws from the side of the antenna's socket.
-
One 1.8 mm #00 Phillips screw.
-
-
Questo passaggio è privo di traduzione. Aiuta a tradurlo
-
Disconnect the top right antenna's coaxial cable from the logic board with a plastic opening tool.
-
Gently bend the cable and screw tab up out of the way of the logic board.
-
-
Questo passaggio è privo di traduzione. Aiuta a tradurlo
-
Use a plastic opening tool to pry the rear-facing camera cable up from its socket on the logic board.
-
-
Questo passaggio è privo di traduzione. Aiuta a tradurlo
-
Pry the top right antenna's ribbon cable up from its socket on the logic board with a plastic opening tool.
-
-
Questo passaggio è privo di traduzione. Aiuta a tradurlo
-
Use tweezers to peel up and remove the small piece of tape covering the button ribbon cable ZIF connector.
-
-
Questo passaggio è privo di traduzione. Aiuta a tradurlo
-
Use the tip of a spudger to lift up the tab on the button ribbon cable ZIF connector.
-
-
Questo passaggio è privo di traduzione. Aiuta a tradurlo
-
Use tweezers to pull the button ribbon cable straight out of its ZIF socket on the logic board.
-
-
Questo passaggio è privo di traduzione. Aiuta a tradurlo
-
Gently peel back the wide piece of tape covering the top of the right speaker.
-
-
Questo passaggio è privo di traduzione. Aiuta a tradurlo
-
Continue peeling the tape, and remove it from the iPad.
-
-
Questo passaggio è privo di traduzione. Aiuta a tradurlo
-
Use the flat end of a spudger to disconnect the two bottom antenna cable connectors from their sockets on the logic board.
-
-
Questo passaggio è privo di traduzione. Aiuta a tradurlo
-
Use the tip of a spudger to peel back the small piece of tape covering both antenna cables on the bottom right side of the iPad.
-
-
Questo passaggio è privo di traduzione. Aiuta a tradurlo
-
With the tip of a spudger, peel up the larger piece of tape covering both antenna cables near the bottom of the rear case.
-
-
Questo passaggio è privo di traduzione. Aiuta a tradurlo
-
Use the tip of a spudger to pry the small metal retaining clip off the left antenna cable, then de-route the cable from the clip.
-
-
Questo passaggio è privo di traduzione. Aiuta a tradurlo
-
De-route the antenna cable from the corner of the iPad.
-
-
Questo passaggio è privo di traduzione. Aiuta a tradurlo
-
Use the tip of a spudger to remove the small piece of tape securing the antenna cable in the bottom right corner of the iPad.
-
-
Questo passaggio è privo di traduzione. Aiuta a tradurlo
-
Peel the cable back from the corner of the iPad.
-
-
Questo passaggio è privo di traduzione. Aiuta a tradurlo
-
Use the tip of a spudger to pry the antenna cable tape up from the rear case of the iPad.
-
Gently pull the antenna cable out of the way as you work along the piece of tape, to keep it from resealing.
-
-
Questo passaggio è privo di traduzione. Aiuta a tradurlo
-
Pull the antenna cable from the slot behind the Lightning connector.
-
-
Questo passaggio è privo di traduzione. Aiuta a tradurlo
-
Use tweezers to remove the small plastic cover on top of the horizontal screw on the right side of the Lightning connector housing.
-
-
Questo passaggio è privo di traduzione. Aiuta a tradurlo
-
Remove the plastic covering from the left side of the Lightning connector housing.
-
-
Questo passaggio è privo di traduzione. Aiuta a tradurlo
-
Pull the wide tape toward the top of the iPad, applying constant force to release it from the antenna cable between it and the speaker.
-
Slide the tip of a spudger through the gap between the wide tape and the antenna cable, breaking the adhesive connecting the two.
-
Continue pulling the wide tape until it is no longer covering the antenna cable.
-
-
Questo passaggio è privo di traduzione. Aiuta a tradurlo
-
Peel back and remove the wide tape from the iPad.
-
-
Questo passaggio è privo di traduzione. Aiuta a tradurlo
-
Use the tip of a spudger to pry the antenna cable tape up from the rear case of the iPad.
-
Gently pull the antenna cable out of the way as you work along the piece of tape, to keep it from resealing.
-
-
Questo passaggio è privo di traduzione. Aiuta a tradurlo
-
Remove the following three screws securing the bottom left antenna to the rear case:
-
One 1.2 mm Phillips #00 screw.
-
One 1.1 mm Phillips #00 screw.
-
One 2.5 mm Phillips #00 screw.
-
-
Questo passaggio è privo di traduzione. Aiuta a tradurlo
-
Use the flat end of a spudger to loosen the foam adhesive securing the lower left antenna to the left speaker.
-
-
Questo passaggio è privo di traduzione. Aiuta a tradurlo
-
Remove the following screws:
-
One 2.5 mm Phillips #00
-
Two 1.1 mm Phillips #00
-
One 1.2 mm Phillips #00
-
-
Questo passaggio è privo di traduzione. Aiuta a tradurlo
-
Use the flat end of a spudger to loosen the foam adhesive holding the antenna to the right speaker.
-
-
Questo passaggio è privo di traduzione. Aiuta a tradurlo
-
Remove two 1.4 mm #00 Phillips screws securing the left and right speakers to the rear case.
-
-
Questo passaggio è privo di traduzione. Aiuta a tradurlo
-
Insert the tip of a spudger into the gap between the left speaker and the bottom left side of the rear case.
-
Pry around the bottom of the speaker, sliding it out from its recess in the rear case.
-
-
Questo passaggio è privo di traduzione. Aiuta a tradurlo
-
Once enough of the speaker is exposed, grasp it and pull it away from its recess in the rear case.
-
Remove the left speaker from the iPad.
-
-
Questo passaggio è privo di traduzione. Aiuta a tradurlo
-
Use the tip of a spudger to slide the right speaker slightly toward the outside of the iPad.
-
-
Questo passaggio è privo di traduzione. Aiuta a tradurlo
-
Insert the tip of a spudger into the gap between the right speaker and the bottom right corner of the case.
-
Pry the speaker out from its recess in the rear case.
-
-
Questo passaggio è privo di traduzione. Aiuta a tradurlo
-
Once enough of the speaker is exposed, grasp it and pull it away from its slot in the rear case.
-
Remove the right speaker from the iPad.
-
-
Questo passaggio è privo di traduzione. Aiuta a tradurlo
-
Remove two 2.8 mm Phillips #00 screws from the base of the Lightning connector.
-
-
Questo passaggio è privo di traduzione. Aiuta a tradurlo
-
Reheat the iOpener in the microwave for one minute.
-
Place the heated iOpener on the left side of the back of the iPad. Let it sit there for 90 seconds to soften the logic board adhesive.
-
-
Questo passaggio è privo di traduzione. Aiuta a tradurlo
-
Slide the flat end of a spudger underneath the Lightning port cable, freeing it from the adhesive securing it to the rear case.
-
-
Questo passaggio è privo di traduzione. Aiuta a tradurlo
-
Gently insert the flat end of a spudger underneath the logic board at various points, slowly prying it up from the rear case.
-
-
Questo passaggio è privo di traduzione. Aiuta a tradurlo
-
Continue to use the spudger to pry the logic board up from the rear case.
-
-
Questo passaggio è privo di traduzione. Aiuta a tradurlo
-
Once all of the adhesive is broken and the logic board is free, gently lift it up from the top.
-
Lift the logic board and Lightning cable assembly up and pull toward the top of the iPad to remove the Lightning connector from its housing.
-
Remove the assembly from the iPad.
-


Annulla: non ho completato questa guida.
Altre 11 persone hanno completato questa guida.
