Salta al contenuto principale

iPad 3 Wi-Fi Adhesive Strips Replacement

Cosa ti serve

  1. iPad 3 Wi-Fi Adhesive Strips Replacement, Home Button: passo 1, immagine 1 di 3 iPad 3 Wi-Fi Adhesive Strips Replacement, Home Button: passo 1, immagine 2 di 3 iPad 3 Wi-Fi Adhesive Strips Replacement, Home Button: passo 1, immagine 3 di 3
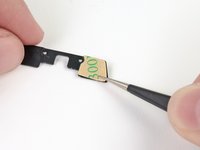
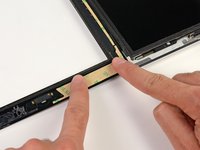
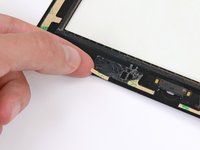
    • Carefully grasp the home button with a pair of tweezers.

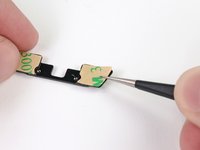
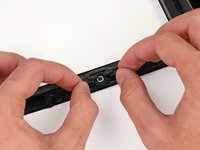
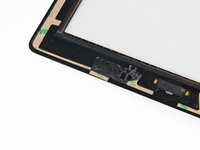
    • Gently lower and place the home button into the round opening located at the bottom of the front panel.

    • The correct orientation of the home button is shown in the third picture. Make sure the back of the home button is face up and the flat portion of the inner home button circle is oriented to the top of the iPad.

  2. iPad 3 Wi-Fi Adhesive Strips Replacement, Front Panel Adhesive Strips: passo 2, immagine 1 di 2 iPad 3 Wi-Fi Adhesive Strips Replacement, Front Panel Adhesive Strips: passo 2, immagine 2 di 2
    • The two small notched trapezoidal strips will be used to attach the home button bracket to the front panel.

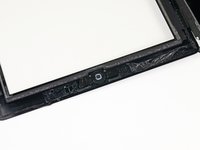
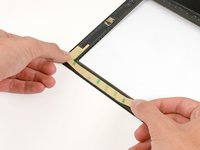
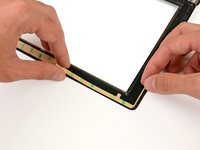
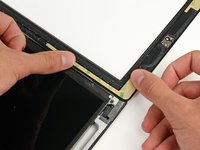
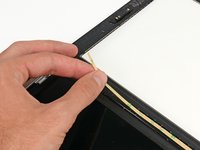
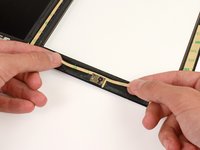
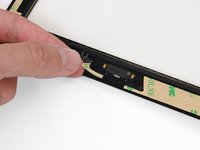
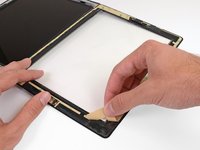
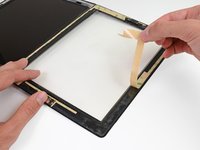
    • Carefully peel off the first trapezoidal adhesive strip.

  3. iPad 3 Wi-Fi Adhesive Strips Replacement: passo 3, immagine 1 di 2 iPad 3 Wi-Fi Adhesive Strips Replacement: passo 3, immagine 2 di 2
    • Using a pair of tweezers, place the first trapezoidal adhesive strip (minding its correct orientation) on the matching side of the home button mounting bracket.

    • Make sure to line up the profile of the strip with the edge of the mounting bracket.

    • Repeat the procedure for the second trapezoidal adhesive strip.

  4. iPad 3 Wi-Fi Adhesive Strips Replacement: passo 4, immagine 1 di 1
    • Use a pair of tweezers to grasp the corner of one of the adhesive strips placed on the mounting bracket.

    • Lift and peel the brown backing up off the adhesive strip, revealing the clear adhesive strip.

    • Repeat the procedure for the secondary adhesive strip.

  5. iPad 3 Wi-Fi Adhesive Strips Replacement: passo 5, immagine 1 di 2 iPad 3 Wi-Fi Adhesive Strips Replacement: passo 5, immagine 2 di 2
    • Gently place the home button mounting bracket on top of the home button.

    • Make sure the home button mounting bracket is lined up with the bottom of the digitizer.

  6. iPad 3 Wi-Fi Adhesive Strips Replacement: passo 6, immagine 1 di 2 iPad 3 Wi-Fi Adhesive Strips Replacement: passo 6, immagine 2 di 2
    • In the following steps, you will be placing the remaining pieces of adhesive on the front panel.

    • Do not peel the brown backing off the strips just yet.

    • Place the largest L-shaped adhesive strip on the top left corner of the front panel.

    • Smooth the strip down from the center out, taking care to not trap any air bubbles between the strip and the front panel.

  7. iPad 3 Wi-Fi Adhesive Strips Replacement: passo 7, immagine 1 di 2 iPad 3 Wi-Fi Adhesive Strips Replacement: passo 7, immagine 2 di 2
    • Place the thinnest L-shaped adhesive strip on the bottom left corner of the front panel.

  8. iPad 3 Wi-Fi Adhesive Strips Replacement: passo 8, immagine 1 di 2 iPad 3 Wi-Fi Adhesive Strips Replacement: passo 8, immagine 2 di 2
    • Place the remaining thin L-shaped adhesive strip on the top right corner of the front panel, near the camera mounting bracket.

  9. iPad 3 Wi-Fi Adhesive Strips Replacement: passo 9, immagine 1 di 2 iPad 3 Wi-Fi Adhesive Strips Replacement: passo 9, immagine 2 di 2
    • Place the straight adhesive strip on the right side of the front panel.

    • If you've already attached the digitizer cable, you'll have to work around/under it to attach this strip.

  10. iPad 3 Wi-Fi Adhesive Strips Replacement: passo 10, immagine 1 di 2 iPad 3 Wi-Fi Adhesive Strips Replacement: passo 10, immagine 2 di 2
    • Place the last L-shaped adhesive strip on the bottom right corner of the front panel.

  11. iPad 3 Wi-Fi Adhesive Strips Replacement: passo 11, immagine 1 di 2 iPad 3 Wi-Fi Adhesive Strips Replacement: passo 11, immagine 2 di 2
    • Lay the thin T-shaped adhesive strip between the bottom edge of the inner frame of the front panel and the camera mounting bracket. The longest edge should be flush with the inner frame.

  12. iPad 3 Wi-Fi Adhesive Strips Replacement: passo 12, immagine 1 di 2 iPad 3 Wi-Fi Adhesive Strips Replacement: passo 12, immagine 2 di 2
    • Place the small hook-shaped adhesive strip below the left side of the home button mounting bracket.

  13. iPad 3 Wi-Fi Adhesive Strips Replacement: passo 13, immagine 1 di 2 iPad 3 Wi-Fi Adhesive Strips Replacement: passo 13, immagine 2 di 2
    • Lay the final small rectangular adhesive strip to the left of the hook-shaped adhesive strip, immediately to the right of the thin L-shaped strip, and flush with the bottom of the front panel.

  14. iPad 3 Wi-Fi Adhesive Strips Replacement: passo 14, immagine 1 di 2 iPad 3 Wi-Fi Adhesive Strips Replacement: passo 14, immagine 2 di 2
    • Make sure that each adhesive strip is placed in the correct location and orientation before peeling the backing.

    • Peel the brown backing up off each adhesive strip.

    • Some of the adhesive strips are quite small and may require some patience to peel the backing.

Conclusione

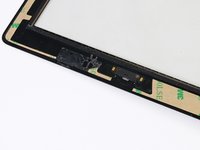
To reassemble your device, follow these instructions in reverse order.

Altre 14 persone hanno completato questa guida.

Jeff Suovanen

Membro da: 08/06/13

427.013 Reputazione

259 Guide realizzate

Team

iFixit Membro di iFixit

Staff

136 Membri

16.573 Guide realizzate

Un commento

my adhesive looks nothing like the adhesive strips in the photos. Mine has a white backing instead of clear and is not shaped as pictured above. My model A1416 iPad3 Wifi does not have a home button ribbon of any kind nor do the stickers accommodate for one. This needs updated images and descriptions.

chrisaaron - Replica

Aggiungi Commento

Visualizza Statistiche:

Ultime 24 Ore: 0

Ultimi 7 Giorni: 4

Ultimi 30 Giorni: 22

Tutti i Tempi: 7,321