Questa versione può contenere modifiche errate. Passa all'ultima istantanea verificata.
Cosa ti serve
-
-
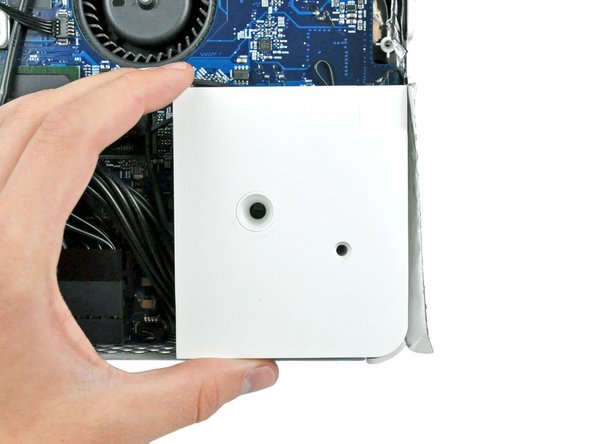
Allenta le due viti con testa a croce Phillips che fissano lo sportello di accesso all'iMac.
-
Rimuovi lo sportello di accesso.
-
-
-
Rimuovere le viti seguenti lungo il bordo inferiore dell'iMac:
-
Tre viti Torx T8 da 6 mm
-
Una vite Torx T8 da 8 mm (lato destro dello slot RAM nel modello 2105)
-
-
-
Inserire una scheda di plastica nell'angolo della fessura di ventilazione accanto alla parte superiore del case posteriore.
-
Premere la scheda verso la parte superiore dell'iMac per sganciare la chiusura della mascherina anteriore.
-
Rimuovere la mascherina anteriore dal case posteriore.
-
Ripetere la procedura per l'altro lato della mascherina anteriore.
-
Se la mascherina non si sgancia, provare a sollevare leggermente il bordo inferiore della mascherina anteriore dal case posteriore (l'operazione viene spiegata nei passaggi successivi) e ripetere la procedura di sgancio della chiusura.
-
-
-
Poggiare l'iMac dal lato della staffa su una superficie piatta.
-
Per sollevare la mascherina anteriore dall'iMac, eseguire queste operazioni contemporaneamente:
-
Premere con i pollici le alette della memoria RAM e tenere l'iMac verso il basso.
-
Tirare con gli indici il piccolo ponte sulla mascherina anteriore verso di sé.
-
Tirare la mascherina anteriore verso l'alto con gli indici.
-
Dopo che il piccolo ponte ha liberato le alette della memoria RAM, sollevare la mascherina anteriore dal bordo inferiore, quanto basta a liberare il bordo inferiore del case posteriore.
-
-
-
Sollevare la schermatura EMI dal case posteriore.
-
-
-
Rimuovere le due viti Torx T6 da 5 mm che fissano il connettore del cavo dati del display alla scheda logica.
-
Estrarre il connettore del cavo dati del display dalla scheda logica tramite la linguetta d'estrazione nera.
-
-
-
Questo passaggio è privo di traduzione. Aiuta a tradurlo
-
Remove the single T10 Torx screw securing the left speaker to the rear case.
-
Pull the left speaker out of the rear case.
-
-
Questo passaggio è privo di traduzione. Aiuta a tradurlo
-
Use the flat end of a spudger to pry both antenna connectors up off the AirPort Extreme card.
-
-
Questo passaggio è privo di traduzione. Aiuta a tradurlo
-
Use a metal spudger to disconnect the SATA data cable up off the logic board.
-
-
Questo passaggio è privo di traduzione. Aiuta a tradurlo
-
Pull the IR board cable connector away from its socket on the IR board.
-
-
Questo passaggio è privo di traduzione. Aiuta a tradurlo
-
De-route the speaker cables from beneath the IR Board and heatsink assembly.
-
-
Questo passaggio è privo di traduzione. Aiuta a tradurlo
-
Remove the single T10 Torx screw securing the right speaker to the logic board.
-
Lift the right speaker out of the rear case and move it out of the way.
-
-
Questo passaggio è privo di traduzione. Aiuta a tradurlo
-
Disconnect the speaker cable connector by lifting it straight up off its socket on the logic board.
-
-
Questo passaggio è privo di traduzione. Aiuta a tradurlo
-
Disconnect the HDD fan and power button from the logic board by pulling their connectors straight up off the sockets on the logic board.
-
-
Questo passaggio è privo di traduzione. Aiuta a tradurlo
-
If necessary, remove the pieces of tape holding the SATA data cable to the logic board.
-
Move the SATA data cable away from the face of the logic board.
-
-
Questo passaggio è privo di traduzione. Aiuta a tradurlo
-
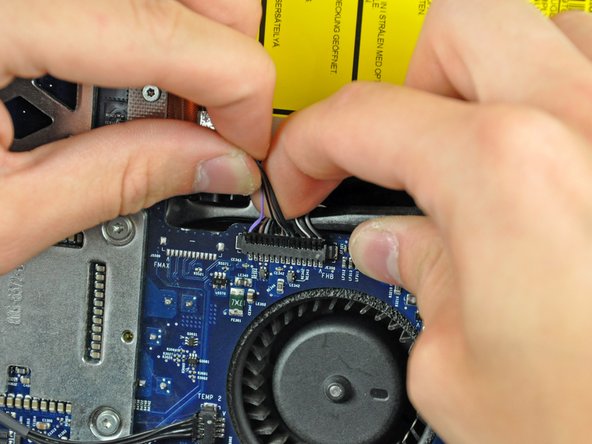
Disconnect the DC-In cable by simultaneously depressing both locking arms and pulling its connector away from the socket on the logic board toward the top of your iMac.
-
-
Questo passaggio è privo di traduzione. Aiuta a tradurlo
-
Pull the ambient light sensor cable connector up off the logic board.
-
-
Questo passaggio è privo di traduzione. Aiuta a tradurlo
-
Use the flat end of a spudger to pry the Bluetooth antenna cable connector up off the Bluetooth board.
-
-
Questo passaggio è privo di traduzione. Aiuta a tradurlo
-
Carefully de-route the IR board cable out from under the IR board and move it out of the way of the logic board.
-
-
Questo passaggio è privo di traduzione. Aiuta a tradurlo
-
Disconnect the following connectors from the logic board:
-
Camera/IR board cable.
-
Optical drive fan.
-
-
Questo passaggio è privo di traduzione. Aiuta a tradurlo
-
Disconnect the optical drive thermal sensor cable from the logic board by pulling its connector away from the socket on the logic board.
-
-
Questo passaggio è privo di traduzione. Aiuta a tradurlo
-
Remove the two T6 Torx screws securing the optical drive ribbon cable connector to the logic board.
-
-
Questo passaggio è privo di traduzione. Aiuta a tradurlo
-
Use the flat end of a spudger to pry the optical drive ribbon cable connector up off the logic board.
-
Bend the optical drive ribbon cable back away from the logic board.
-
-
Questo passaggio è privo di traduzione. Aiuta a tradurlo
-
Disconnect the following connectors from the logic board:
-
Hard drive thermal sensor cable.
-
CPU fan cable.
-
-
Questo passaggio è privo di traduzione. Aiuta a tradurlo
-
Remove the two T6 Torx screws securing the top of the heat sink framework to the chassis.
-
-
Questo passaggio è privo di traduzione. Aiuta a tradurlo
-
Remove the following seven screws securing the logic board to the rear case:
-
Three coarse-thread T10 Torx.
-
Three fine-thread T10 Torx.
-
One long coarse-thread T10 Torx.
-
-
Questo passaggio è privo di traduzione. Aiuta a tradurlo
-
Carefully rotate the top edge of the logic board out of the rear case and lift the board up out of the iMac, minding the RAM arms and any cables that may get caught.
-
-
Questo passaggio è privo di traduzione. Aiuta a tradurlo
-
If necessary, remove the tape covering the inverter cable.
-
-
Questo passaggio è privo di traduzione. Aiuta a tradurlo
-
Disconnect the inverter cable by pulling the connector away from its socket.
-
-
Questo passaggio è privo di traduzione. Aiuta a tradurlo
-
If necessary, remove the tape covering the metal chassis where the AC-In cable resides.
-
-
Questo passaggio è privo di traduzione. Aiuta a tradurlo
-
Use a pair of tweezers to pull the AC-In cable out from underneath the chassis.
-
-
Questo passaggio è privo di traduzione. Aiuta a tradurlo
-
Disconnect the AC-In cable by depressing the lock mechanism while pulling the connector away from its socket.
-
-
Questo passaggio è privo di traduzione. Aiuta a tradurlo
-
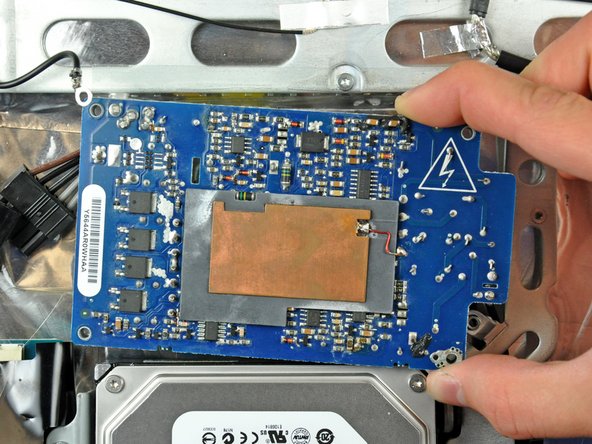
Remove four T10 Torx screws securing the power supply to the rear case.
-
Lift the power supply out of the rear case, minding the AC-in cable that may get caught.
-


Annulla: non ho completato questa guida.
Altre 82 persone hanno completato questa guida.

9 Commenti
Excellent guide !
Great guide! Powered down computer prior to vacation and came back to find it non-operative. This guide, about 90 minutes, and a $50 replacement power supply off of ebay and it is back up and running. This is a secondary computer we don't use much any more, but I hated to throw it out when it was still working for what we were using it for. Thanks so much!