Salta al contenuto principale

iLive IKBC384S Audio Speakers Replacement

Cosa ti serve

  1. iLive IKBC384S Audio Speakers Replacement, Top Cover: passo 1, immagine 1 di 2 iLive IKBC384S Audio Speakers Replacement, Top Cover: passo 1, immagine 2 di 2
    • Make sure you remove all seven 3 mm screws before proceeding to the next step.

  2. iLive IKBC384S Audio Speakers Replacement: passo 2, immagine 1 di 2 iLive IKBC384S Audio Speakers Replacement: passo 2, immagine 2 di 2
    • Use iOpener or heat gun on all sides except the front.

  3. iLive IKBC384S Audio Speakers Replacement: passo 3, immagine 1 di 2 iLive IKBC384S Audio Speakers Replacement: passo 3, immagine 2 di 2
    • Be cautious when taking the top of the device off there may still be some adhesive stuck to device.

    • The top of the device will be very difficult to remove because of the adhesive holding it together.

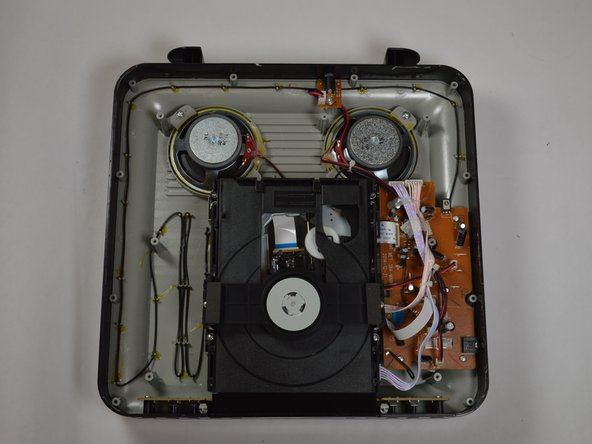
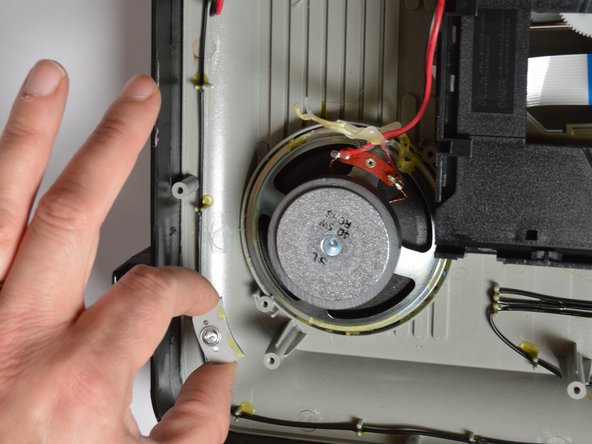
  4. iLive IKBC384S Audio Speakers Replacement, Audio Speakers: passo 4, immagine 1 di 2 iLive IKBC384S Audio Speakers Replacement, Audio Speakers: passo 4, immagine 2 di 2
    • Be sure to unscrew (3 mm) the two plastic brackets on each speaker, use iOpener or heat gun they are glued onto speakers, please do not discard.

  5. iLive IKBC384S Audio Speakers Replacement: passo 5, immagine 1 di 1
    • Unplug both of the speakers from the motherboard.

Conclusione

To reassemble your device, follow these instructions in reverse order.

Allen Dover

Membro da: 03/21/17

401 Reputazione

4 Guide realizzate

Team

0 Commenti

Aggiungi Commento

Visualizza Statistiche:

Ultime 24 Ore: 0

Ultimi 7 Giorni: 3

Ultimi 30 Giorni: 9

Tutti i Tempi: 434