Salta al contenuto principale

iDea USA CT702 Button Replacement

Cosa ti serve

  1. iDea USA CT702 Button Replacement, Button: passo 1, immagine 1 di 3 iDea USA CT702 Button Replacement, Button: passo 1, immagine 2 di 3 iDea USA CT702 Button Replacement, Button: passo 1, immagine 3 di 3
    • Place the device face up.

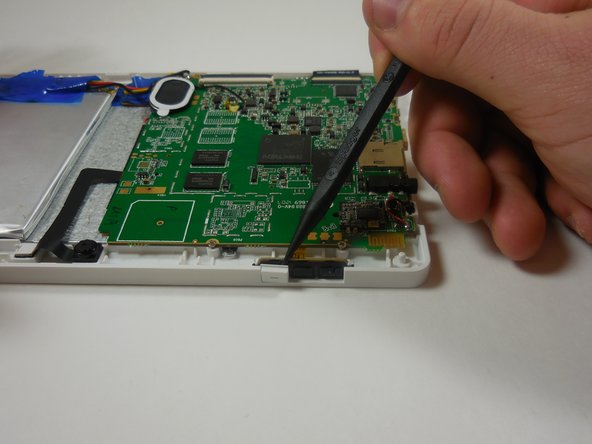
    • Use a plastic opening tool to gently pry open the black panel around the portholes.

  2. iDea USA CT702 Button Replacement: passo 2, immagine 1 di 3 iDea USA CT702 Button Replacement: passo 2, immagine 2 di 3 iDea USA CT702 Button Replacement: passo 2, immagine 3 di 3
    • Pry the rest of the back off; slowly apply pressure from each side to break each clip connection.

  3. iDea USA CT702 Button Replacement: passo 3, immagine 1 di 2 iDea USA CT702 Button Replacement: passo 3, immagine 2 di 2
    • With a plastic spudger tool, pry the keys away from the black key mat to remove them.

    • It is easiest to start with the volume up button key and then work on freeing the next two.

  4. iDea USA CT702 Button Replacement: passo 4, immagine 1 di 2 iDea USA CT702 Button Replacement: passo 4, immagine 2 di 2
    • Replace the button keys, starting with the outer and ending with the innermost key.

    • The back of each button key has a notch that matches an indent on the black button mat. Match the notches and the indents to properly align the buttons.

    • To replace the back cover, follow the first three steps in reverse order.

Conclusione

To reassemble your device, follow these instructions in reverse order.

Daniel Brandt

Membro da: 03/11/15

201 Reputazione

2 Guide realizzate

Team

0 Commenti

Aggiungi Commento

Visualizza Statistiche:

Ultime 24 Ore: 0

Ultimi 7 Giorni: 2

Ultimi 30 Giorni: 5

Tutti i Tempi: 139