Introduzione
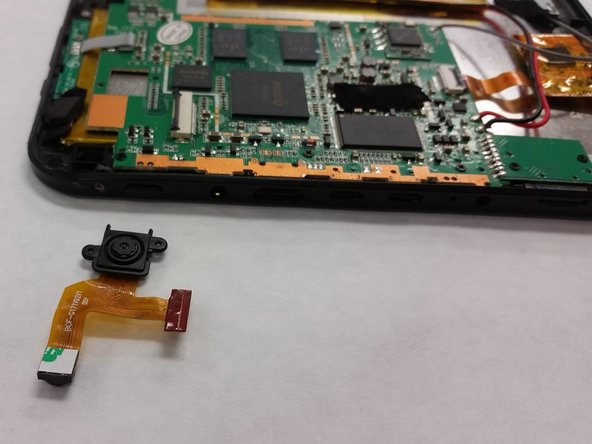
For this repair guide, the rear facing camera on the iDea USA CT 1020 will be addressed. The camera can easily become damaged or cracked if the tablet is mishandled by the user, or the camera can simply stop working. Once the backing plate is removed from the tablet and the rear camera is located on the motherboard, the removal process is simple. The electrical ribbon running from the camera goes to an electrical connector, and once the connector is unsnapped, the camera is free to be removed.
Cosa ti serve
-
-
Place the tablet on a clean surface with the screen down
-
-


To reassemble your device, follow these instructions in reverse order.
To reassemble your device, follow these instructions in reverse order.
Annulla: non ho completato questa guida.
Un'altra persona ha completato questa guida.
Team

IUPUI, Team S1-G3, Freund Spring 2018 Membro di IUPUI, Team S1-G3, Freund Spring 2018
IUPUI-FREUND-S18S1G3
3 Membri
4 Guide realizzate