Salta al contenuto principale

iBook G3 14" Rear Display Bezel Replacement

Solo Prerequisita
Questa guida è destinata a essere usata solo come prerequisito per altre guide. Da sola è incompleta.

Cosa ti serve

  1. iBook G3 14" Rear Display Bezel Replacement, Rear Display Bezel: passo 1, immagine 1 di 1
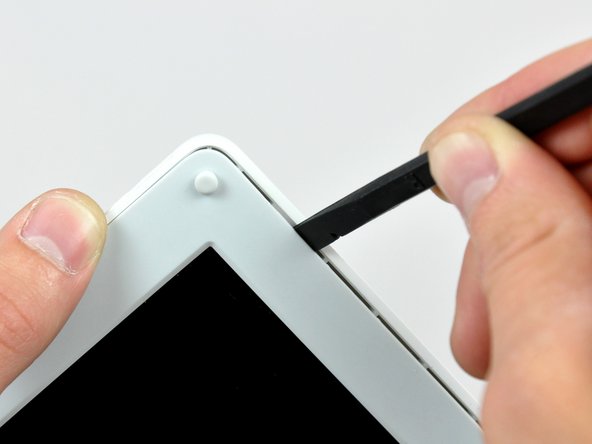
    • Use a 1.5 mm hex screwdriver to remove the two hex screws on either side of the display (four screws total).

    • If you don't have a 1.5 mm hex driver, you can probably get these screws out with a T6 Torx screwdriver. However, if you use a T6 Torx driver you'll be more likely to strip the screws.

  2. iBook G3 14" Rear Display Bezel Replacement: passo 2, immagine 1 di 1
    • Use your thumbs to slightly separate the rear bezel from the front bezel.

    • It is helpful to hold the opposing corner of the display stationary to aid in flexing the rear bezel away from the display.

  3. iBook G3 14" Rear Display Bezel Replacement: passo 3, immagine 1 di 3 iBook G3 14" Rear Display Bezel Replacement: passo 3, immagine 2 di 3 iBook G3 14" Rear Display Bezel Replacement: passo 3, immagine 3 di 3
    • Insert the flat end of a spudger into the gap between the front and rear bezels.

    • Rotate your spudger until it is parallel to the front face of the display.

    • Run the spudger around the perimeter of the display to separate the rear bezel from its retaining clips.

  4. iBook G3 14" Rear Display Bezel Replacement: passo 4, immagine 1 di 1
    • Lift the rear bezel off the display.

Conclusione

To reassemble your device, follow these instructions in reverse order.

Un'altra persona ha completato questa guida.

0 Commenti

Aggiungi Commento

Visualizza Statistiche:

Ultime 24 Ore: 0

Ultimi 7 Giorni: 0

Ultimi 30 Giorni: 0

Tutti i Tempi: 36