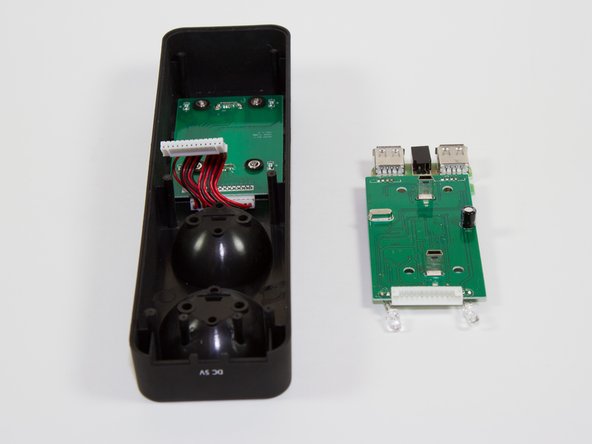
Salta al contenuto principale

dreamGEAR Quad Dock Pro Mother Board Replacement

Cosa ti serve

  1. dreamGEAR Quad Dock Pro Mother Board Replacement, Prerequisite Guide to Accessing Interior: passo 1, immagine 1 di 2 dreamGEAR Quad Dock Pro Mother Board Replacement, Prerequisite Guide to Accessing Interior: passo 1, immagine 2 di 2
    • Remove the rubber foot pads on the bottom of the device using a plastic opening tool.

  2. dreamGEAR Quad Dock Pro Mother Board Replacement: passo 2, immagine 1 di 2 dreamGEAR Quad Dock Pro Mother Board Replacement: passo 2, immagine 2 di 2
    • Remove the six 2 mm PH0 screws on the bottom of the device.

    • Four of those screws are located under the foot pads.

  3. dreamGEAR Quad Dock Pro Mother Board Replacement: passo 3, immagine 1 di 1
    • Gently remove the bottom of the device.

  4. dreamGEAR Quad Dock Pro Mother Board Replacement, Mother Board: passo 4, immagine 1 di 2 dreamGEAR Quad Dock Pro Mother Board Replacement, Mother Board: passo 4, immagine 2 di 2
    • Remove the four 1.8 mm J1 screws.

    • Remove the two 2mm PH0 screws.

  5. dreamGEAR Quad Dock Pro Mother Board Replacement: passo 5, immagine 1 di 1
    • Gently pick up the mother board

    • Pick the mother board straight up or you may risk damaging the mini-USB charging ports.

  6. dreamGEAR Quad Dock Pro Mother Board Replacement: passo 6, immagine 1 di 2 dreamGEAR Quad Dock Pro Mother Board Replacement: passo 6, immagine 2 di 2
    • Use a plastic opening tool or similar tool to gently pry the power ribbon cord out of its port.

Conclusione

To reassemble your device, follow these instructions in reverse order.

Un'altra persona ha completato questa guida.

Jacob

Membro da: 03/11/15

757 Reputazione

6 Guide realizzate

Team

0 Commenti

Aggiungi Commento

Visualizza Statistiche:

Ultime 24 Ore: 1

Ultimi 7 Giorni: 6

Ultimi 30 Giorni: 7

Tutti i Tempi: 217