Salta al contenuto principale

d.light Solar Lantern S2 Circuit Board Replacement

Cosa ti serve

  1. d.light Solar Lantern S2 Circuit Board Replacement, Circuit Board: passo 1, immagine 1 di 2 d.light Solar Lantern S2 Circuit Board Replacement, Circuit Board: passo 1, immagine 2 di 2
    • To remove the lens, three T15 x 12.5mm screws must be removed by a T15 head screwdriver.

    • The location of the other two screws are marked in red.

  2. d.light Solar Lantern S2 Circuit Board Replacement: passo 2, immagine 1 di 3 d.light Solar Lantern S2 Circuit Board Replacement: passo 2, immagine 2 di 3 d.light Solar Lantern S2 Circuit Board Replacement: passo 2, immagine 3 di 3
    • After the lens has been removed the back cover needs to be removed. There are no snaps or screws holding it in place.

  3. d.light Solar Lantern S2 Circuit Board Replacement: passo 3, immagine 1 di 1
    • Remove battery by unplugging it from the circuit board.

  4. d.light Solar Lantern S2 Circuit Board Replacement: passo 4, immagine 1 di 2 d.light Solar Lantern S2 Circuit Board Replacement: passo 4, immagine 2 di 2
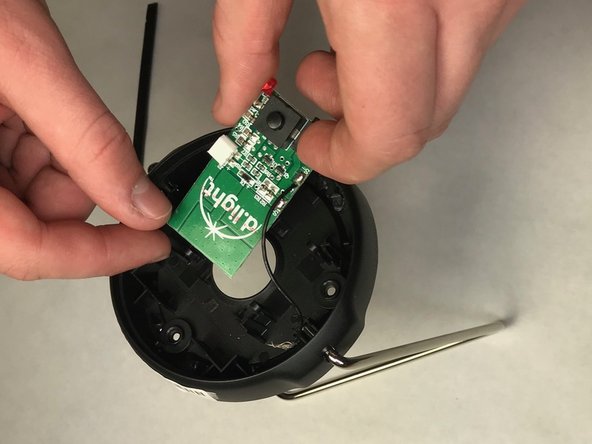
    • Remove the circuit board by pressing on the mounting clips (shown in red circles) using the spudger.

  5. d.light Solar Lantern S2 Circuit Board Replacement: passo 5, immagine 1 di 1
    • Desolder the wires to free the circuit board.

Conclusione

To reassemble your device, follow these instructions in reverse order.

Altre 2 persone hanno completato questa guida.

Team

IUPUI, Team S2-G3, Harley Fall 2017 Membro di IUPUI, Team S2-G3, Harley Fall 2017

IUPUI-HARLEY-F17S2G3

3 Membri

3 Guide realizzate

0 Commenti

Aggiungi Commento

Visualizza Statistiche:

Ultime 24 Ore: 2

Ultimi 7 Giorni: 6

Ultimi 30 Giorni: 27

Tutti i Tempi: 1,175