Questa versione può contenere modifiche errate. Passa all'ultima istantanea verificata.
Cosa ti serve
-
Questo passaggio è privo di traduzione. Aiuta a tradurlo
-
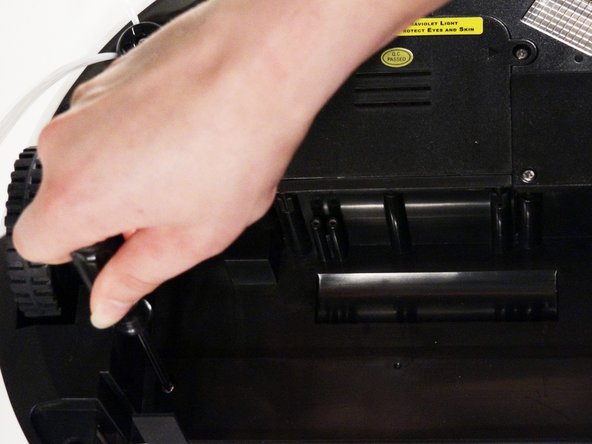
Remove bObi’s front wheel to access one of the screws holding bObi together.
-
Uninstall the larger screw that sits deeper in the wheel compartment.
-
-
Questo passaggio è privo di traduzione. Aiuta a tradurlo
-
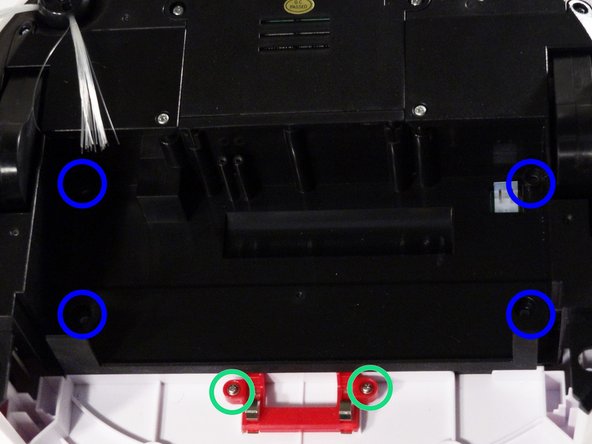
Remove bObi's dustbin.
-
Uninstall the 2 screws close to the bin and 2 smaller screws above her main brushes.
-
-
Questo passaggio è privo di traduzione. Aiuta a tradurlo
-
Lift the brush holder. To detach completely, unplug it from bObi.
-
Remove the two screws on the dustbin contact point holder inside bObi.
-
There are 4 screws beneath the main brushes. Uninstall these, and open bObi up to expose her main circuit board.
-
-
-
Questo passaggio è privo di traduzione. Aiuta a tradurlo
-
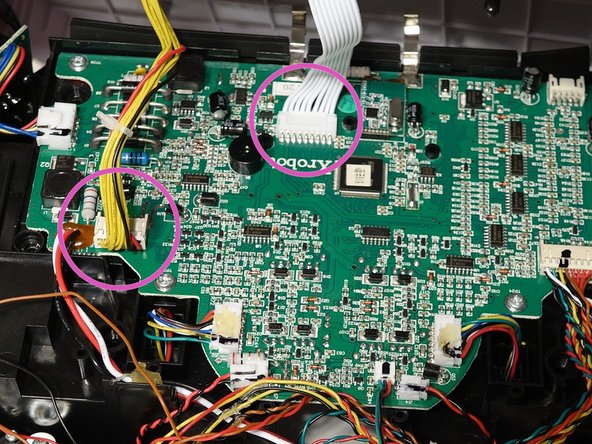
Detach the two circuit plugs connecting bObi's cover to the main board and the cover will be completely removed.
-
-
Questo passaggio è privo di traduzione. Aiuta a tradurlo
-
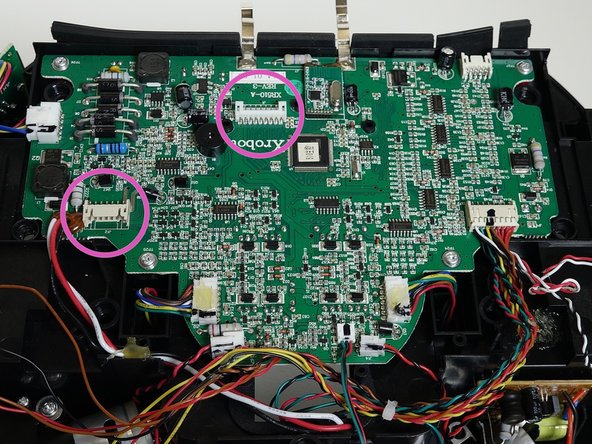
The UV lamp attaches to the right side of bObi’s main board. Remove the circuit plug, and break off any glue holding it in place.
-
-
Questo passaggio è privo di traduzione. Aiuta a tradurlo
-
Remove four more screws. Two found on the UV lamp's circuit board cover and two more holding the actual lamp on bObi.
-
Lift the cover up to expose the circuit board.
-
Slide the UV lamp's circuit board up to remove it from the holders on bObi. Then lift the whole lamp out.
-
-
Questo passaggio è privo di traduzione. Aiuta a tradurlo
-
Lay the lamp down and reinstall the two screws securing it on bObi.
-
Slide the circuit board of the new UV lamp down into its holders inside bObi.
-
-
Questo passaggio è privo di traduzione. Aiuta a tradurlo
-
Replace the circuit board’s cover and screws. Make sure the wires for the UV lamp and its circuit plug sit in the indentations of the circuit board cover.
-
Attach the circuit plug to the main board and you’ll be ready to close the cover. Instructions on closing bObi can be found in the guide: Closing bObi's Cover Post-Repair
-