Salta al contenuto principale

bObi Robotic Vacuum Screen Replacement

Cosa ti serve

  1. bObi Robotic Vacuum Screen Replacement, Top Cover: passo 1, immagine 1 di 2 bObi Robotic Vacuum Screen Replacement, Top Cover: passo 1, immagine 2 di 2
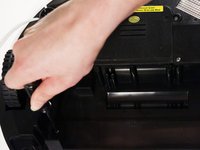
    • Remove bObi’s front wheel to access one of the screws holding bObi together.

    • Make sure the wheel is turned closer to bObi's front touch sensors. Use your screwdriver for leverage, and the wheel will pop up and out.

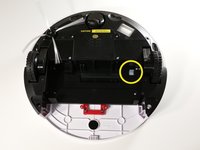
    • Uninstall the larger screw that sits deeper in the wheel compartment.

  2. bObi Robotic Vacuum Screen Replacement: passo 2, immagine 1 di 3 bObi Robotic Vacuum Screen Replacement: passo 2, immagine 2 di 3 bObi Robotic Vacuum Screen Replacement: passo 2, immagine 3 di 3
    • Remove bObi's dustbin.

    • Uninstall the 2 screws close to the bin and 2 smaller screws above her main brushes.

  3. bObi Robotic Vacuum Screen Replacement: passo 3, immagine 1 di 3 bObi Robotic Vacuum Screen Replacement: passo 3, immagine 2 di 3 bObi Robotic Vacuum Screen Replacement: passo 3, immagine 3 di 3
    • Lift the brush holder. To detach completely, unplug it from bObi.

    • Remove the two screws on the dustbin contact point holder inside bObi.

    • There are 4 screws beneath the main brushes. Uninstall these, and open bObi up to expose her main circuit board.

  4. bObi Robotic Vacuum Screen Replacement: passo 4, immagine 1 di 3 bObi Robotic Vacuum Screen Replacement: passo 4, immagine 2 di 3 bObi Robotic Vacuum Screen Replacement: passo 4, immagine 3 di 3
    • Detach the two circuit plugs connecting bObi's cover to the main board and the cover will be completely removed.

  5. bObi Robotic Vacuum Screen Replacement, Screen: passo 5, immagine 1 di 2 bObi Robotic Vacuum Screen Replacement, Screen: passo 5, immagine 2 di 2
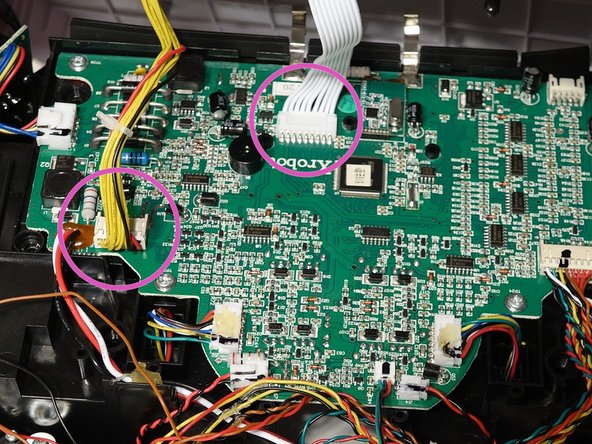
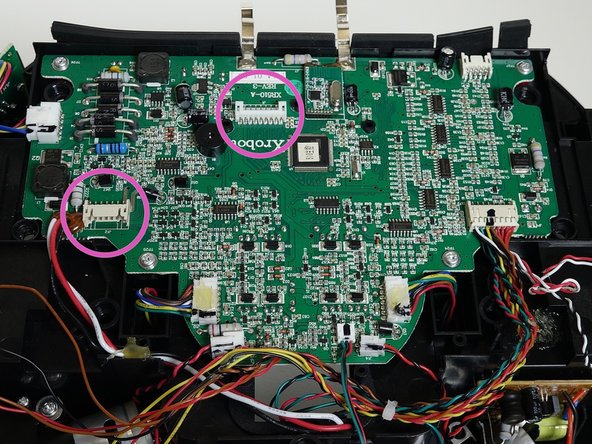
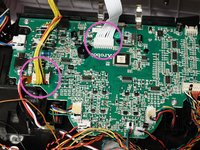
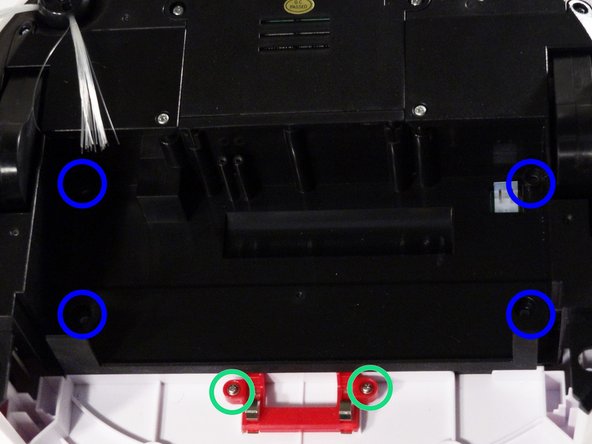
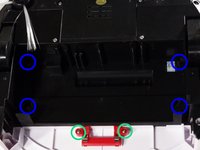
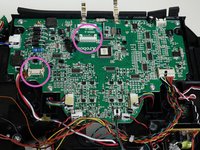
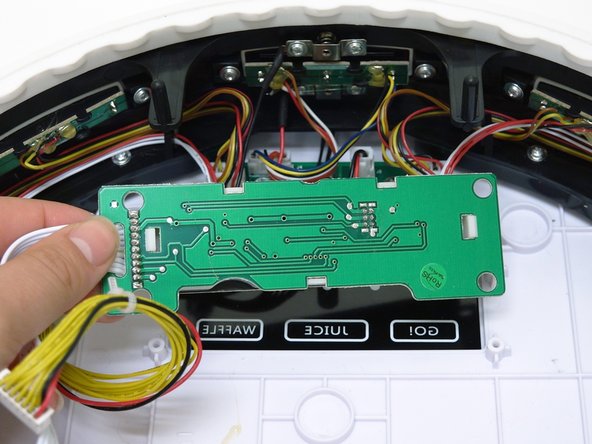
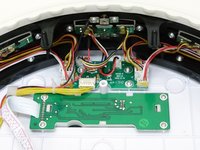
    • Remove the four screws that secure bObi's screen and lift the whole piece out.

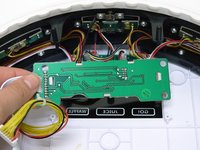
    • Put the replacement screen in the open space.
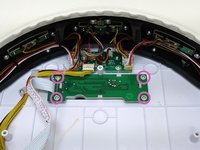
  6. bObi Robotic Vacuum Screen Replacement: passo 6, immagine 1 di 2 bObi Robotic Vacuum Screen Replacement: passo 6, immagine 2 di 2
Conclusione

To reassemble your device, follow the guide for closing bObi, found here: Closing bObi's Cover Post-Repair

Chelsea

Membro da: 09/24/14

2.278 Reputazione

31 Guide realizzate

0 Commenti

Aggiungi Commento

Visualizza Statistiche:

Ultime 24 Ore: 0

Ultimi 7 Giorni: 0

Ultimi 30 Giorni: 2

Tutti i Tempi: 160