Salta al contenuto principale

ZTE Axon 7 Speaker Replacement

Cosa ti serve

  1. ZTE Axon 7 Speaker Replacement, Back Case: passo 1, immagine 1 di 2 ZTE Axon 7 Speaker Replacement, Back Case: passo 1, immagine 2 di 2
    • Make sure the device is powered off.

    • Using the SIM Tray Removal Tool, press the pin into the hole on the SIM Tray (located on the top left of the device) to eject the tray.

  2. ZTE Axon 7 Speaker Replacement: passo 2, immagine 1 di 2 ZTE Axon 7 Speaker Replacement: passo 2, immagine 2 di 2
    • Heat the iOpener in the microwave for 15-30 seconds.

    • iOpener will be HOT! Use oven mitts if necessary.

    • Place the iOpener on top of the top and bottom speaker grills to loosen up the adhesive underneath.

  3. ZTE Axon 7 Speaker Replacement: passo 3, immagine 1 di 3 ZTE Axon 7 Speaker Replacement: passo 3, immagine 2 di 3 ZTE Axon 7 Speaker Replacement: passo 3, immagine 3 di 3
    • Use a Jimmy to pry off the top and bottom speaker grills.

    • Remove the speaker grills gently so they don't crack or break off.

  4. ZTE Axon 7 Speaker Replacement: passo 4, immagine 1 di 2 ZTE Axon 7 Speaker Replacement: passo 4, immagine 2 di 2
    • Use a Phillips #00 screwdriver to remove the six 3 mm screws located under the speaker grills.

    • There may be remaining adhesive covering some screws. Take time to gently scrape away the adhesive using a spudger or opening tool.

  5. ZTE Axon 7 Speaker Replacement: passo 5, immagine 1 di 2 ZTE Axon 7 Speaker Replacement: passo 5, immagine 2 di 2
    • Carefully wedge the Jimmy between the screen and aluminum back plate of the device.

    • Begin near the bottom right of the device and carefully work under the screen and slide the Jimmy up the edge of the device to remove the back case.

    • Use plastic picks to keep the display and back aluminum casing from closing as you pry along the perimeter of the phone with the Jimmy.

  6. ZTE Axon 7 Speaker Replacement: passo 6, immagine 1 di 3 ZTE Axon 7 Speaker Replacement: passo 6, immagine 2 di 3 ZTE Axon 7 Speaker Replacement: passo 6, immagine 3 di 3
    • Separate the front and back of the phone, (like a book) to open and gain access to the internal components.

    • Careful to not damage the fingerprint sensor cable attached to the motherboard from the back casing.

    • Place the tip of your opening tool under the edge of the connector, and pry the connector straight up from its socket.

    • Be very careful to pry only under the edge of the connector, and not under the socket itself. If you pry under the socket, you will separate it from the circuit board, which requires specialized microsoldering skills and equipment to repair.

    • To reconnect, align the connector carefully over its socket and press down with your fingertip—first at one side, then the other—until it clicks into place. Don't press down on the middle of the connector until it's fully aligned and seated. If misaligned the connector can be permanently damaged.

  7. ZTE Axon 7 Speaker Replacement: passo 7, immagine 1 di 1
    • The back is now completely removed.

  8. ZTE Axon 7 Speaker Replacement, Speaker: passo 8, immagine 1 di 2 ZTE Axon 7 Speaker Replacement, Speaker: passo 8, immagine 2 di 2
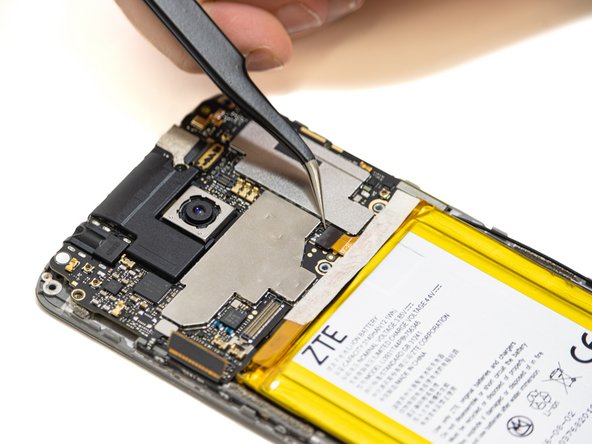
    • Use a Phillips #00 screwdriver to remove the 2.0 mm screw securing the bracket at the top of the battery.

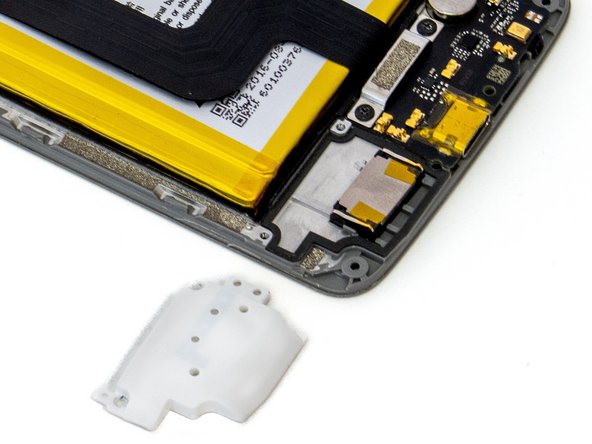
    • Use the angled tweezers to slide the top bracket up and off the phone.

  9. ZTE Axon 7 Speaker Replacement: passo 9, immagine 1 di 2 ZTE Axon 7 Speaker Replacement: passo 9, immagine 2 di 2
    • Place the tip of your opening tool or spudger under the edge of the battery connector, and pry the connector straight up from its socket to disconnect from the motherboard.

  10. ZTE Axon 7 Speaker Replacement: passo 10, immagine 1 di 2 ZTE Axon 7 Speaker Replacement: passo 10, immagine 2 di 2
    • Use a Phillips #00 screwdriver to remove the two 2.0 mm screws securing the white speaker cover.

  11. ZTE Axon 7 Speaker Replacement: passo 11, immagine 1 di 2 ZTE Axon 7 Speaker Replacement: passo 11, immagine 2 di 2
    • Use a spudger to pry the lower speaker out from the case of the phone.

    • The speaker is set in tight so you may need to use slight force to get it out.

  12. ZTE Axon 7 Speaker Replacement: passo 12, immagine 1 di 2 ZTE Axon 7 Speaker Replacement: passo 12, immagine 2 di 2
    • Place the tip of your opening tool or spudger under the edge of the two press connectors on the left side of the motherboard, and pry the connector straight up from its socket to disconnect from the motherboard.

    • Be very careful to pry only under the edge of the connector, and not under the socket itself. If you pry under the socket, you will separate it from the circuit board, which requires specialized microsoldering skills and equipment to repair.

    • To reconnect, align the connector carefully over its socket and press down with your fingertip—first at one side, then the other—until it clicks into place.

  13. ZTE Axon 7 Speaker Replacement: passo 13, immagine 1 di 1
    • Use a Phillips #00 screwdriver to remove the four 3.0 mm screws securing the motherboard.

  14. ZTE Axon 7 Speaker Replacement: passo 14, immagine 1 di 1
    • Use tweezers to remove the motherboard from the case.

  15. ZTE Axon 7 Speaker Replacement: passo 15, immagine 1 di 3 ZTE Axon 7 Speaker Replacement: passo 15, immagine 2 di 3 ZTE Axon 7 Speaker Replacement: passo 15, immagine 3 di 3
    • Use a spudger to pry the top speaker out from the phone case.

Conclusione

To reassemble your device, follow these instructions in reverse order.

0 Commenti

Aggiungi Commento

Visualizza Statistiche:

Ultime 24 Ore: 0

Ultimi 7 Giorni: 0

Ultimi 30 Giorni: 1

Tutti i Tempi: 95