Salta al contenuto principale

ZD-N Plus Wireless Controller Rumble Motor Replacement

Cosa ti serve

  1. ZD-N Plus Wireless Controller Rumble Motor Replacement, Back Panel: passo 1, immagine 1 di 1
    • Remove the seven 12mm JIS #00 screws that hold the back panel in place.

  2. ZD-N Plus Wireless Controller Rumble Motor Replacement: passo 2, immagine 1 di 2 ZD-N Plus Wireless Controller Rumble Motor Replacement: passo 2, immagine 2 di 2
    • Lift up on the back panel of the ZD-N Plus to remove it from the rest of the controller.

  3. ZD-N Plus Wireless Controller Rumble Motor Replacement, Battery: passo 3, immagine 1 di 1
    • Use an opening tool to pry the battery from its original position.

    • The battery is glued on, so this may take some effort.

  4. ZD-N Plus Wireless Controller Rumble Motor Replacement: passo 4, immagine 1 di 2 ZD-N Plus Wireless Controller Rumble Motor Replacement: passo 4, immagine 2 di 2
    • Use an opening tool to pry the connector away from the two metallic prongs.

    • The parts are built to stay together, so this may take some effort.

    • Be careful to not warp the prongs in the process.

  5. ZD-N Plus Wireless Controller Rumble Motor Replacement: passo 5, immagine 1 di 2 ZD-N Plus Wireless Controller Rumble Motor Replacement: passo 5, immagine 2 di 2
    • Remove the battery from the controller.

  6. ZD-N Plus Wireless Controller Rumble Motor Replacement, Rumble Motor: passo 6, immagine 1 di 2 ZD-N Plus Wireless Controller Rumble Motor Replacement, Rumble Motor: passo 6, immagine 2 di 2
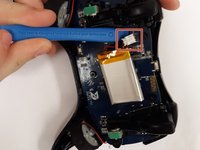
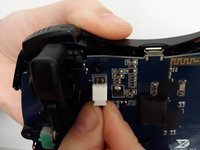
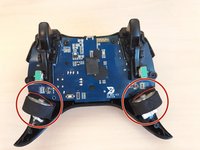
    • Remove the electrical connector attaching each rumble motor to the controller.

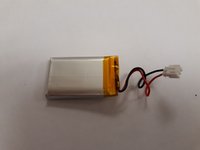
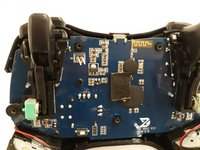
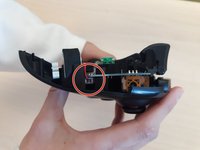
    • Lift up on the circular section of the rumble to remove it from the controller.

Conclusione

To reassemble your device, follow these instructions in reverse order.

0Commenti sulla guida

Aggiungi Commento

Visualizza Statistiche:

Ultime 24 Ore: 4

Ultimi 7 Giorni: 6

Ultimi 30 Giorni: 15

Tutti i Tempi: 418