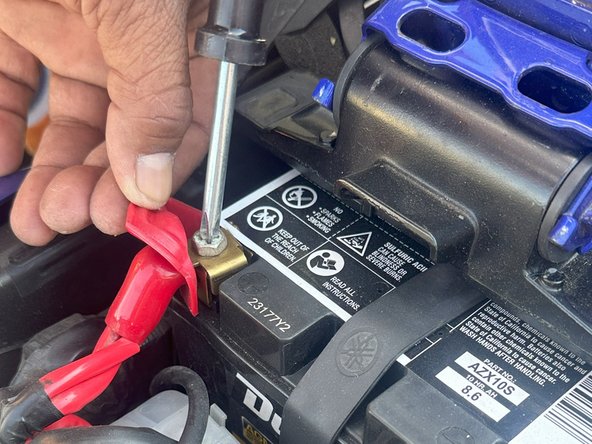
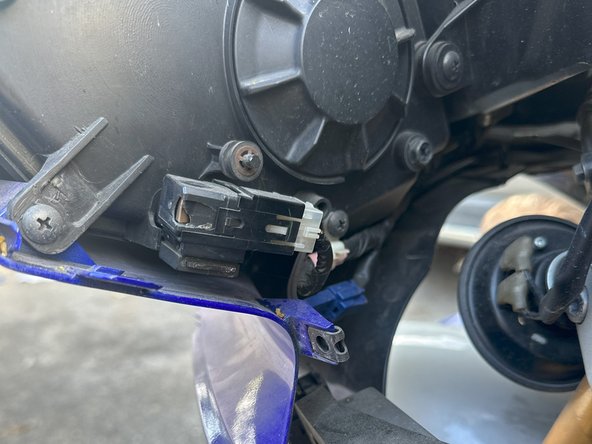
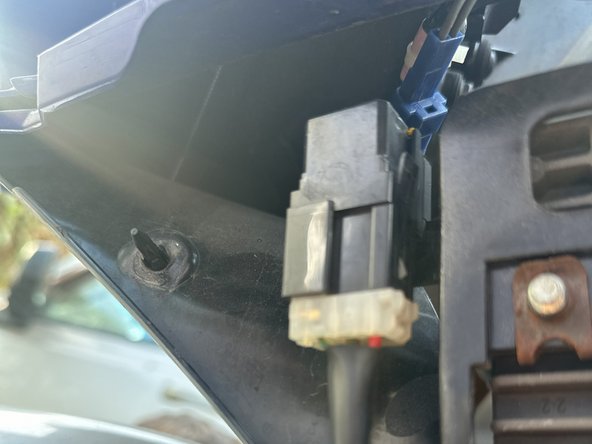
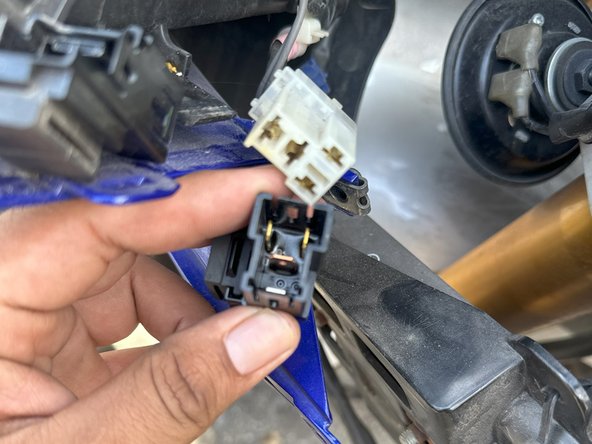
Salta al contenuto principale

Yamaha YZF-R6 Fan Relay Replacement

Cosa ti serve

  1. Yamaha YZF-R6 Fan Relay Replacement, Yamaha YZF-R6 Fan Relay: passo 1, immagine 1 di 3 Yamaha YZF-R6 Fan Relay Replacement, Yamaha YZF-R6 Fan Relay: passo 1, immagine 2 di 3 Yamaha YZF-R6 Fan Relay Replacement, Yamaha YZF-R6 Fan Relay: passo 1, immagine 3 di 3
    • Use your motorcycle's key to open the rear seat, and remove the seat to access the tool pouch.

  2. Yamaha YZF-R6 Fan Relay Replacement: passo 2, immagine 1 di 2 Yamaha YZF-R6 Fan Relay Replacement: passo 2, immagine 2 di 2
    • Use a 10 mm Allen key to remove the front seat and expose the battery.

  3. Yamaha YZF-R6 Fan Relay Replacement: passo 3, immagine 1 di 2 Yamaha YZF-R6 Fan Relay Replacement: passo 3, immagine 2 di 2
    • Using a Phillips-head screwdriver, remove the screws attached to the battery terminals.

  4. Yamaha YZF-R6 Fan Relay Replacement: passo 4, immagine 1 di 3 Yamaha YZF-R6 Fan Relay Replacement: passo 4, immagine 2 di 3 Yamaha YZF-R6 Fan Relay Replacement: passo 4, immagine 3 di 3
    • Using the 10mm Allen key, remove the hardware securing the left side fairings.

  5. Yamaha YZF-R6 Fan Relay Replacement: passo 5, immagine 1 di 3 Yamaha YZF-R6 Fan Relay Replacement: passo 5, immagine 2 di 3 Yamaha YZF-R6 Fan Relay Replacement: passo 5, immagine 3 di 3
    • Remove the middle fairing on the left-hand side, and carefully unclip the turn signal cable.

  6. Yamaha YZF-R6 Fan Relay Replacement: passo 6, immagine 1 di 3 Yamaha YZF-R6 Fan Relay Replacement: passo 6, immagine 2 di 3 Yamaha YZF-R6 Fan Relay Replacement: passo 6, immagine 3 di 3
    • Once you have removed the left-hand cover under the clutch lever, locate the relay assemblies for the lights and cooling fans.

  7. Yamaha YZF-R6 Fan Relay Replacement: passo 7, immagine 1 di 2 Yamaha YZF-R6 Fan Relay Replacement: passo 7, immagine 2 di 2
    • Use a flat-head screwdriver to gently pry the locking mechanism open on the relay assembly. You can remove the relay by itself or with the bracket assembly.

Conclusione

To reassemble your device, follow these instructions in reverse order.

Jose Perez 323

Membro da: 10/23/23

145 Reputazione

1 Guida realizzata

Team

0 Commenti

Aggiungi Commento

Visualizza Statistiche:

Ultime 24 Ore: 2

Ultimi 7 Giorni: 14

Ultimi 30 Giorni: 51

Tutti i Tempi: 163