Salta al contenuto principale

Questa traduzione potrebbe non riflettere gli aggiornamenti più recenti dalla guida originale. Aiuta ad aggiornare la traduzione o visualizza la guida d'origine.

Xiaomi Mi 8 Complete Screen Replacement (LCD and Digitizer)

Guida Archiviata
Questa guida ĆØ mantenuta solo per scopi storici. Usa la versione aggiornata della guida per eseguire la riparazione.

Cosa ti serve

  1. Xiaomi Mi 8 Complete Screen Replacement (LCD and Digitizer), Complete Screen (LCD and Digitizer): passo 1, immagine 1 di 1
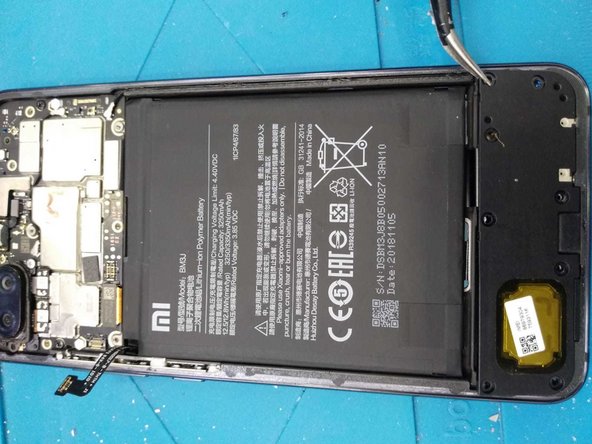
    • Turn off the cell phone and remove the SIM card.

  2. Xiaomi Mi 8 Complete Screen Replacement (LCD and Digitizer): passo 2, immagine 1 di 1
    • Place on top of a hot plate on soften the adhesive on the back cover (no more than 90Āŗc of heat). You can also use a heat gun, but be careful not to overdo it.

  3. Xiaomi Mi 8 Complete Screen Replacement (LCD and Digitizer): passo 3, immagine 1 di 1
    • Use a razor or a piece of plastic to take off the cover. Watch out! It is very fragile, use a lot of caution. Be careful with the flex cable. Do not insert the blade too far or you can cut it.

  4. Xiaomi Mi 8 Complete Screen Replacement (LCD and Digitizer): passo 4, immagine 1 di 2 Xiaomi Mi 8 Complete Screen Replacement (LCD and Digitizer): passo 4, immagine 2 di 2
    • Lift the cover from right to left, but do not do it completely while the flex cable is still connected. Unscrew the seven screws and place them as in the image.

  5. Xiaomi Mi 8 Complete Screen Replacement (LCD and Digitizer): passo 5, immagine 1 di 2 Xiaomi Mi 8 Complete Screen Replacement (LCD and Digitizer): passo 5, immagine 2 di 2
    • Unscrew the eight screws that fasten the bottom speaker. This step isn't necessary but it makes it much easier to pull the adhesive on the battery.

  6. Xiaomi Mi 8 Complete Screen Replacement (LCD and Digitizer): passo 6, immagine 1 di 2 Xiaomi Mi 8 Complete Screen Replacement (LCD and Digitizer): passo 6, immagine 2 di 2
    • Carefully pull the two adhesives that attatch the battery to the middle frame.

  7. Xiaomi Mi 8 Complete Screen Replacement (LCD and Digitizer): passo 7, immagine 1 di 2 Xiaomi Mi 8 Complete Screen Replacement (LCD and Digitizer): passo 7, immagine 2 di 2
    • Place the screen on the plate (apply heat), separate the screen from under as you have done with the back cover

  8. Xiaomi Mi 8 Complete Screen Replacement (LCD and Digitizer): passo 8, immagine 1 di 1
    • Congratulations, you have finished. To mount the new screen continue the guide in reverse.

Conclusione

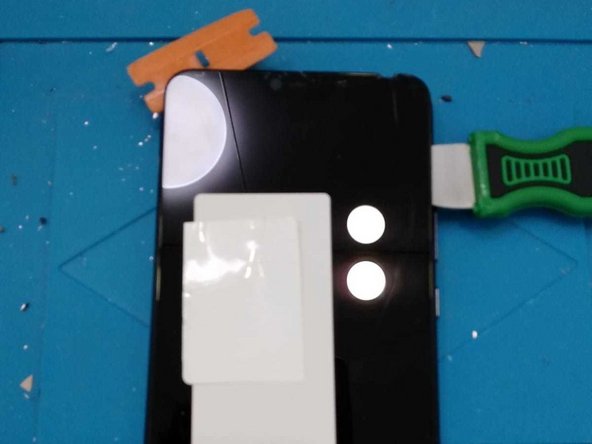
To reassemble your device, follow these instructions in reverse order.

Un'altra persona ha completato questa guida.

Un ringraziamento speciale a questi traduttori:

es en

90%

Questi traduttori ci stanno aiutando ad aggiustare il mondo! Vuoi partecipare?
Inizia a tradurre ›

0 Commenti

Aggiungi Commento

Visualizza Statistiche:

Ultime 24 Ore: 0

Ultimi 7 Giorni: 0

Ultimi 30 Giorni: 0

Tutti i Tempi: 268