Questa versione può contenere modifiche errate. Passa all'ultima istantanea verificata.
Cosa ti serve
-
Questo passaggio è privo di traduzione. Aiuta a tradurlo
-
Position the iFixit Opening Tool's riveted edge in between the top and bottom cover of the plastic enclosure.
-
Apply downward pressure on the iFixit Opening Tool until the security clip unlocks.
-
Repeat on different points of the plastic enclosure until the bottom cover is removed.
-
-
Questo passaggio è privo di traduzione. Aiuta a tradurlo
-
Remove the six 50 mm green screws (labeled F1-F6) from the metal chassis using a Torx 10 screwdriver.
-
-
Questo passaggio è privo di traduzione. Aiuta a tradurlo
-
Apply pressure to peel off the sides of the casing.
-
Separate the metal chassis from the top cover, lifting the back of the chassis up and away from the top cover.
-
-
-
Questo passaggio è privo di traduzione. Aiuta a tradurlo
-
Flip the metal enclosure so that the fan cover is on top.
-
-
Questo passaggio è privo di traduzione. Aiuta a tradurlo
-
Remove the two 15mm screws from the front panel using the Torx T8 screwdriver.
-
-
Questo passaggio è privo di traduzione. Aiuta a tradurlo
-
Carefully slide the top metal case off the frame.
-
-
Questo passaggio è privo di traduzione. Aiuta a tradurlo
-
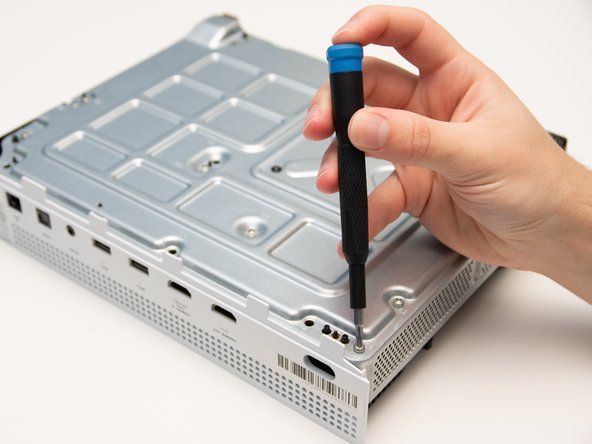
Remove the eight 10mm screws from the bottom of the metal casing using the Torx T9 screwdriver.
-
Remove the four 15mm screws from the bottom of the heatsink fastener using the Torx T8 screwdriver.
-
-
Questo passaggio è privo di traduzione. Aiuta a tradurlo
-
Remove the two plastic pieces from the motherboard.
-
-
Questo passaggio è privo di traduzione. Aiuta a tradurlo
-
Lift the motherboard up from the metal chassis.
-


Annulla: non ho completato questa guida.
Altre 3 persone hanno completato questa guida.

Team

Cal Poly, Team S12-G6, Regan Fall 2019 Membro di Cal Poly, Team S12-G6, Regan Fall 2019
CPSU-REGAN-F19S12G6
4 Membri
26 Guide realizzate