Introduzione
Use this guide to replace the circuit board housing the status LEDs beneath the power button.
Cosa ti serve
-
-
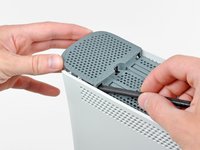
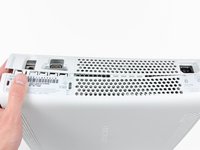
Grasp the hard drive assembly and press the release button while lifting its front edge.
-
Remove the hard drive assembly from the top vent.
-
-
Attrezzo utilizzato in questo passaggio:Xbox 360 Opening Tool$4.99
-
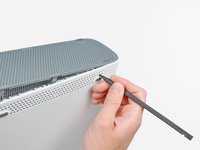
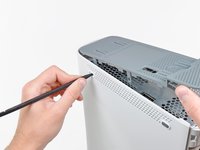
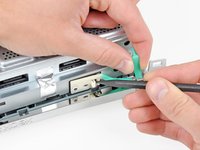
Insert the flat end of a spudger or the edge of an Xbox 360 opening tool into the small gap at the front edge of the bottom vent.
-
Pry the front edge of the bottom vent away from the faceplate.
-
-
-
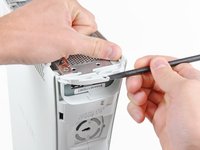
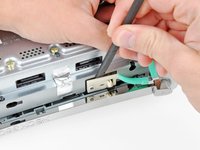
Insert the flat edge of a spudger between the faceplate and the outer casing near the power button.
-
Run your spudger along the edge of the faceplate to release the clips securing it to the front of the console.
-
-
-
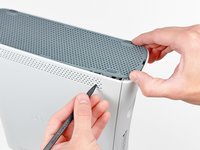
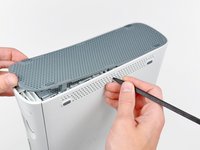
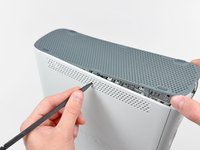
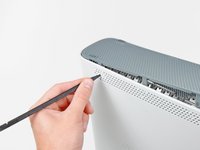
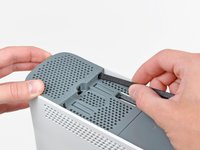
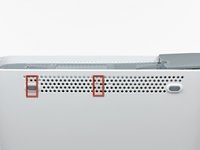
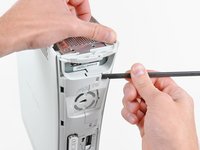
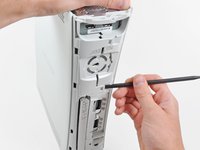
The top vent is secured to the console via clips. The first two clips are located underneath the top vent closest to the faceplate, as shown in the pictures.
-
-
-
-
Stand the console vertically with the top edge facing down.
-
Carefully peel the warranty sticker off the console.
-
-
-
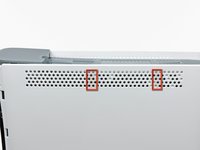
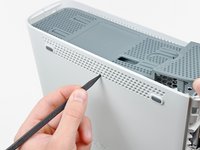
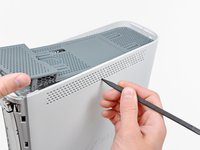
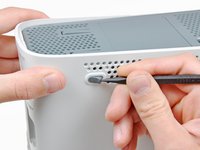
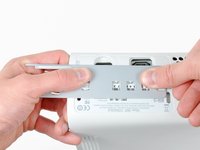
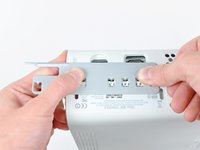
While pushing the upper and lower cases apart, use the tip of a spudger or the finger of an Xbox 360 opening tool to push the long clip highlighted in red toward the center of the 360.
-
The clip should release, leaving the clips near the power connector as the only thing holding the upper and lower cases together.
-
-
-
Use the tip of a spudger to release the clip securing the eject button to the metal casing.
-
Insert the flat end of a spudger between the eject button and the optical drive.
-
Pry the eject button off its retaining posts and remove it from the 360.
-
-
-
Remove the six silver 64 mm T10 Torx screws securing the upper case to the metal casing.
-
-
-
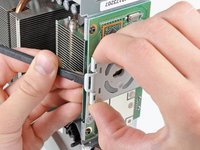
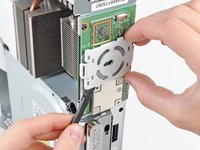
Use the flat end of a spudger to release the clips securing the plastic RF module shield along the top and the left edge of the power button board.
-
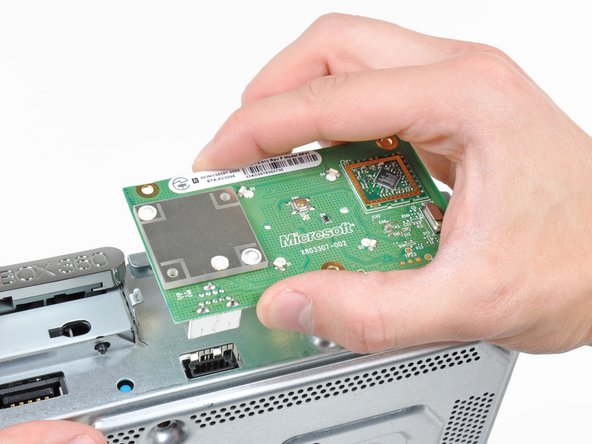
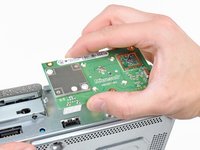
Lift and remove the RF module shield from the console.
-


To reassemble your device, follow these instructions in reverse order.
Annulla: non ho completato questa guida.
Altre 28 persone hanno completato questa guida.

1Commento della guida
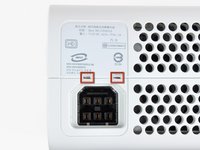
Just out of curiosity, what does it mean when there is the marking AC above the chipset to the right of the Microsoft logo? Is it a different kind of board? Or just a variant on the console lifetime?