Introduzione
It should be noted that while this modification will add additional storage to your console, it violates the Xbox Live terms of service, and could potentially lead to your banishment from Xbox Live.
Here I show you the rather simple replacement of the actual hard drive in the 360's HDD enclosure. Microsoft makes it expensive or difficult to upgrade your hard drive by limiting your options with said upgrade. This guide deals with how to physically take the drive apart and replace it with your shiny, new WD HDD. Yes, for some reason it has to be a Western Digital drive. One from either of the following drive series:
-WD Scorpio Series BEVS/BEAS
-WD Scorpio Blue Series BEVS/BEVT
-WD Scorpio Black Series BEKT/BJKT
-WD VelociRaptor Series
I looked on Newegg.com and found a Scorpio Black 250GB drive spinning at 7200RPM with 16MB cache and 3.0Gb/s. for about $65. That is what I would probably recommend, being that it gives you the most bang for your buck, and is about half what MS will charge you for the 250GB drive.
Cosa ti serve
-
-
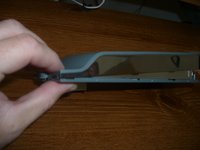
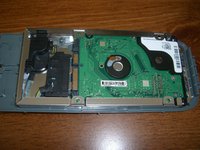
Here it is. The standard 20GB HDD for the Xbox 360.
-
Notice the proprietary adapter. Inside is just a pretty standard 2.5" SATA drive...
-
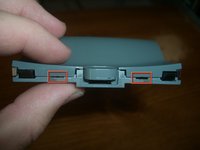
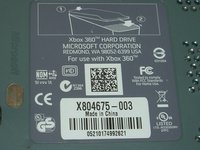
I took these pictures as I was putting it back together, hence the Microsoft warranty sticker looking a little funny.
-
-
-
-
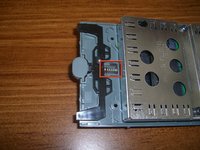
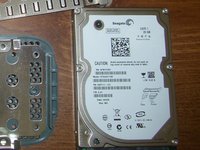
All the parts disassembled. The adapter cable will probably come out as it doesn't seem to be attached directly, but removing it would have required bending the metal enclosure and I didn't want to mess with that.
-
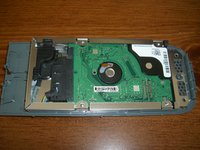
I thought it interesting to note that the drive runs at 5V 0.62A when the enclosure states 5V 1A. I wonder where the other 380mA are going.
-
Also interesting to note: this is a Seagate drive, while the 250GB drive upgrade I mention in the description requires a WD drive. If I understood correctly, this is because the software to format the drive to be recognized by your 360 is written for the WD firmware.
-


To reassemble your device, get your new hard drive and follow these instructions in reverse order.
Annulla: non ho completato questa guida.
Altre 67 persone hanno completato questa guida.

6Commenti sulla guida
I happen to have an external HD enclosure (the original HD had a platter crash) that works perfectly to mount the XBox 360 HD to my PC for all sorts of uses, allowing for either USB or external SATA connectivity. :D
Link to article seems to be down. Any mirrors? It woulb be much appreciated, Thanks
Sounds and looks easy enough. But will replacing a 20 go drive with a 250 go drive now need any formatting or can I just plug it in and work?
Hola, buenas tardes, realice todos estos pasos y al instalar el disco no lo reconoce. Probe con otro disco y probe con el mismo que acababa de sacar y no lo reconoce. Enchufe el disco por medio de un cable al USB exterior y si lo reconoce.
Ahora supongo que es un problema en la coneccion del disco en su lugar original, puede ser en el cable o en el enchufe. Lo que quiero saber es si estoy bien orientado, o si existe algo que pase por alto y me esta generando este problema. Gracias