Salta al contenuto principale

Questa versione può contenere modifiche errate. Passa all'ultima istantanea verificata.

Attrezzature medicali
Né iFixit né questa guida di riparazione sono approvati dal produttore del dispositivo medicale o affiliati ad esso.

Cosa ti serve

  1. Questo passaggio è privo di traduzione. Aiuta a tradurlo

    : passo 1, immagine 1 di 2 : passo 1, immagine 2 di 2
    • Unplug the AC power connection cable.

  2. Questo passaggio è privo di traduzione. Aiuta a tradurlo

    : passo 2, immagine 1 di 3 : passo 2, immagine 2 di 3 : passo 2, immagine 3 di 3
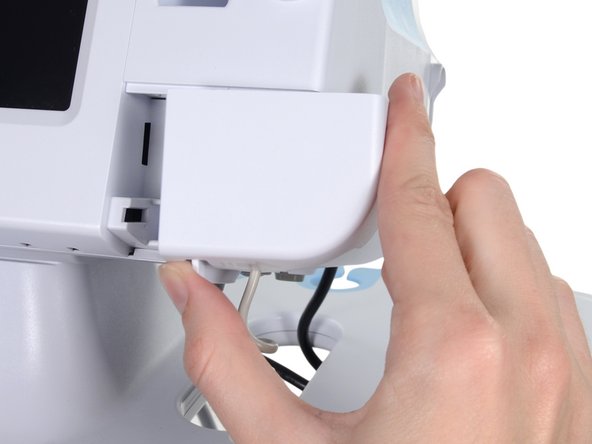
    • Place your thumb and forefinger on the blood pressure (NIBP) hose connector. Squeeze the side tabs until the connector releases.

    • Always grasp the hose by the connector. Do not pull on the hose itself.

    • Pull the connector away from the connector port.

  3. Questo passaggio è privo di traduzione. Aiuta a tradurlo

    : passo 3, immagine 1 di 3 : passo 3, immagine 2 di 3 : passo 3, immagine 3 di 3
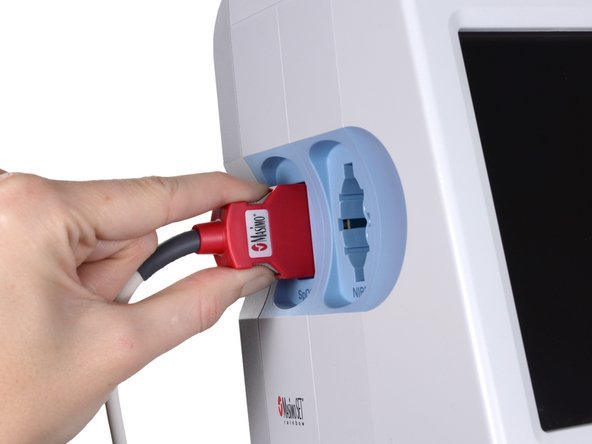
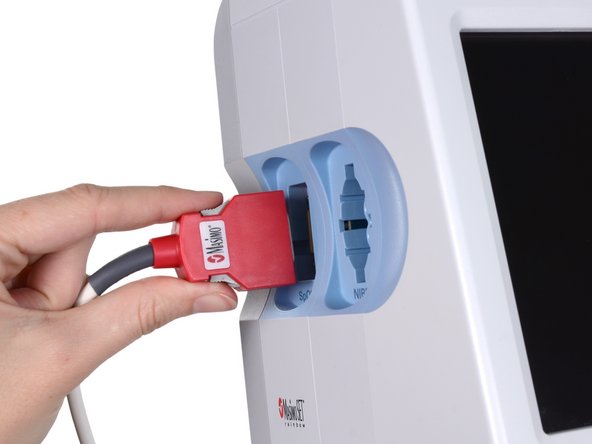
    • Place your thumb and forefinger on the Pulse oximetry (SpO2 or combined SpO2/SpHb) cable connector. Squeeze the side tabs until the connector releases.

    • Always grasp the cable by the connector. Do not pull on the cable itself.

    • Pull the connector away from the connector port.

  4. Questo passaggio è privo di traduzione. Aiuta a tradurlo

    : passo 4, immagine 1 di 2 : passo 4, immagine 2 di 2
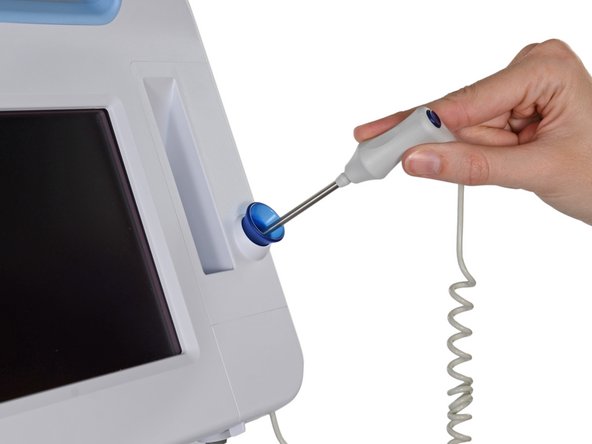
    • Grasp the temperature probe and pull it up to remove it from the monitor.

  5. Questo passaggio è privo di traduzione. Aiuta a tradurlo

    : passo 5, immagine 1 di 3 : passo 5, immagine 2 di 3 : passo 5, immagine 3 di 3
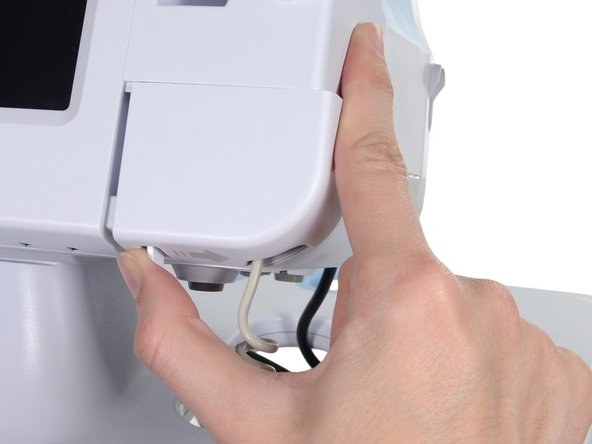
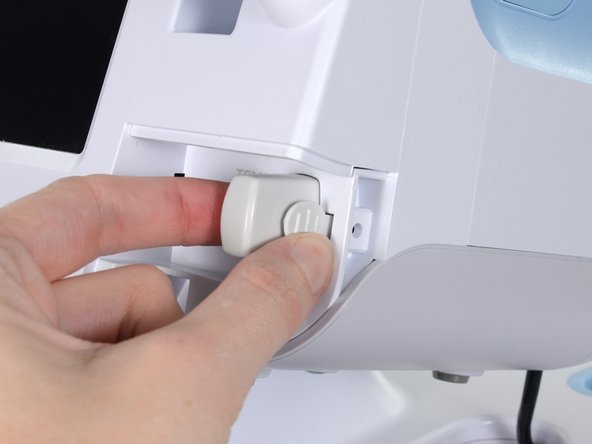
    • Remove the cover of the temperature module by pressing the tab and sliding the cover to the right.

  6. Questo passaggio è privo di traduzione. Aiuta a tradurlo

    : passo 6, immagine 1 di 3 : passo 6, immagine 2 di 3 : passo 6, immagine 3 di 3
    • Depress the spring tab on the temperature probe cable connector and withdraw it from the probe port.

  7. Questo passaggio è privo di traduzione. Aiuta a tradurlo

    : passo 7, immagine 1 di 1
    • Remove the flathead screw on the USB networking door.

    • Loosen the captive Phillips #2 screw securing the monitor to the stand.

  8. Questo passaggio è privo di traduzione. Aiuta a tradurlo

    : passo 8, immagine 1 di 1
    • Holding the monitor securely, open the USB networking door.

    • You may have to lift the monitor slightly to allow the door to swing out from the stand mount.

  9. Questo passaggio è privo di traduzione. Aiuta a tradurlo

    : passo 9, immagine 1 di 2 : passo 9, immagine 2 di 2
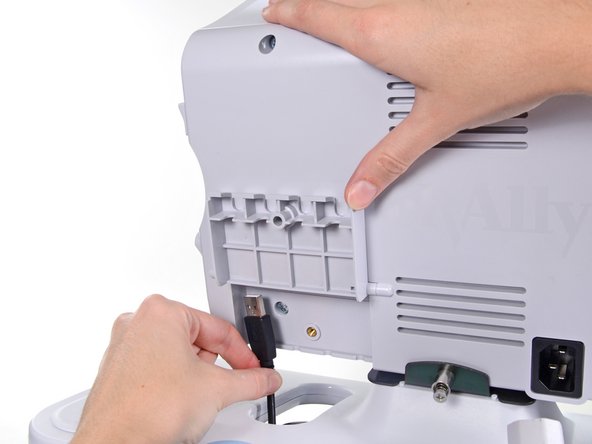
    • Detach any accessory USB cables from USB ports on the monitor.

  10. Questo passaggio è privo di traduzione. Aiuta a tradurlo

    : passo 10, immagine 1 di 3 : passo 10, immagine 2 di 3 : passo 10, immagine 3 di 3
    • Slide the monitor off of the stand tray.

  11. Questo passaggio è privo di traduzione. Aiuta a tradurlo

    : passo 11, immagine 1 di 3 : passo 11, immagine 2 di 3 : passo 11, immagine 3 di 3
    • Place the monitor upside down on a clean surface.

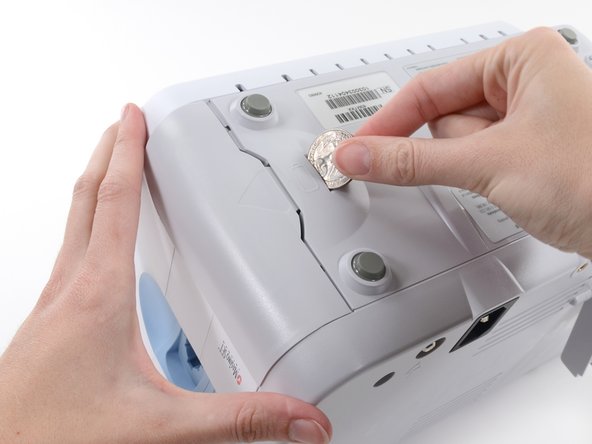
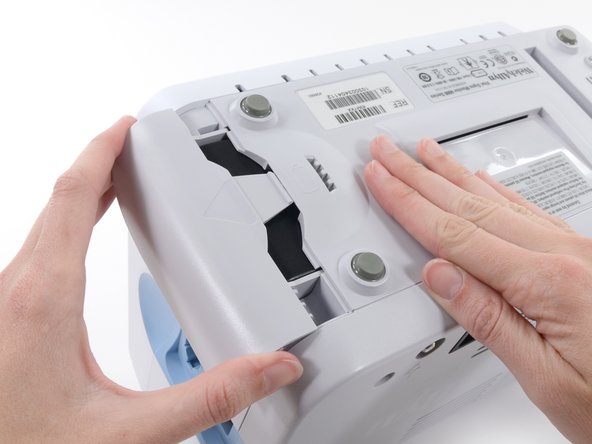
    • Insert a coin into the slot and push to open.

    • Choose a coin that fits comfortably into the slot.

    • Remove the battery cover.

  12. Questo passaggio è privo di traduzione. Aiuta a tradurlo

    : passo 12, immagine 1 di 3 : passo 12, immagine 2 di 3 : passo 12, immagine 3 di 3
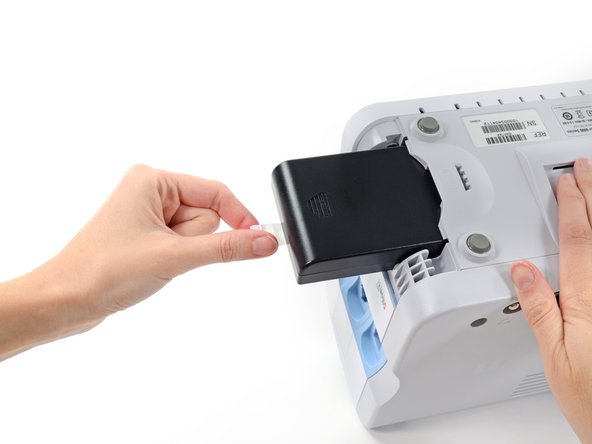
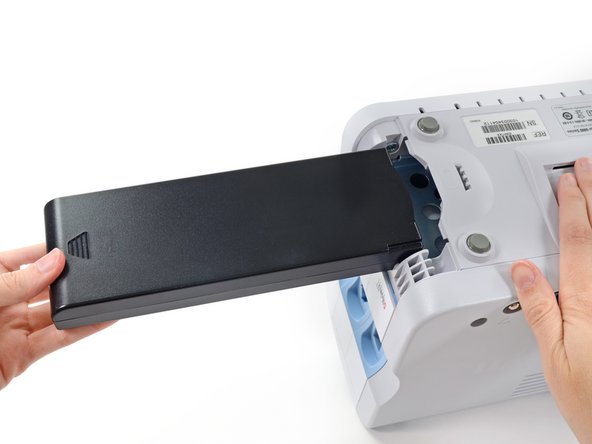
    • Use the plastic label to remove the battery from its recess.

  13. Questo passaggio è privo di traduzione. Aiuta a tradurlo

    : passo 13, immagine 1 di 2 : passo 13, immagine 2 di 2
    • Open the communications door to access the lower left-hand rear housing screw.

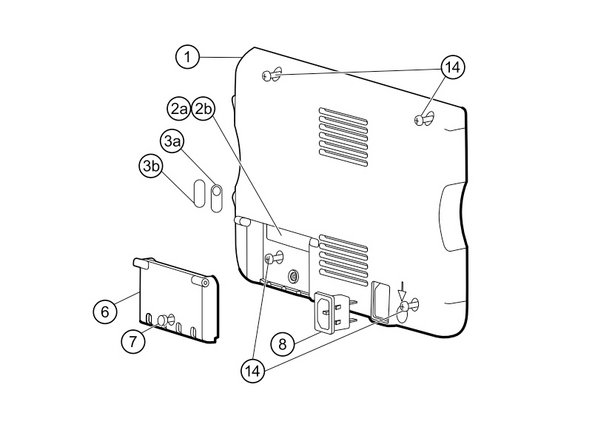
    • Remove the four Phillips #2 screws (labeled 14 in the service manual) from the rear housing.

  14. Questo passaggio è privo di traduzione. Aiuta a tradurlo

    : passo 14, immagine 1 di 2 : passo 14, immagine 2 di 2
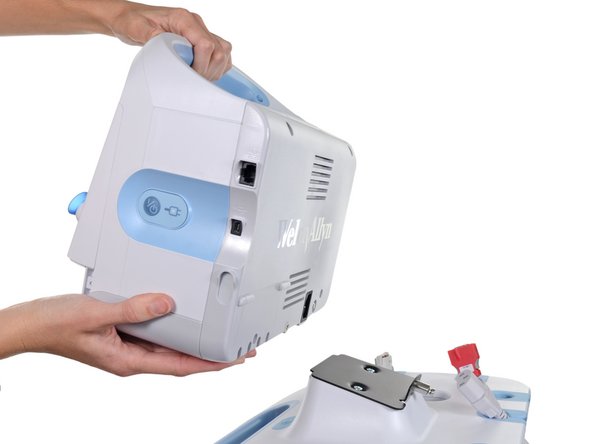
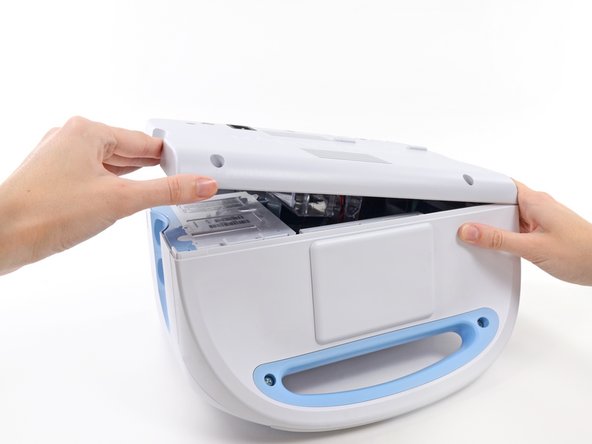
    • With the handle/alert bar facing you, begin to lift the rear housing from the left side, holding the right side securely.

    • Do not attempt to separate the rear housing from the monitor, it is still attached with several cables.

  15. Questo passaggio è privo di traduzione. Aiuta a tradurlo

    : passo 15, immagine 1 di 1
    • Support the rear housing while you disconnect the cables in the following steps.

  16. Questo passaggio è privo di traduzione. Aiuta a tradurlo

    : passo 16, immagine 1 di 3 : passo 16, immagine 2 di 3 : passo 16, immagine 3 di 3
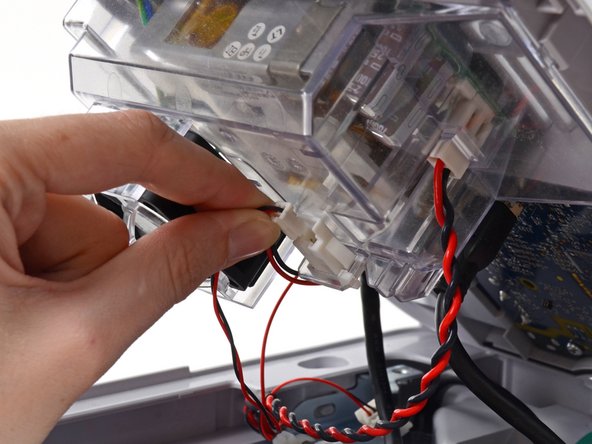
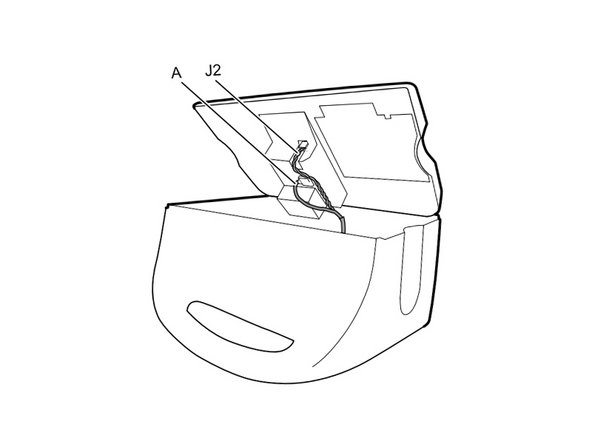
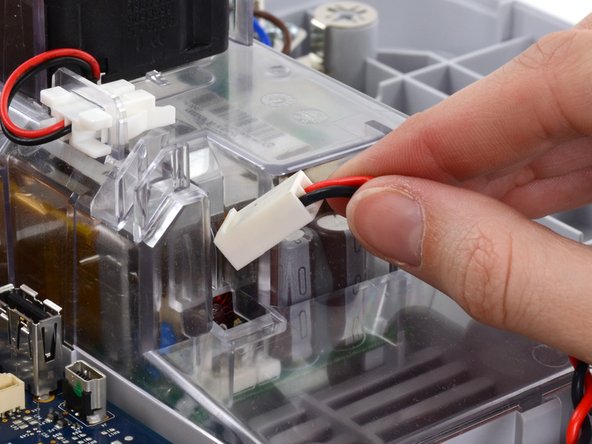
    • Disconnect the fan cable (labeled connector A in the service manual) from its socket in the power supply.

  17. Questo passaggio è privo di traduzione. Aiuta a tradurlo

    : passo 17, immagine 1 di 3 : passo 17, immagine 2 di 3 : passo 17, immagine 3 di 3
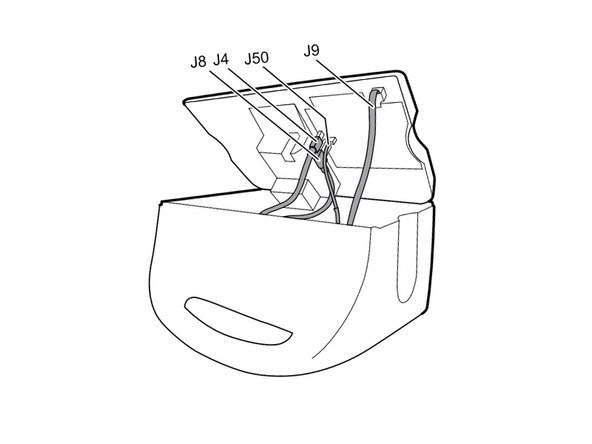
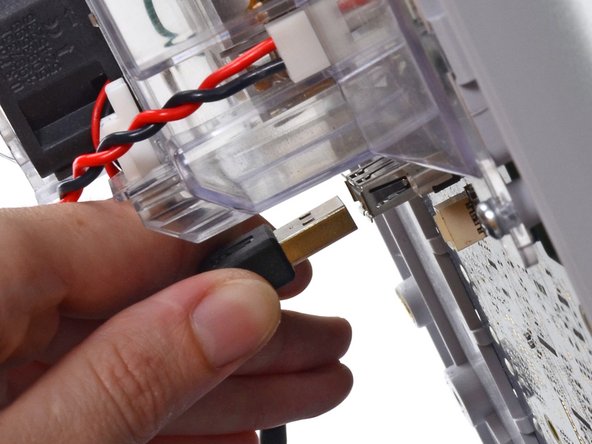
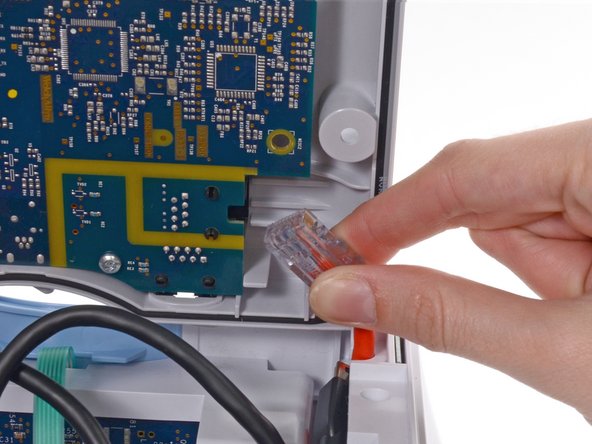
    • Unplug the small USB connector from its socket (labeled J4 in the service manual).

  18. Questo passaggio è privo di traduzione. Aiuta a tradurlo

    : passo 18, immagine 1 di 3 : passo 18, immagine 2 di 3 : passo 18, immagine 3 di 3
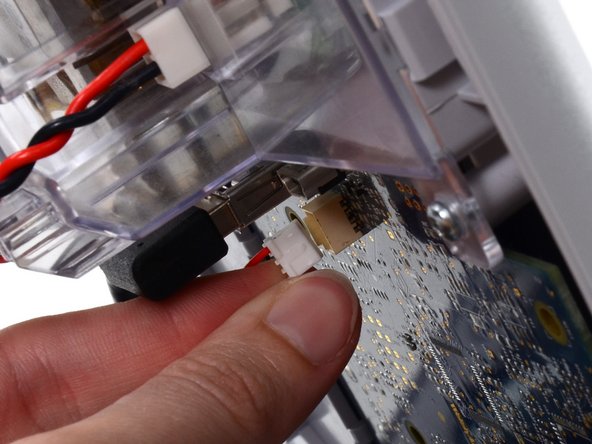
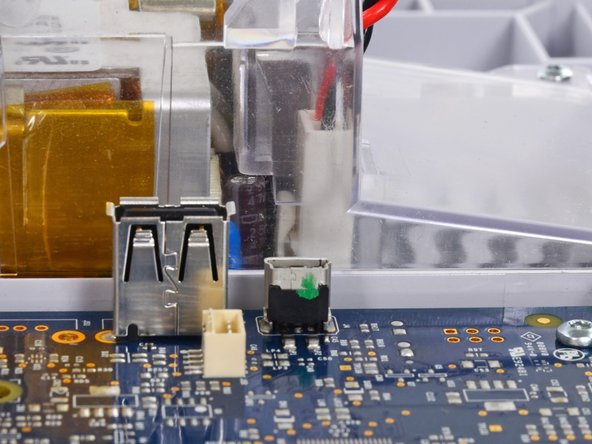
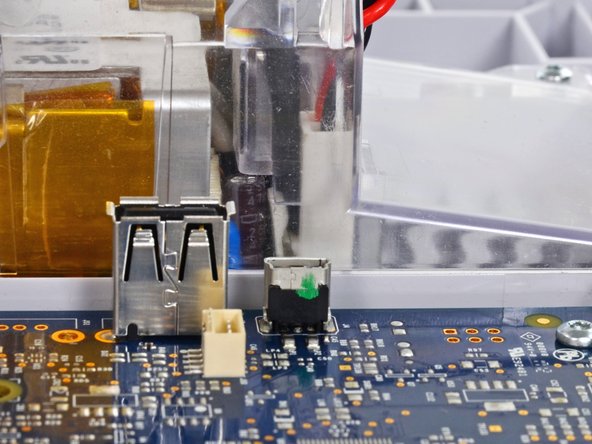
    • Disconnect the communications power cable from its socket (labeled J50 in the service manual).

    • Only pull on the connector itself and not the socket. This connection is very tight, work the connector slowly and gently.

  19. Questo passaggio è privo di traduzione. Aiuta a tradurlo

    : passo 19, immagine 1 di 3 : passo 19, immagine 2 di 3 : passo 19, immagine 3 di 3
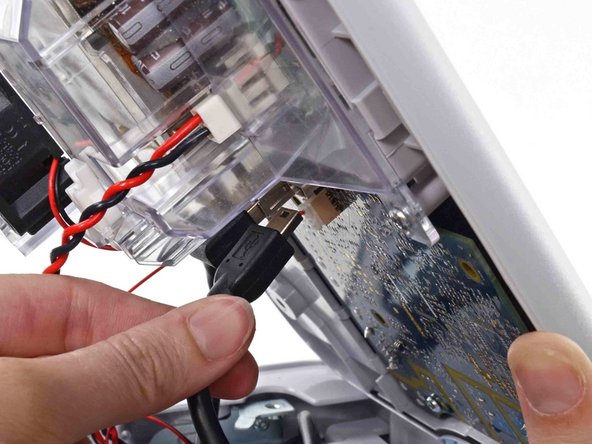
    • Unplug the large USB connector from its socket (labeled J8 in the service manual).

  20. Questo passaggio è privo di traduzione. Aiuta a tradurlo

    : passo 20, immagine 1 di 3 : passo 20, immagine 2 di 3 : passo 20, immagine 3 di 3
    • Press the tab on the ethernet cable and unplug it from its socket (labeled J9 in the service manual).

  21. Questo passaggio è privo di traduzione. Aiuta a tradurlo

    : passo 21, immagine 1 di 1
    • The following connector requires two hands to disconnect. Flip the rear case over, and lay it on its back to gain access to the power supply cable.

  22. Questo passaggio è privo di traduzione. Aiuta a tradurlo

    : passo 22, immagine 1 di 3 : passo 22, immagine 2 di 3 : passo 22, immagine 3 di 3
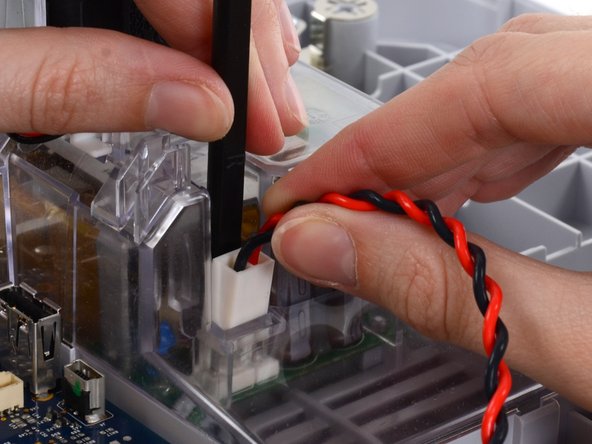
    • The power supply cable is secured by an interlocking connector that must be held open to unplug the connector.

    • Insert the flat end of a spudger down into the power supply cover between the socket clip and the power supply connector.

  23. Questo passaggio è privo di traduzione. Aiuta a tradurlo

    : passo 23, immagine 1 di 3 : passo 23, immagine 2 di 3 : passo 23, immagine 3 di 3
    • Grasp the power supply cable firmly and lift both it and the spudger from the channel in the power supply housing to unplug the connector.

Linea Traguardo

Un'altra persona ha completato questa guida.

Sam Goldheart

Membro da: 10/18/12

465.970 Reputazione

538 Guide realizzate

Team

iFixit Membro di iFixit

Staff

136 Membri

17.299 Guide realizzate

0 Commenti

Aggiungi Commento

Visualizza Statistiche:

Ultime 24 Ore: 0

Ultimi 7 Giorni: 1

Ultimi 30 Giorni: 11

Tutti i Tempi: 623