Questa versione può contenere modifiche errate. Passa all'ultima istantanea verificata.
Cosa ti serve
-
Questo passaggio è privo di traduzione. Aiuta a tradurlo
-
Remove the two 5.0 mm JIS #1 screws to loosen the cutting blades.
-
-
Questo passaggio è privo di traduzione. Aiuta a tradurlo
-
Lift the bottom blade straight up from the device body to remove it.
-
-
Questo passaggio è privo di traduzione. Aiuta a tradurlo
-
Remove the three 9.0 mm JIS #1 screws attaching the base of the blade assembly to the body.
-
-
Questo passaggio è privo di traduzione. Aiuta a tradurlo
-
Lift the base of blade assembly straight up off of the body.
-
-
-
Questo passaggio è privo di traduzione. Aiuta a tradurlo
-
Remove the two 12.0 mm JIS #1 screws on the back of the device body.
-
-
Questo passaggio è privo di traduzione. Aiuta a tradurlo
-
Remove the 13.0 mm Phillips #2 screw on the side of the device body.
-
This screw is located on the opposite side of the body from the switch.
-
-
Questo passaggio è privo di traduzione. Aiuta a tradurlo
-
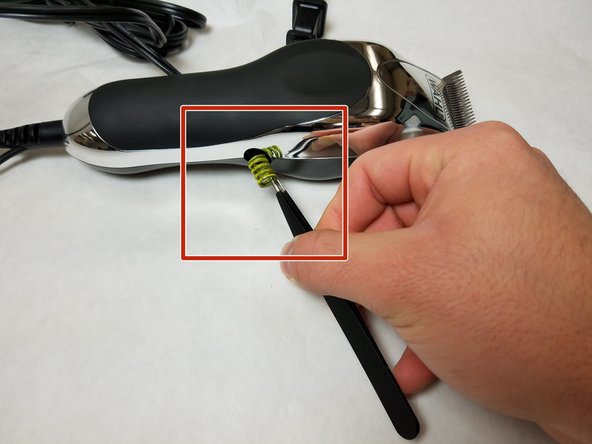
Remove the spring on the side of the body using tweezers.
-
-
Questo passaggio è privo di traduzione. Aiuta a tradurlo
-
Pry the body case off of the device using a spudger.
-
-
Questo passaggio è privo di traduzione. Aiuta a tradurlo
-
Remove one 7.5 mm JIS #1 screw connecting the power cord to the switch base.
-
-
Questo passaggio è privo di traduzione. Aiuta a tradurlo
-
Remove one 7.5 mm JIS #1 screw connecting the wire to the switch base.
-
-
Questo passaggio è privo di traduzione. Aiuta a tradurlo
-
Remove the switch from device by lifting straight up from the device body.
-


Team

IUPUI, Team S7-G3, Baechle Fall 2017 Membro di IUPUI, Team S7-G3, Baechle Fall 2017
IUPUI-BAECHLE-F17S7G3
3 Membri
4 Guide realizzate